How To Create Usb 3.0 Bootable Windows 7
How to Install Windows 7 from USB 3.0
An attempt to install Windows 7 to new computers usually leads to "A required CD/DVD drive device driver is missing" error, which is caused by missing USB 3.0 drivers.
This article explains how to circumvent "A required CD/DVD drive device driver is missing" error and install Windows 7 to new laptop or new PC. This is especially useful on Skylake, Kaby Lake, Coffee Lake and Ryzen platforms.
1. Symptoms of the problem
When you try to install Windows 7 or a new computer (based on Skylake, Kaby Lake, Coffee Lake or Ryzen platform) the following error message appears:
A required CD/DVD drive device driver is missing. If you have driver floppy disk, CD, DVD or USB flash drive, please insert it now.
Note: If the Windows installation media is in the CD/DVD drive, you can safely remove it for this step.
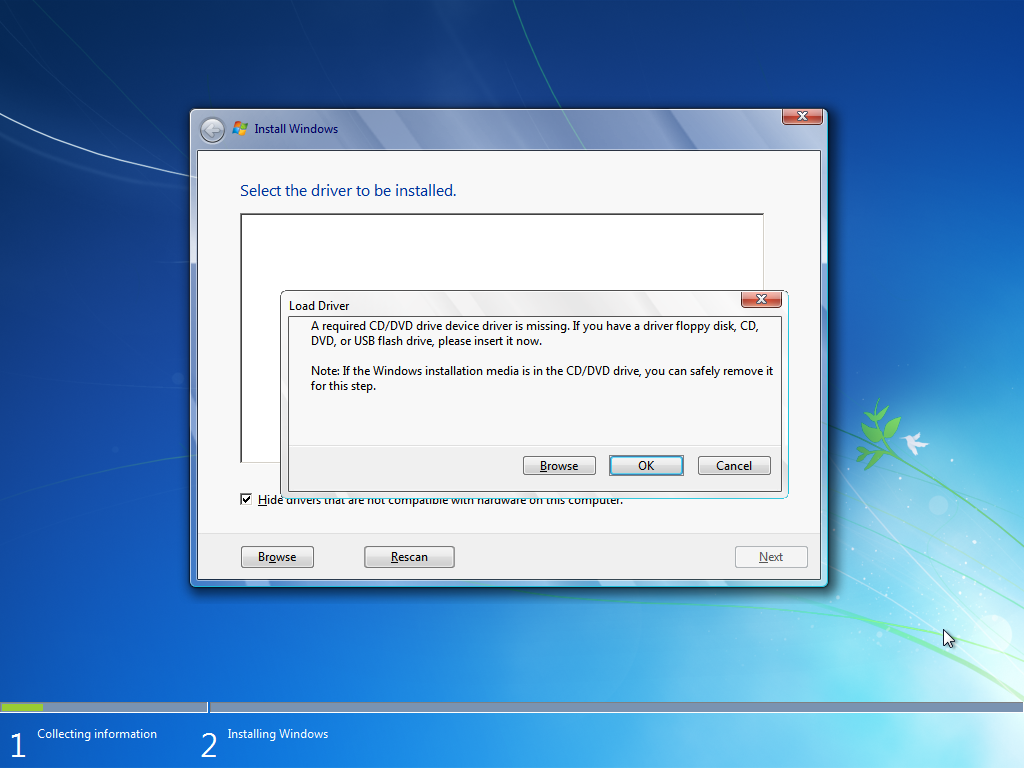
Replugging installation media (USB thumbdrive) from blue (USB 3.0) to black (USB 2.0) port doesn't help, because on Skylake and later platform all USB ports (2.0 and 3.0) look like USB 3.0 ports from software point of view.
Windows just does not detect USB controller and any USB-plugged devices at all. This applies to USB mouse, USB keyboard, on some laptops even touchpad is connected internally via USB interface and doesn't work too.
What happened is that the initial boot had been done via BIOS or UEFI functions. At some point access to the installation media was handed over to the Windows setup inside \sources\boot.wim, which doesn't have USB 3.0 drivers. Fail.
The old-school fix for this problem was to put the necessary drivers on some removable media and do an "F6" driver addition during the Windows installation process, but these days we only have USB 3.0 ports, so Windows can't read any USB thumbdrives altogether.
2. Solution — Method #1
(a) PS/2 for human interface devices
If you still have PS/2 mouse and keyboard, and your computer still has PS/2 port(s), you may plug them (temporarily, for the time of Windows installation). At least human interface devices will work.
Also some BIOS setups have PS/2 emulation option: keyboard and mouse are still physically connected via USB interface, but from software point of view (including Windows) they look like PS/2 devices (so USB 3.0 drivers are not required for them to work).
Later, after installing Windows 7, downloading "USB 3.0 host controller" drivers from your motherboard or notebook vendor's website, and installing that drivers, you may disable PS/2 emulation option in BIOS setup (or unplug PS/2 keyboard and mouse).
(b)(1) USB 2.0 emulation for USB mass storage devices
Also some BIOSes have an option to put USB 3.0 host controller into USB 2.0 emulation mode (however this option is rare). In this mode, source USB thumbdrive with Windows 7 installation files will be detected normally and "A required CD/DVD drive device driver is missing" error will not be displayed.
So you would be able to install Windows 7 usual way, then download "USB 3.0 host controller drivers" for Windows 7 OS from your motherboard or notebook vendor's website, and install them as any other software. After completing this procedure, a BIOS setup option for USB 3.0 host controller to emulate USB 2.0 can be disabled.
(b)(2) Avoiding USB mass storage devices altogether
If you still have an option to plug SATA DVD reader/recorder via internal SATA bus (i.e. this is a full-sized PC, not laptop), you may take this way and install Windows 7 without touching USB at all. PS/2 mouse and keyboard (or their emulation via BIOS setup option) is still required though.
3. Solution — Method #2
USB 3.0 driver slipstreaming to Windows setup
Just use FlashBoot Pro. With FlashBoot, you can install Windows 7 to new laptop or new PC with no problems. FlashBoot will prepare Windows installation USB thumbdrive with slipstreamed drivers, so you can quickly and easily install Windows 7 to any new computer, even Kaby Lake and Ryzen platforms. Besides of builtin USB 3.0, NVMe and RAID drivers, FlashBoot can also slipstream user-supplied drivers.
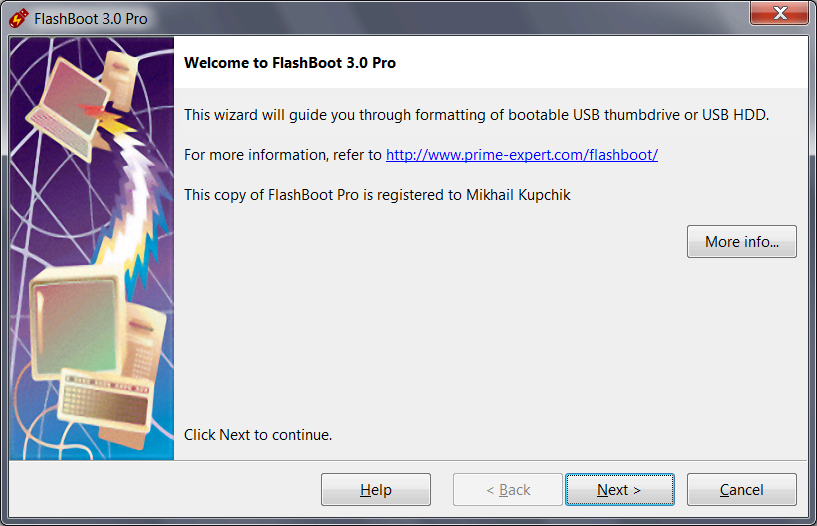
Run FlashBoot Pro, click Next:
Choose "OS installer -> USB" in the Main Menu:
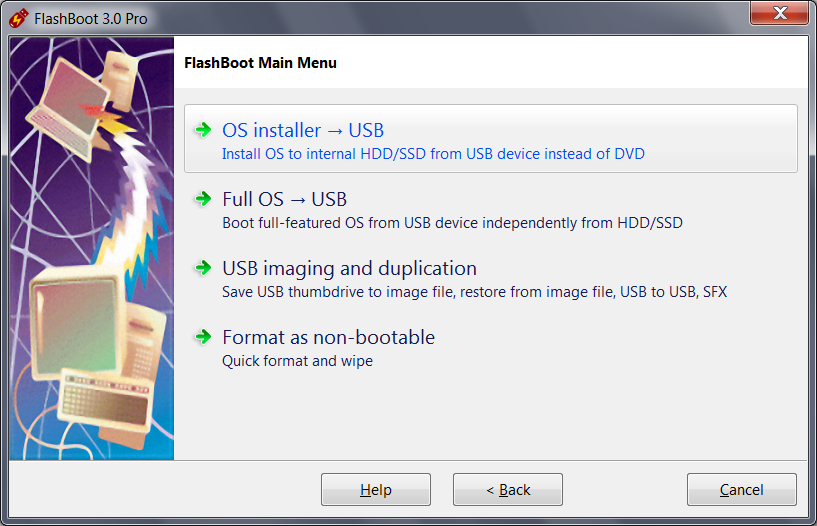
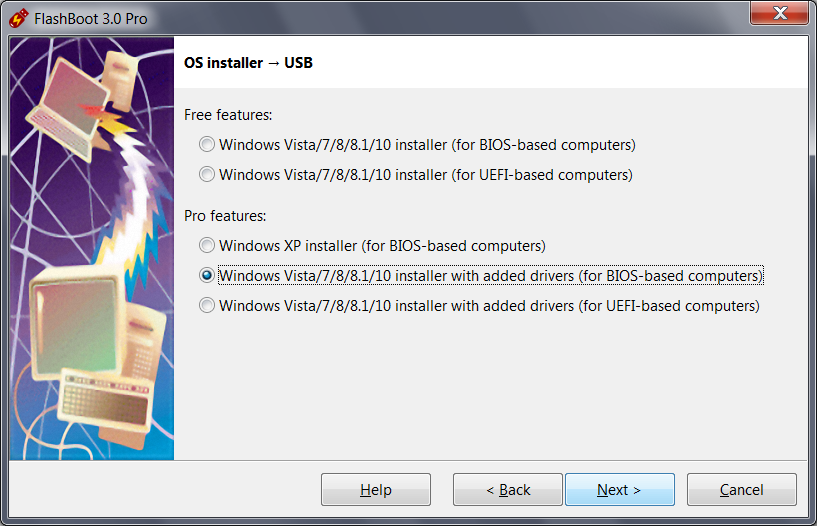
Choose "Windows Vista/7/8/8.1/10 installer with added drivers (for BIOS-based computers)" or "Windows Vista/7/8/8.1/10 installer with added drivers (for UEFI-based computers)" in this menu and click Next:
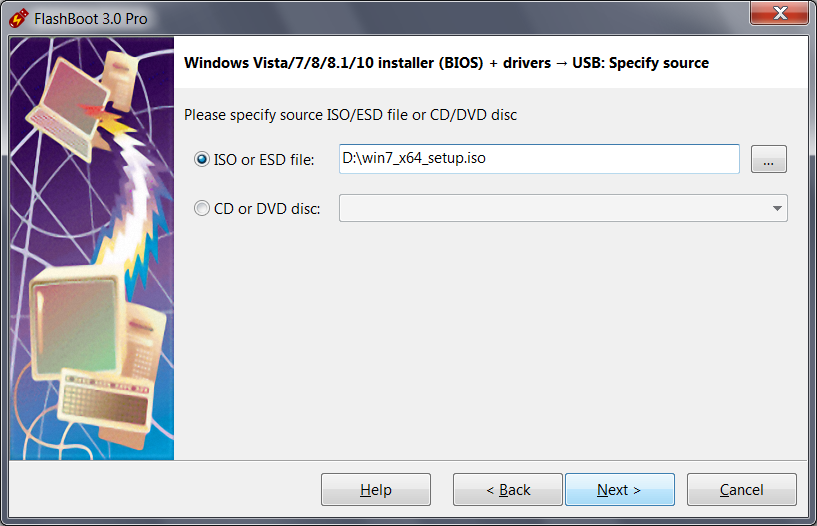
Specify ISO image file (or DVD disc, or ESD image file) of Windows setup and click Next:
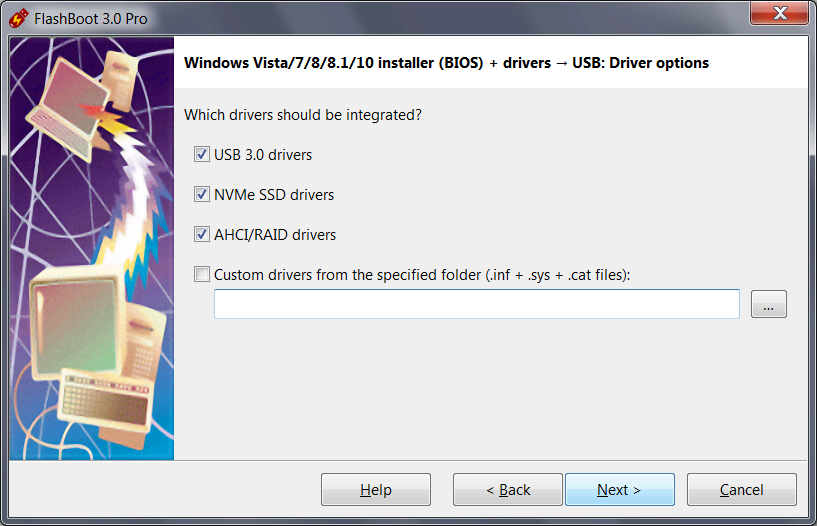
Choose which drivers should be integrated and click Next:
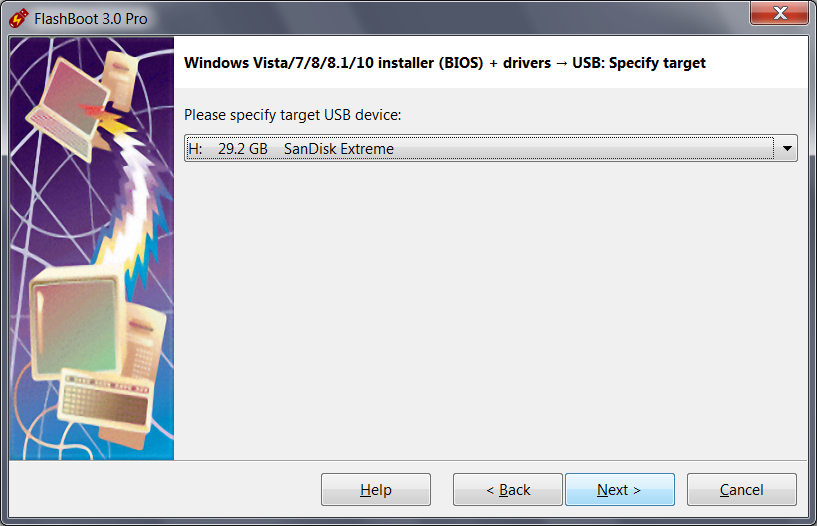
Specify target USB storage device and click Next:
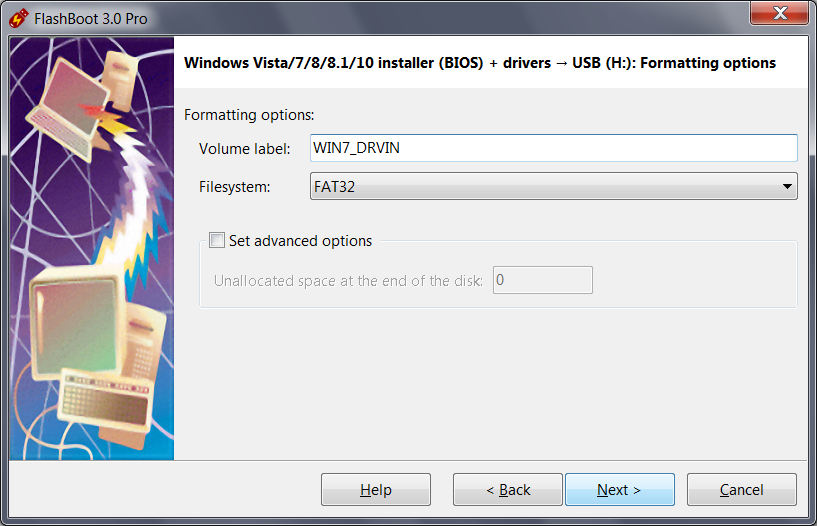
If necessary, change volume label and filesystem type, or leave them as is, and click Next:
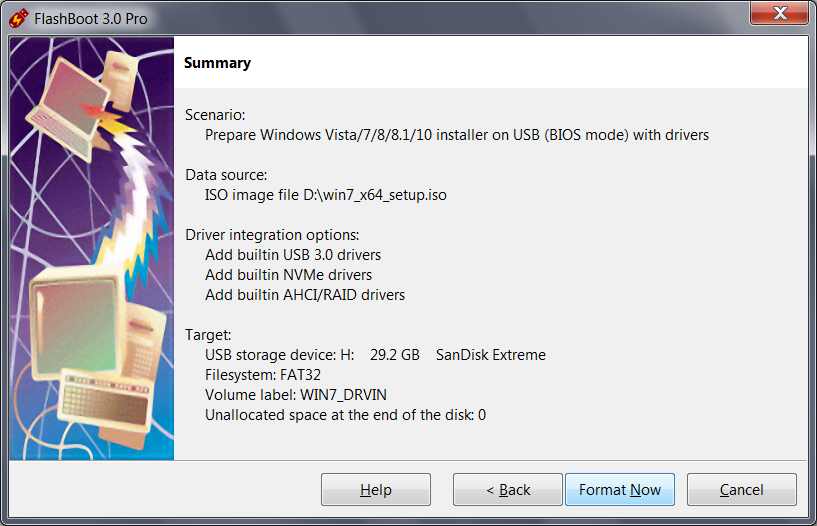
Check summary information and click Format Now:
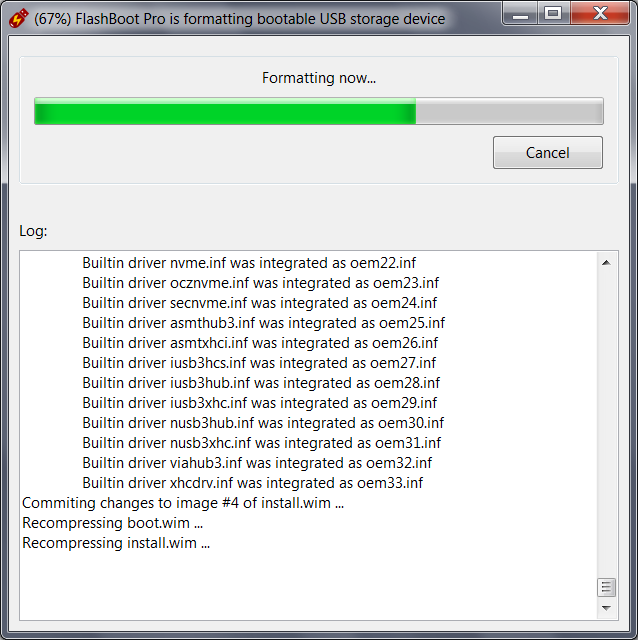
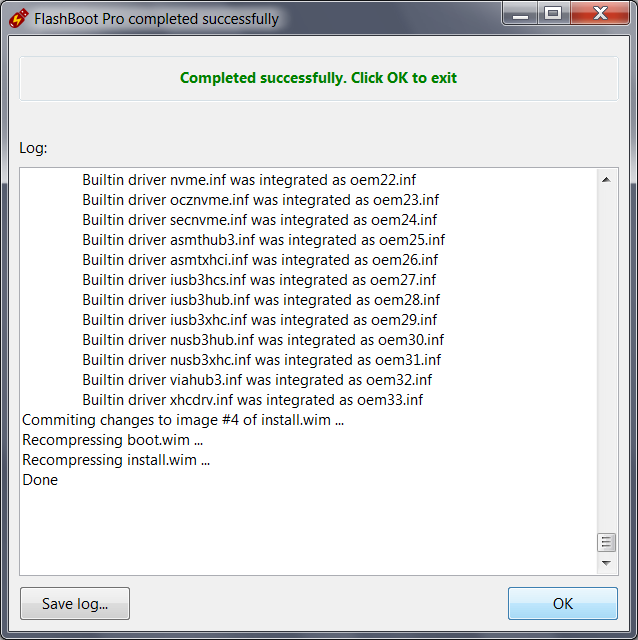
Wait for process completion:
Bootable USB storage device is ready to use. Click OK to exit:
How To Create Usb 3.0 Bootable Windows 7
Source: https://www.prime-expert.com/articles/b31/how-to-install-windows-7-from-usb-3-0/
Posted by: ozunaparch2000.blogspot.com

0 Response to "How To Create Usb 3.0 Bootable Windows 7"
Post a Comment