

How To Draw A Brick Wall On Paper
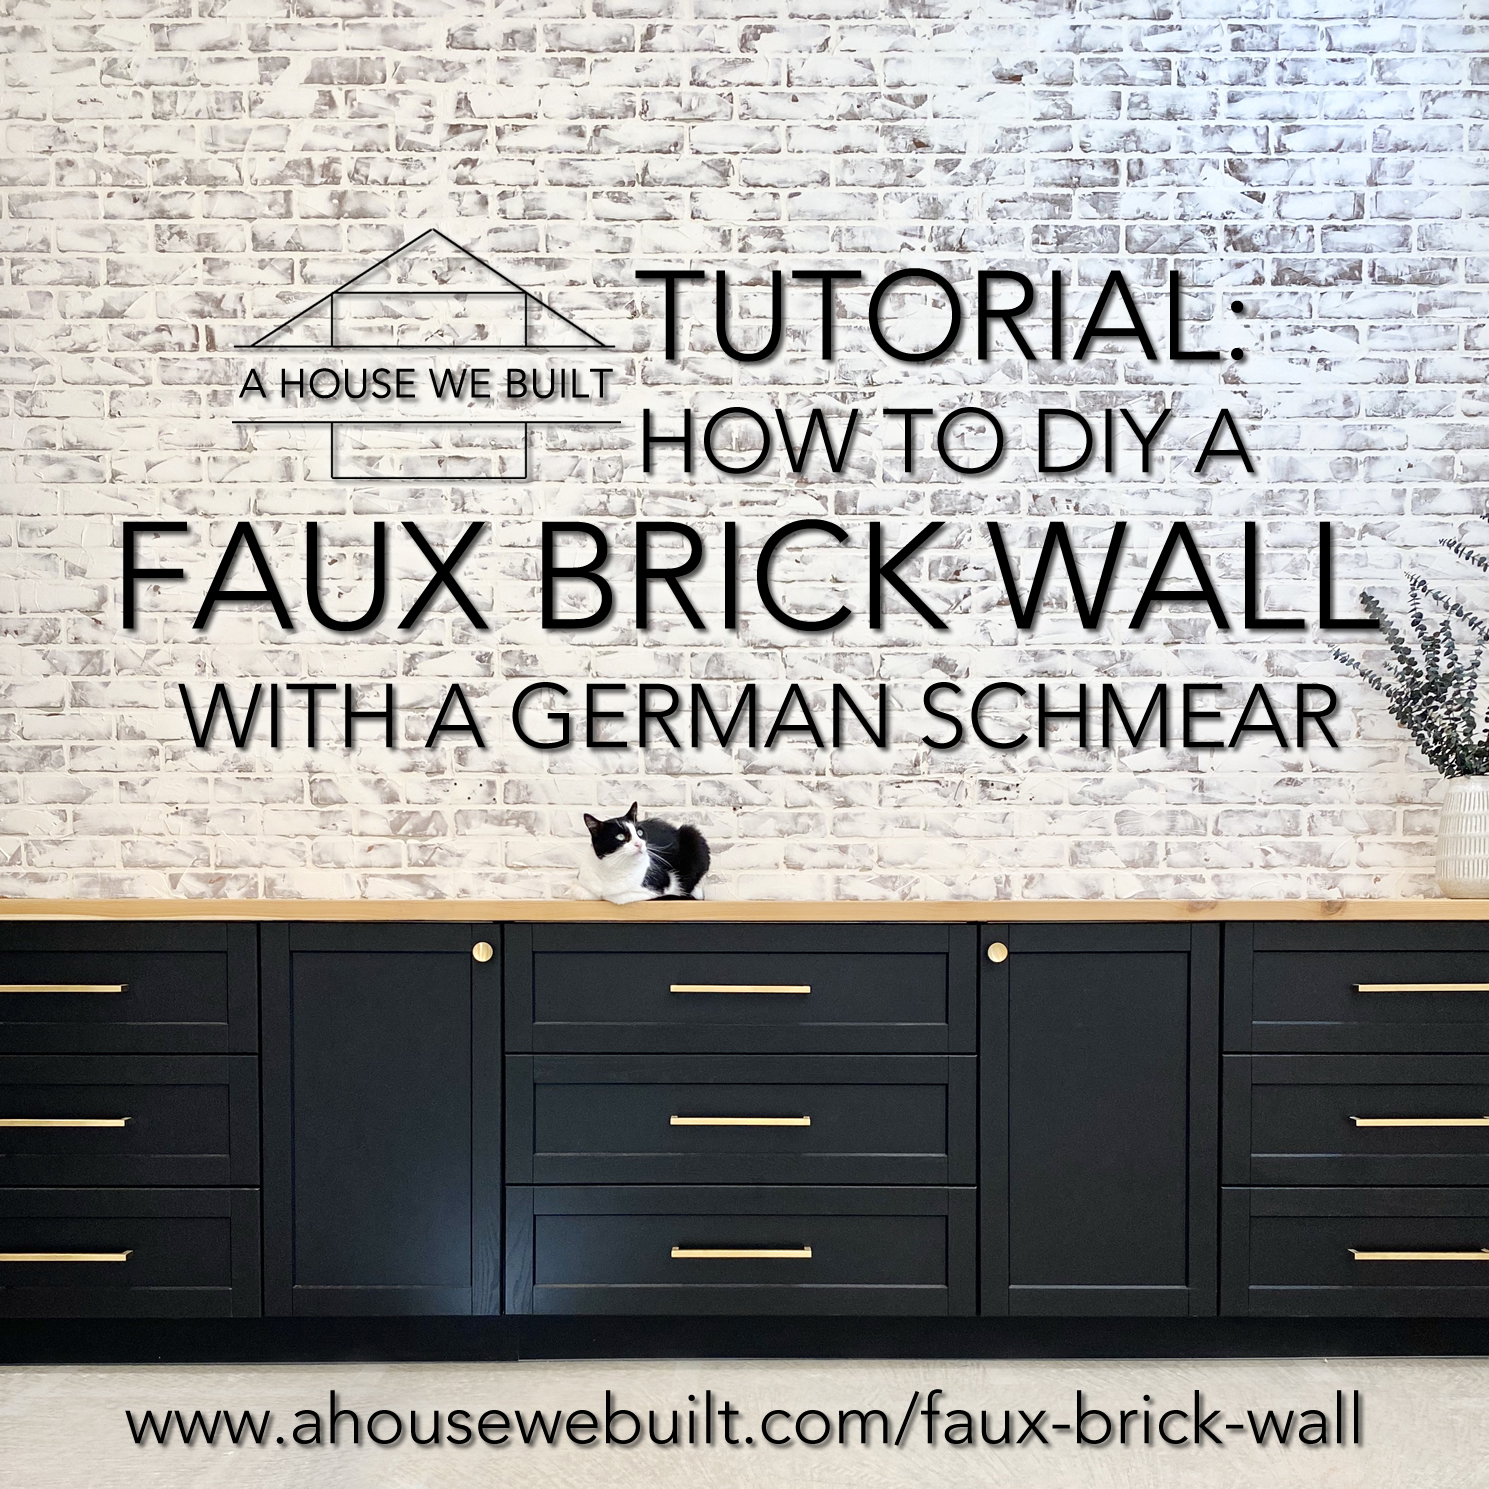
Ever since we started designing our house, I've loved the idea of doing a brick wall somewhere. It's rustic, cozy, and industrial and depending on how you style it, it can also be very modern. But real brick walls are not only expensive but also very time consuming to install, not to mention quite permanent, so I started exploring the idea of a "faux brick wall" instead BUT I wanted it to look real. There are many options for how to do this and I'm pretty sure I've researched every one of them at this point. The reason I settled on using this method that I'm going to share with you here was that it was the perfect combination of everything I was looking for: It looked real, it felt real, it was easy to DIY, it was cost effective, and most importantly it gave me exactly the look I was going for. So, here's how we did this accent wall…
Also, you can visit our Game Room page to see how this room turned out!
SUPPLY LIST FOR BRICK PANELS & INSTALLATION:
- Brick wall panels: Home Depot (I used 3, and this particular panel is by far the BEST I've found)
- Jig saw: Home Depot (needed to precisely cut the brick panel edges)
- Construction adhesive: Home Depot (2 tubes of this per panel, so I needed 6 tubes)
- Carpenter's square: Home Depot
- Brad nailer: Home Depot
- Level: Home Depot
- Ladder: Home Depot
- Pencil
SUPPLY LIST FOR GERMAN SCHMEAR & APPLICATION:
- Pre-mixed joint compound: Home Depot (for 3 panels, I used half this container, but the smaller container isn't enough so it's better to buy this size and save the rest for future projects)
- Plastic putty knives: Home Depot (I used both the smallest and biggest of this set, very important to use plastic, not metal knives as metal will damage the panels)
- Drywall hawk: Home Depot (this isn't 100% necessary but it makes work SO much easier)
- Ladder: Home Depot
- ~1 cup water
HOW TO MAKE THE WALL:
- PREPARE BRICK PANELS.
- INSTALL BRICK PANELS.
- GERMAN SCHMEAR.
STEP 1: PREPARE BRICK PANELS.
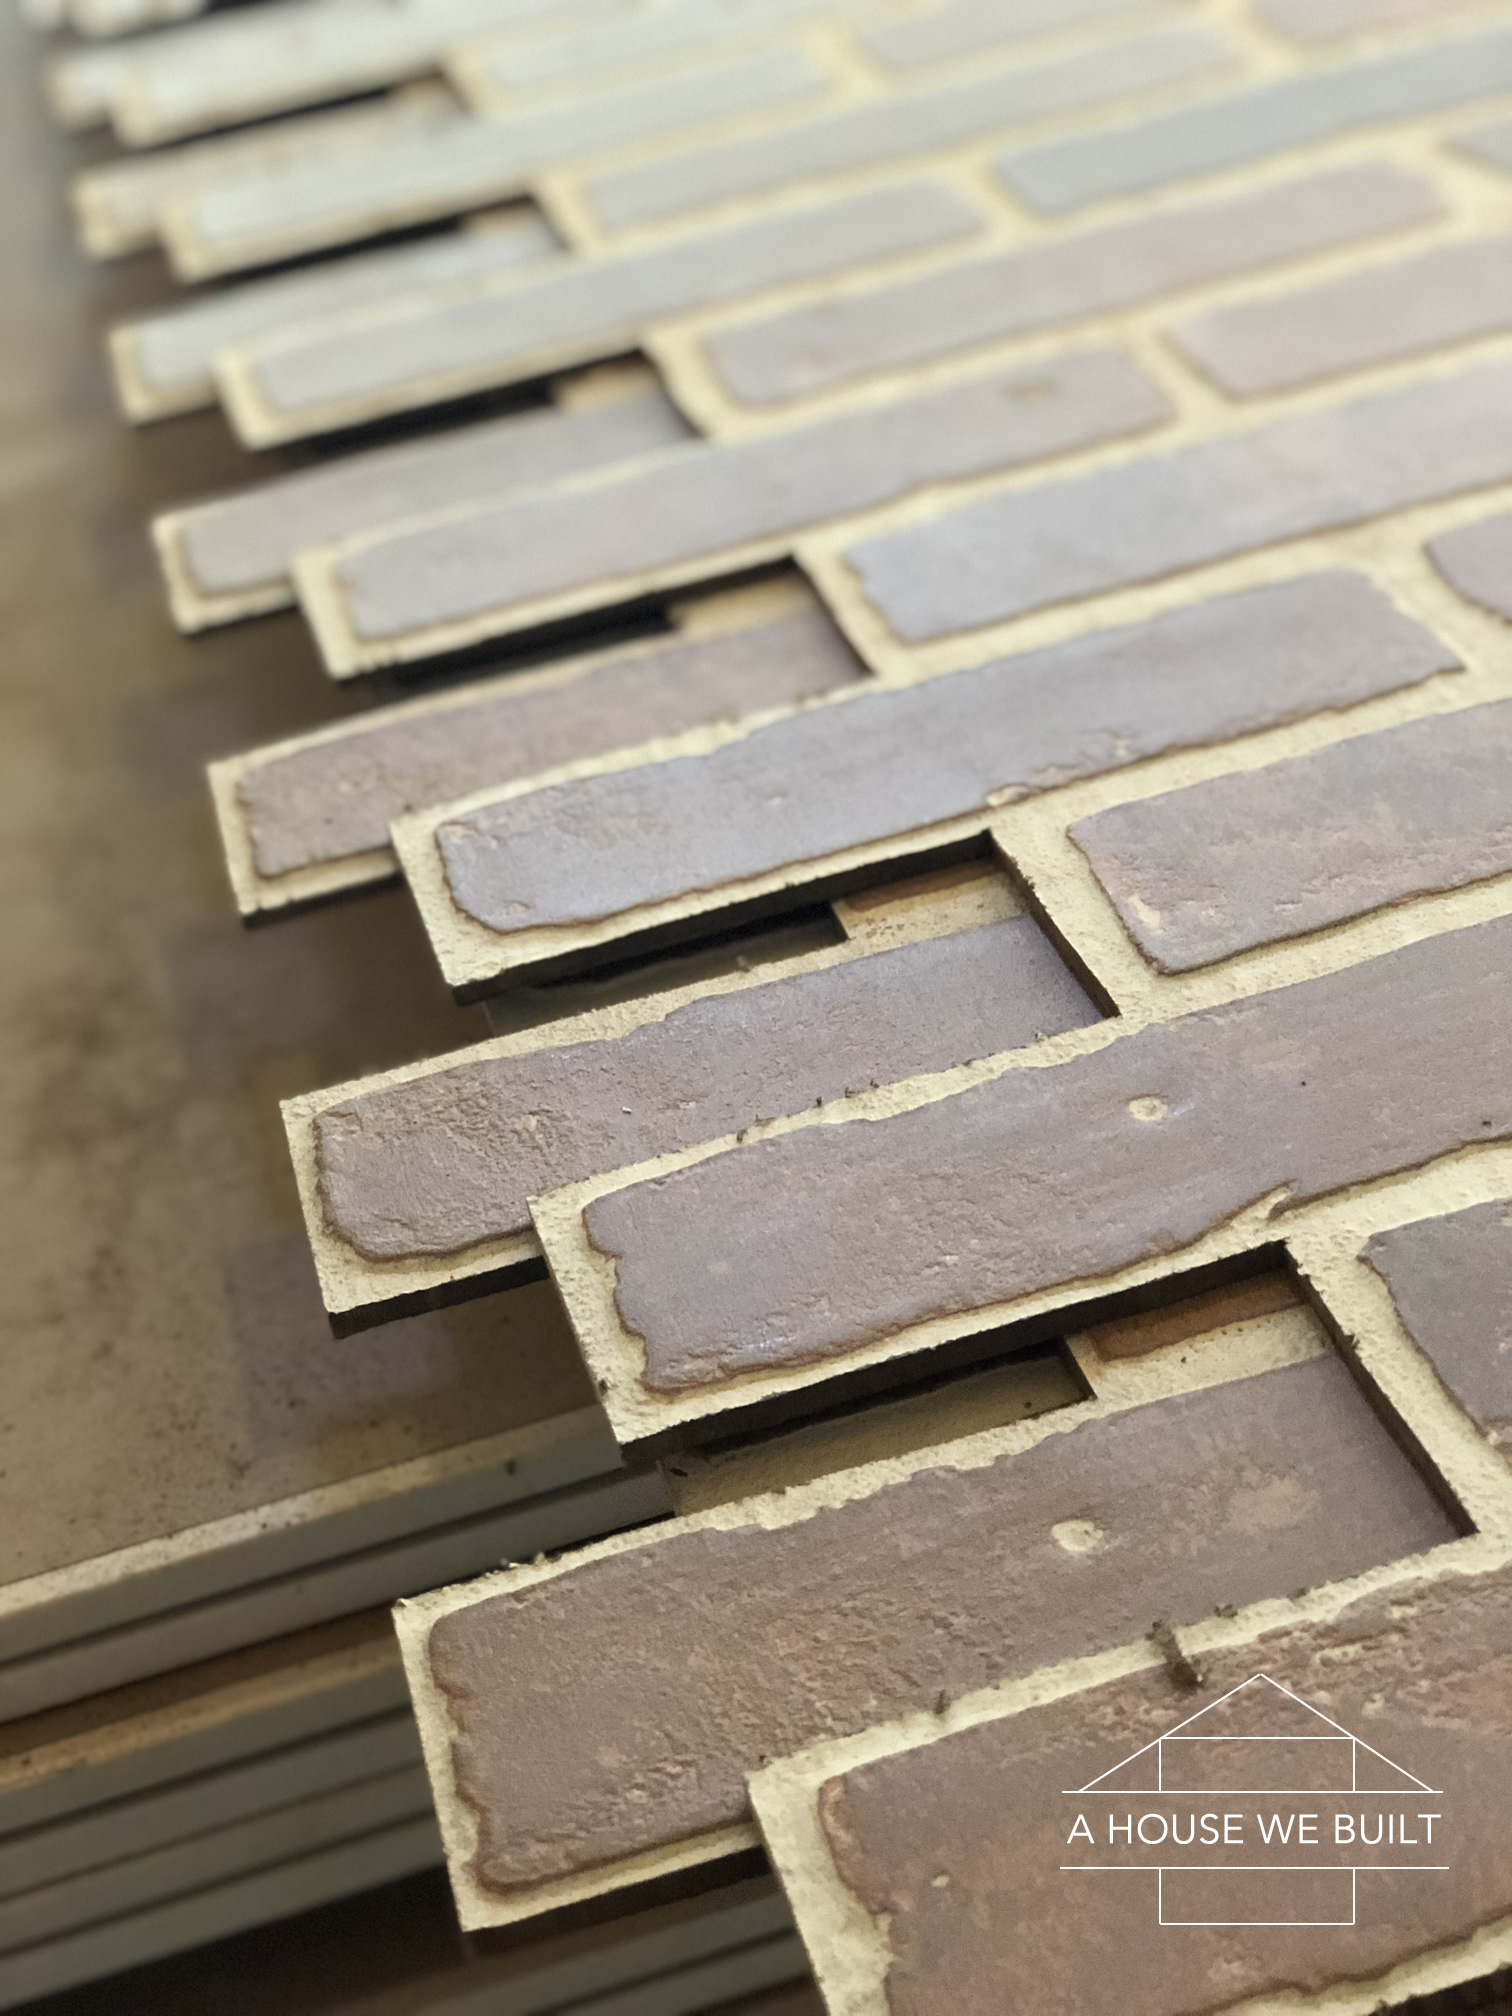
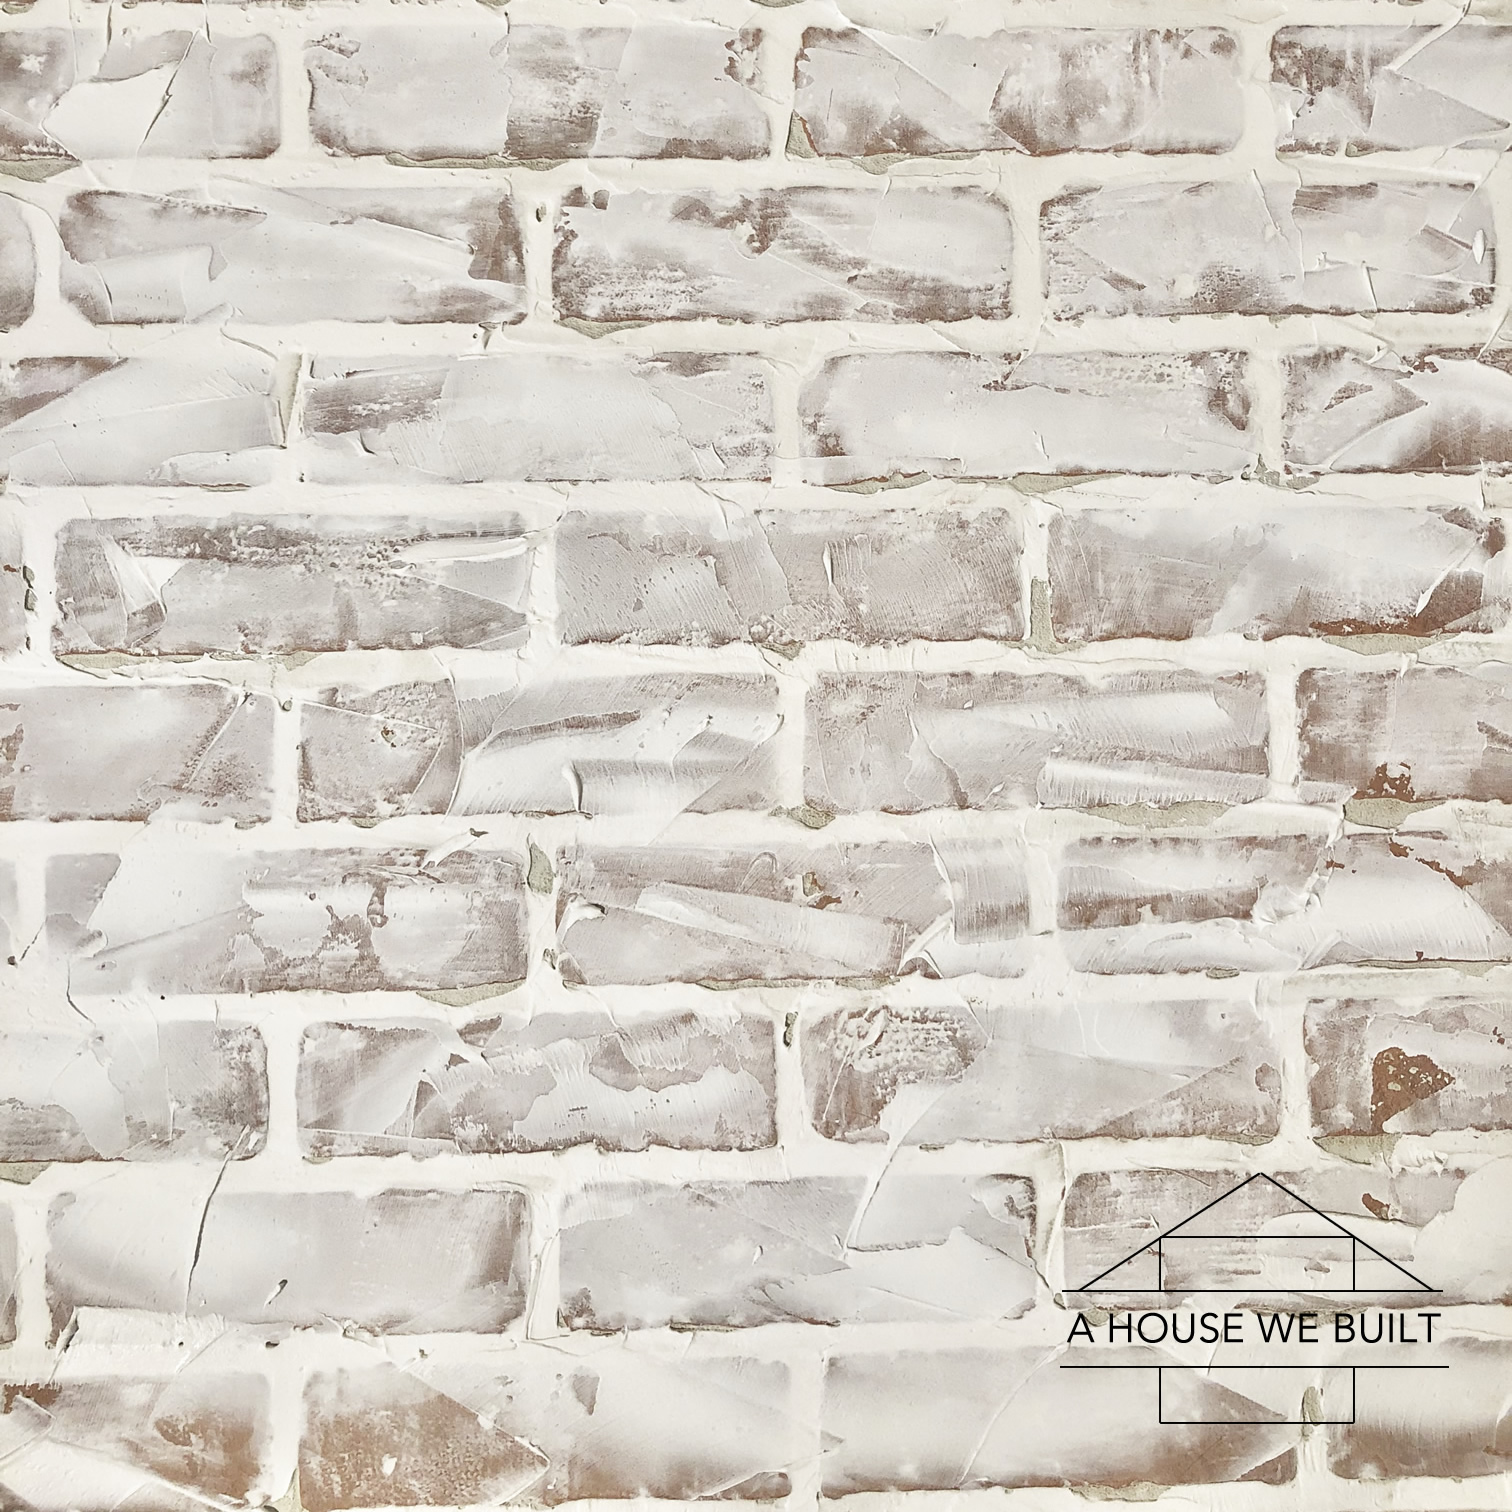
I did a lot of research before choosing these brick panels to use for this project. I chose them because they're realistically formed with a 3-dimensional textured and raised imprint, and the pattern doesn't repeat so even if you put three of these panels beside each other, like I did, it looks real.
The downside is that because they come in 4×8 evenly rectangular boards, that means that if you simply put three of them in a row as-is, you're going to see a seam between them no matter how talented you are with joint compound because every other half-brick along the seam will visually be cut in half.
So the secret to making these panels turn into what looks like a real brick wall was to cut out every other half-brick along the edges (as shown in the pics) so that the panels could literally interlock and this was definitely something that could be hidden with joint compound even if you have no experience!!
To do this, we first outlined the cut lines with a pencil and carpenter's square. You want to be sure you're cutting in the middle of the grout line.
We used a jig-saw (like this one) to make the cuts. This is a labor of love which my dad very kindly did for us (thanks Dad!!!!) but it is absolutely essential to making your faux brick wall look real.
Once you've cut all your panels, lay them out on the floor beside each other and make sure that they actually interlock properly. If there are little spots that don't fit, it's easy to make additional cuts now to fix that, but if you skip this step you'll be in big trouble when you install them. If you have a little extra space between the panels in some places (even up to 1/2″), don't worry – that can all be hidden later.
Note: because of the nature of the cuts, you will need to take one brick row off the bottom of one of the panels so that the panels can actually interlock. I recommend removing the row from the bottom as it will be less obvious. And again, make sure you are cutting in the middle of the grout line.
Note: depending on how many panels you need to make your wall, the sides you cut will be different. I needed 3 panels so the Left Panel needed the right side edges cut, the Middle Panel needed both left & right edges cut, and the Right panel needed the left side edges cut. You need to basically cut anywhere that one panel joins another panel, but don't cut the edge that goes against a wall because you need that one to be straight. (The pics below show what I mean by this.)
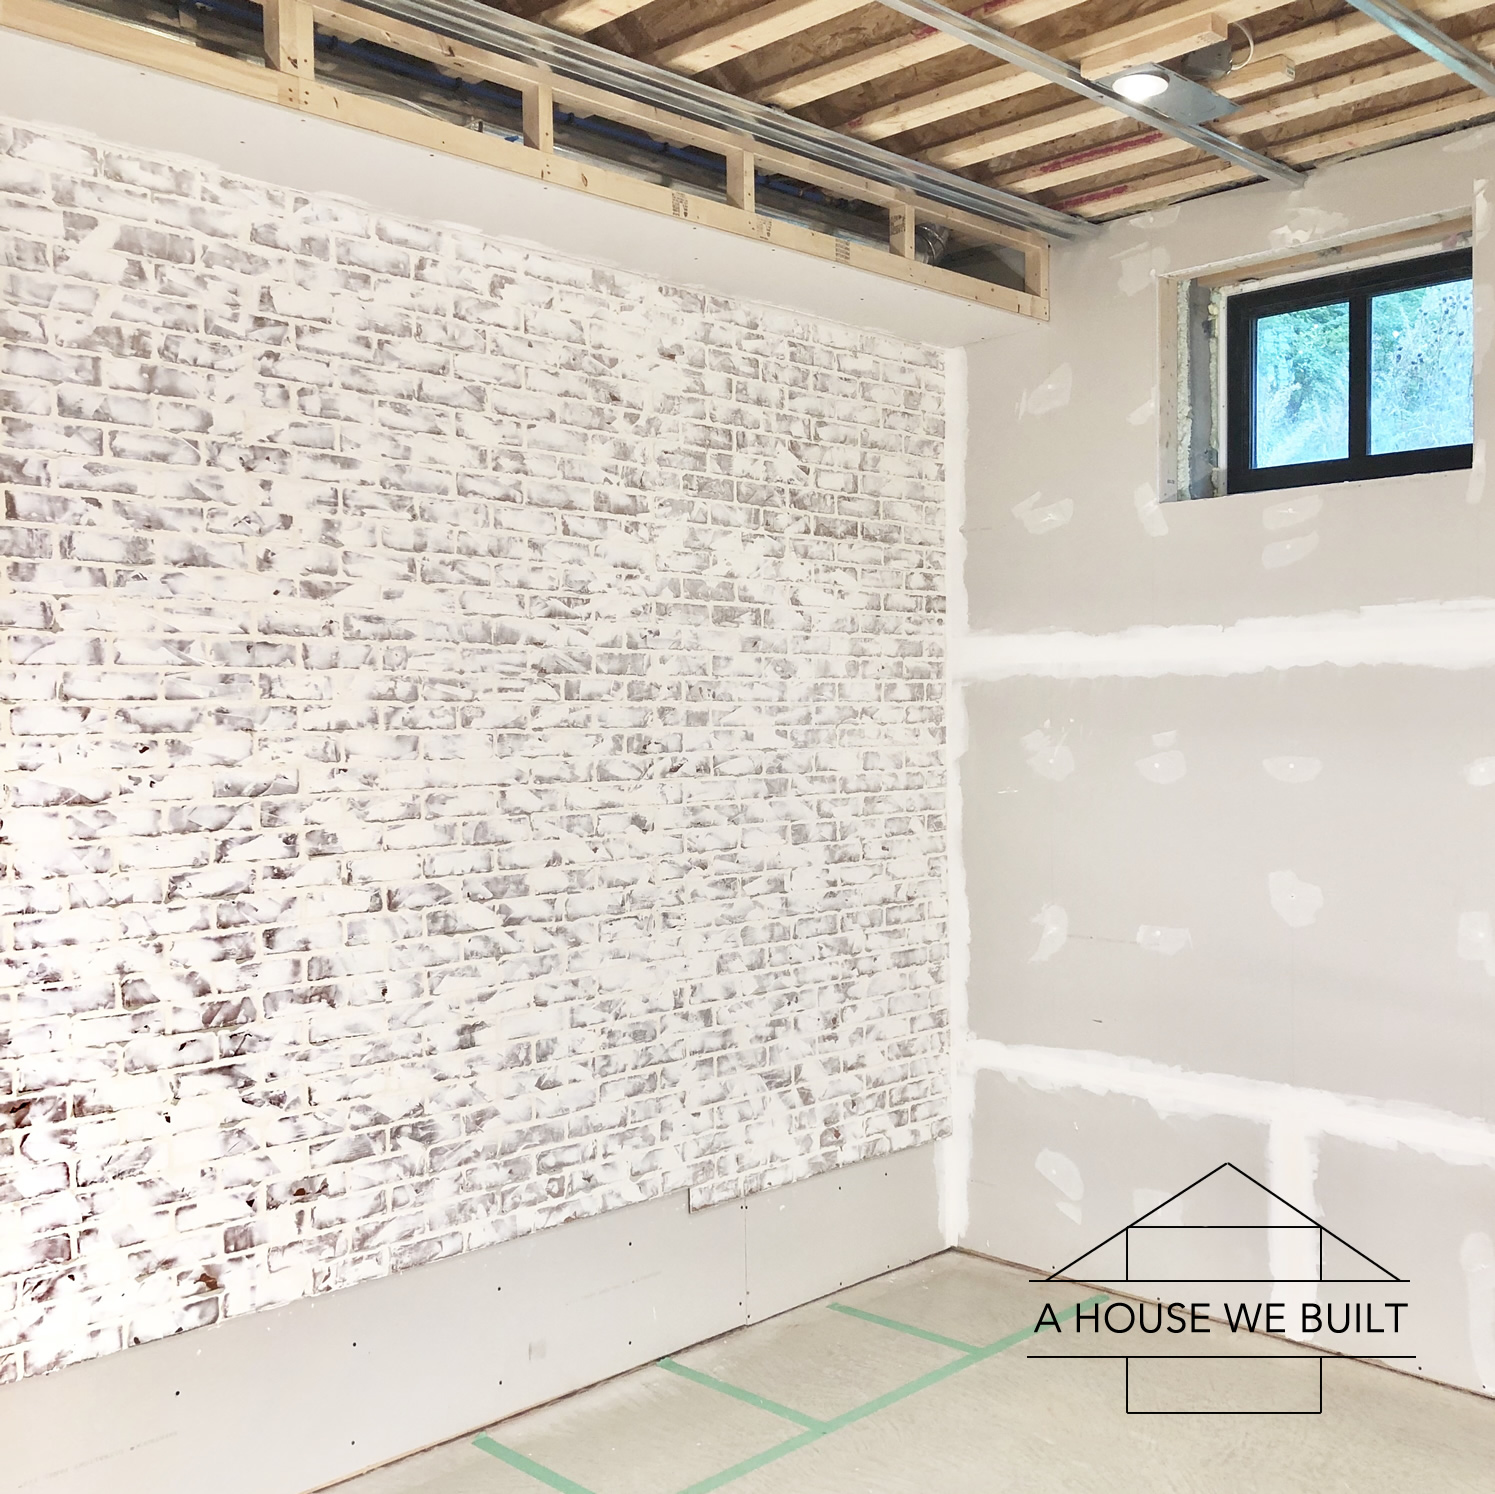
STEP 2: INSTALL BRICK PANELS.
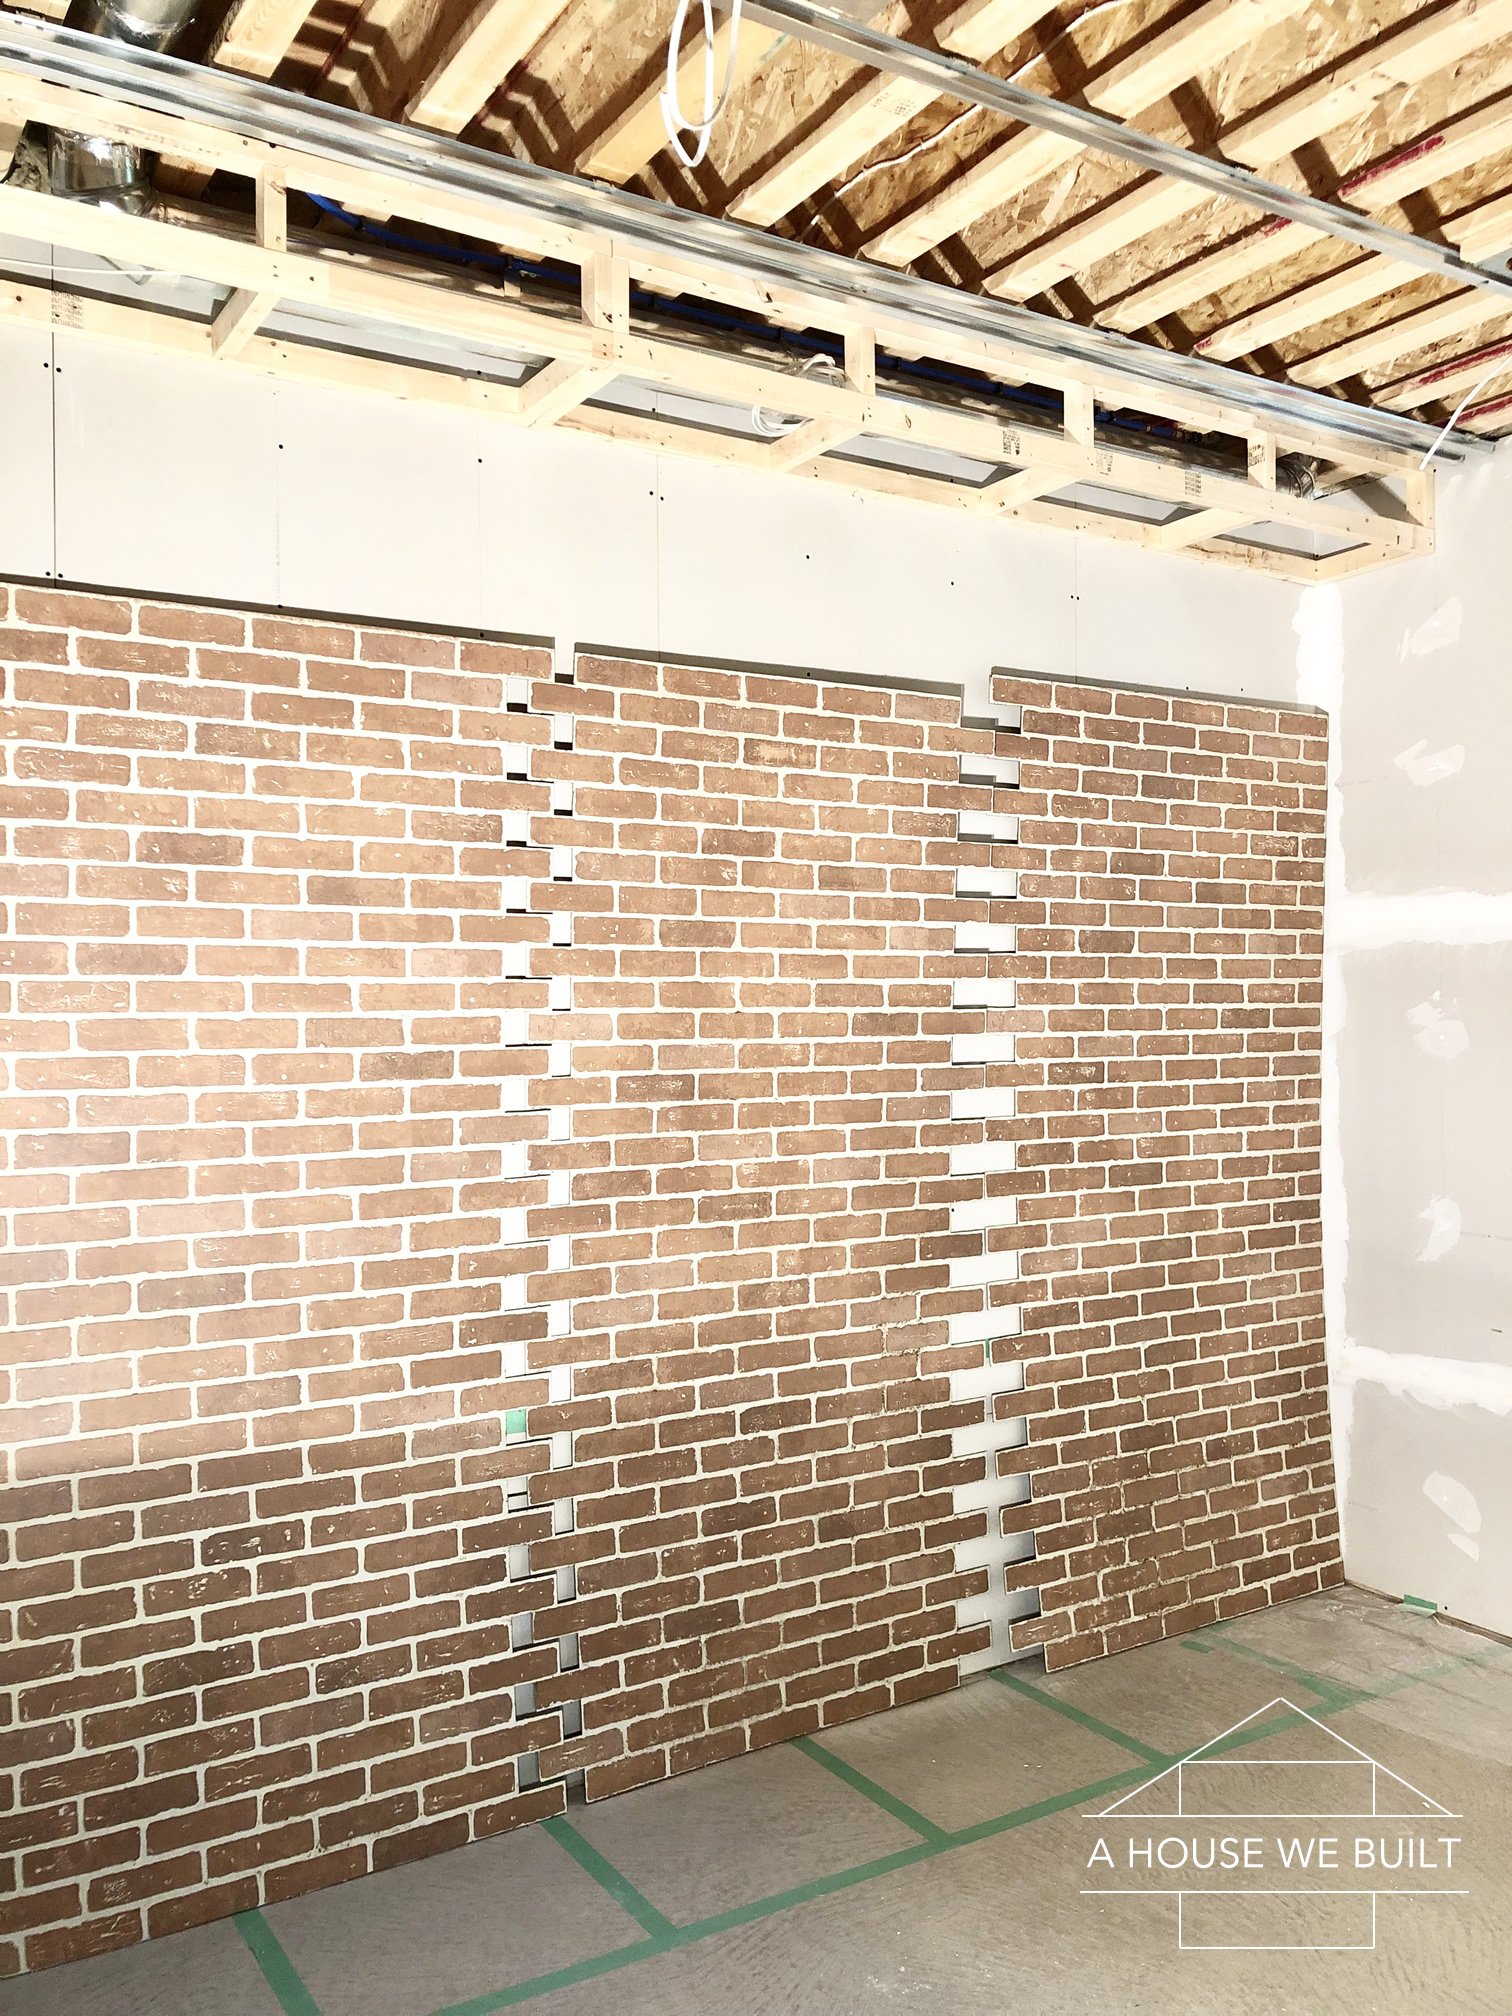
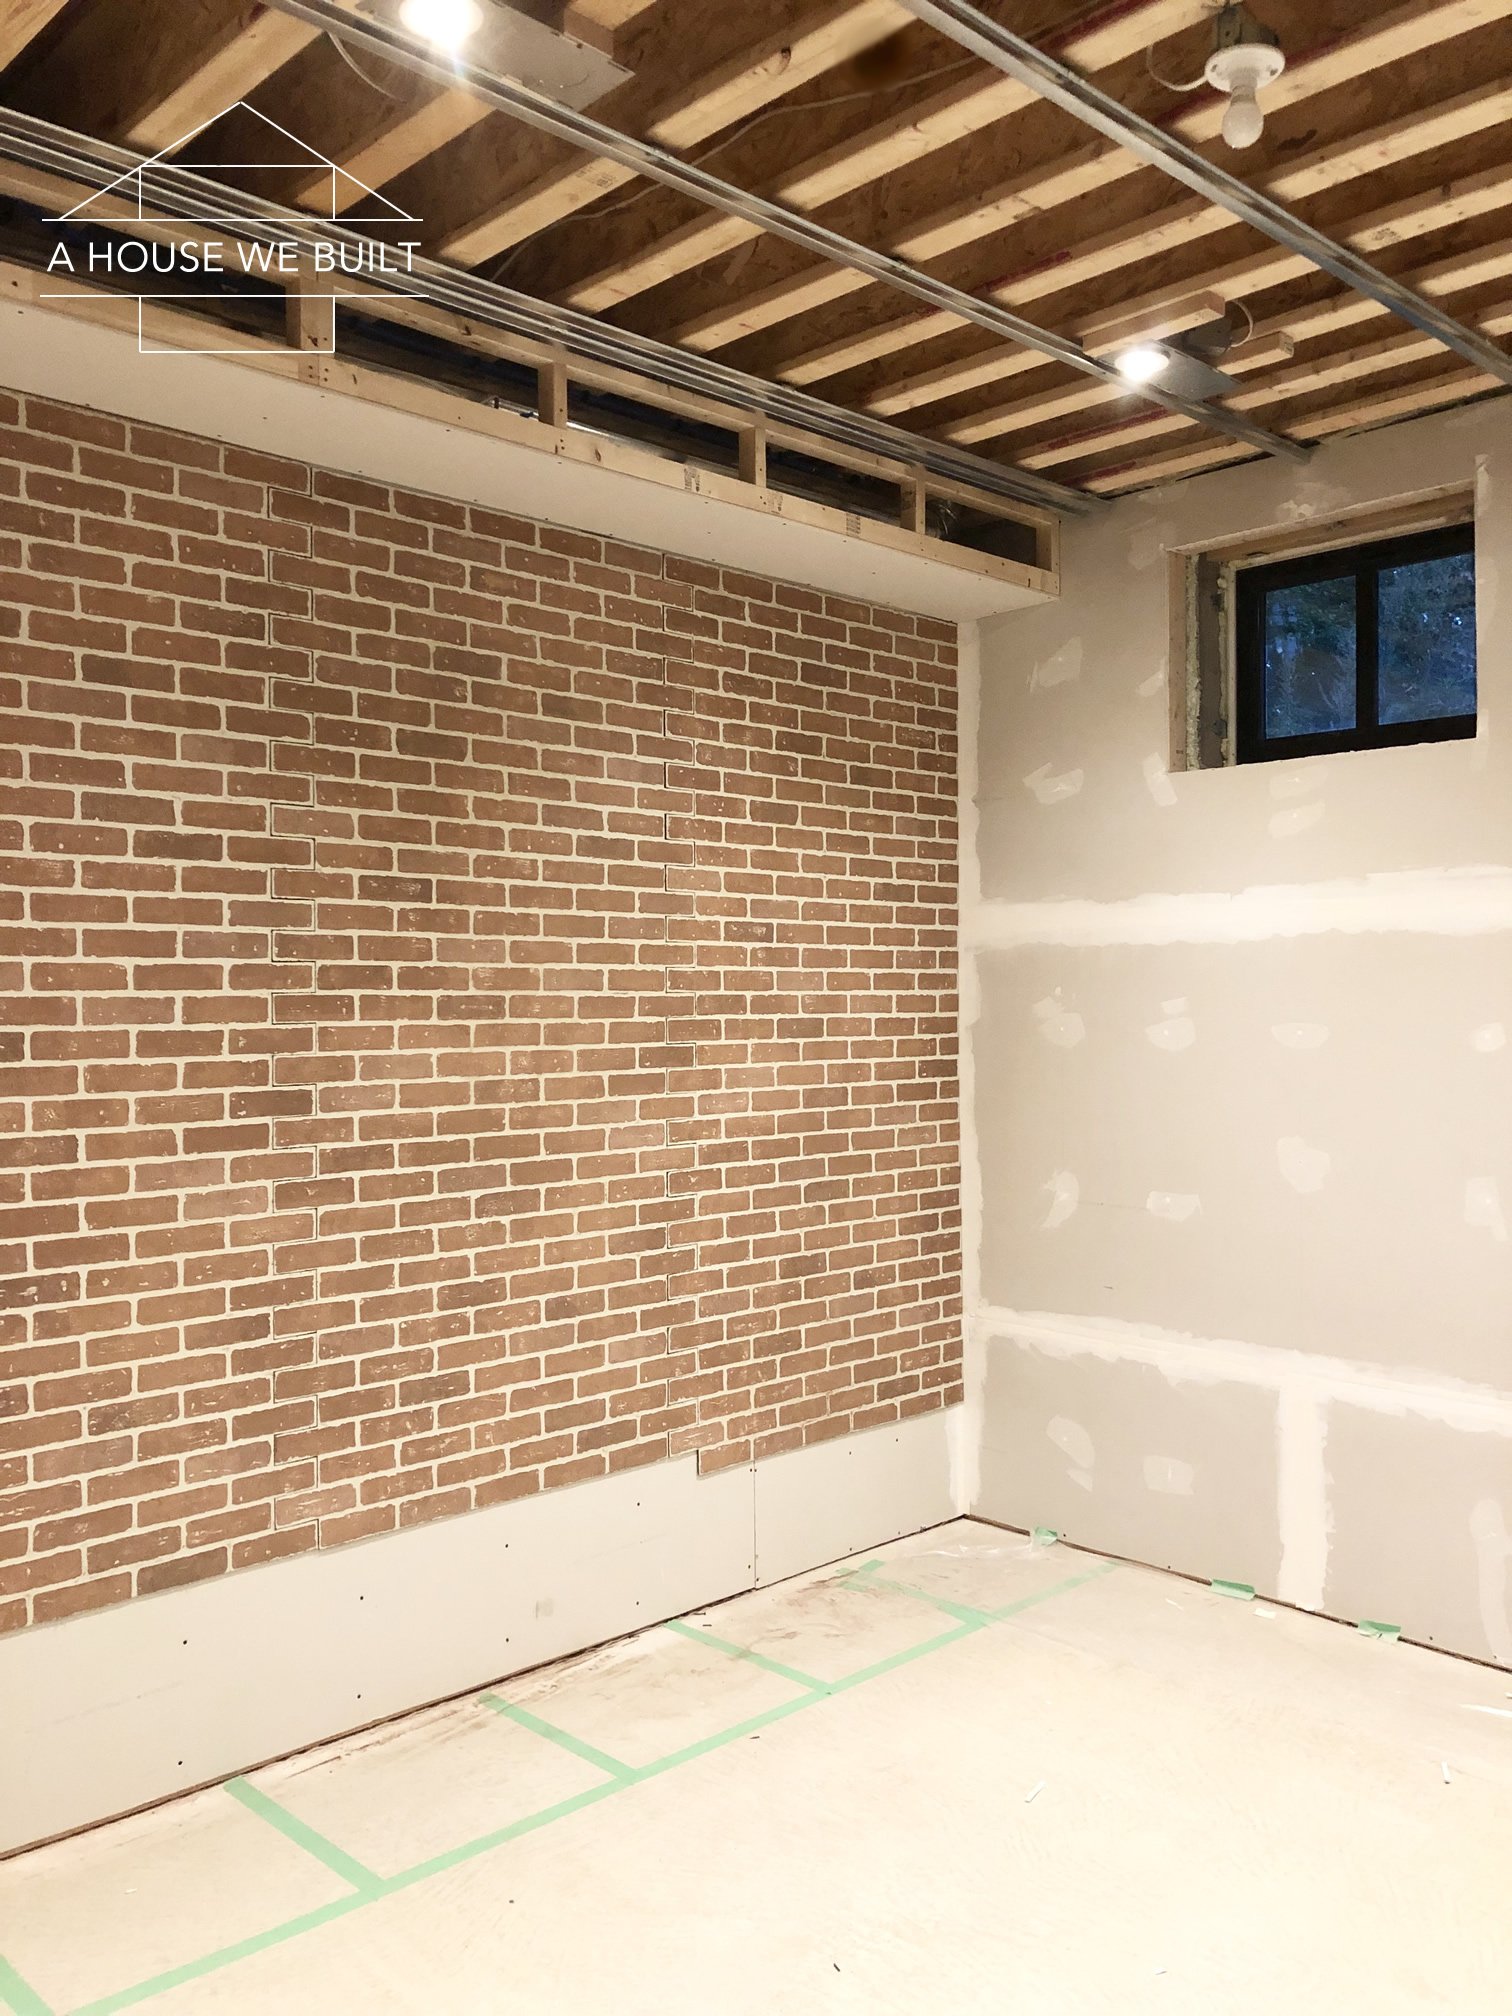
We installed our now pre-cut brick panels using a combination of both construction adhesive (you'll need 2 tubes per panel so make sure you have all the tubes you need on hand) and a brad nailer for added reinforcement. In my opinion, you need both of these (the adhesive and the nailer) to properly install these panels. If you just use adhesive you risk sagging, if you just use the nailer you risk unevenness.
Start with either the far left or far right panel (whichever has a corner edge). Lay the brick panels face-down on the floor and apply the adhesive. When you're applying the adhesive, make sure it's even and that you run a line down every one of the protruding brick cuts so each one gets glued to the wall.
It takes 2 people to install the panels. Lift your panel into place and square it up with your ceiling and corner, then use a level to make sure it is level both horizontally and vertically. Don't worry if there's a bit of a gap on the sides or top (up to a 1/2″) – you can fix this with the compound in the next step.
Once your brick panel is in place, use a brad nailer with 18-guage nails to secure the panel to the wall (preferably into the studs) and make sure you put a nail into each of the individual brick cut edges. It's a good idea to make a note of where your studs are before you start, but mark them on the floor with tape or something because your wall is about to get covered by the panel.
Then repeat until all the panels are installed. Make sure you check that each one is level. You may need to use a rubber mallet or a solid thump with the palm of your hand to make the brick cut edges interlock.
STEP 3: GERMAN SCHMEAR.
You will need 5 things to do this step:
First you'll need pre-mixed joint compound. I use this particular kind because it's less dusty, and has a drying time of 24 hours. This is SO important because you want to be able to do your whole wall, then go back and make adjustments here and there before it dries, so whatever you do, do not get a fast drying compound. I used half that container for my 3 panels, but it's a good product to have on hand so I don't mind having extra, and the smaller size it comes in isn't enough to complete this project so this was my best option. And I way prefer this pre-mixed compound to the mix-it-yourself kind because omg it's such a time-saver! Also, grab yourself a glass of clean water to have on hand. I'll explain why down below.
For your application tool, you'll need plastic putty knives. I got this inexpensive set and used both the biggest and smallest ones. You need plastic because metal ones will damage the brick panels.
To make your life easier, I recommend using a drywall hawk to hold your joint compound and the style that I linked is what I consider to be the most ergonomic one and it shouldn't make your arm ache during the couple hours it'll take you to do this project. This is a nice-to-have (but not a need-to-have) item.
Finally, you might need a ladder (I love this light-weight one) since these are 8-foot high panels. Our basement ceilings are 10-ft high and even though we installed these panels below a bulkhead, it was still super helpful to have a ladder to work on.
Ok, so now that you have all your tools and materials, here's what to do with them.
First, I suggest thinning out your drywall compound just a little bit. You don't have to do this, you can certainly just use the compound straight out of the tub, but I find that a little water makes it easier to work with. So use the small putty knife to scoop out about 2 cups of the joint compound onto the middle of your drywall hawk. Then make a little indent/hole in the middle of the compound glob and pour about 1-2 tablespoons of water into the center, then slowly mix it into the compound. The final consistency you're looking for is kinda like creamy mashed potatoes. It should be smooth enough to easily stir BUT firm enough that it won't slide off the hawk if you tip it at a right angle to the floor.
Put the lid firmly back on your compound tub (it will dry out if you don't) and clean off the small putty knife. Clean everything as you go!
To get started on the next part, grab your biggest putty knife out of the set I showed, along with your hawk with the mixed compound, and your ladder and now it's time for the exciting part!!
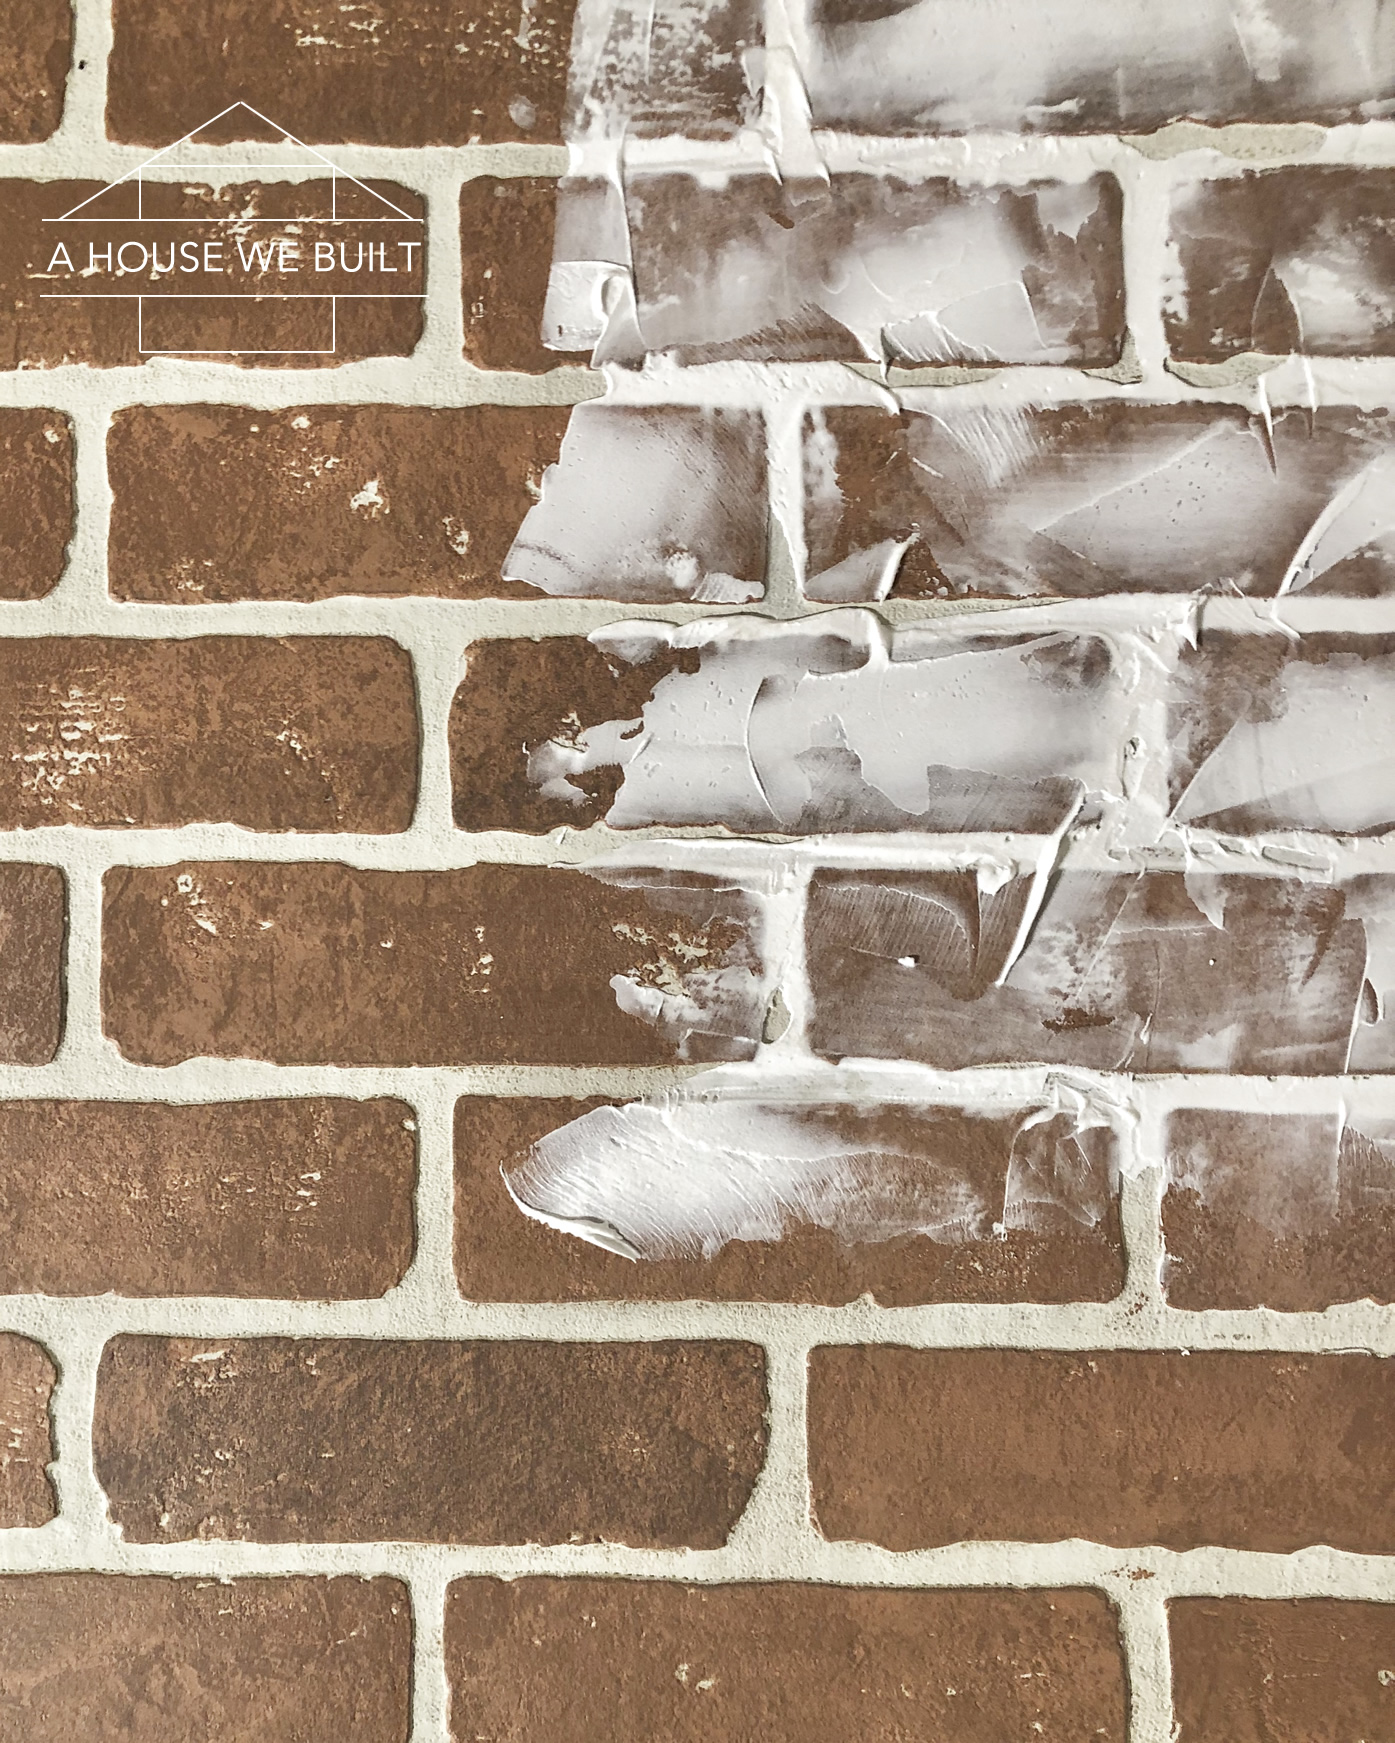
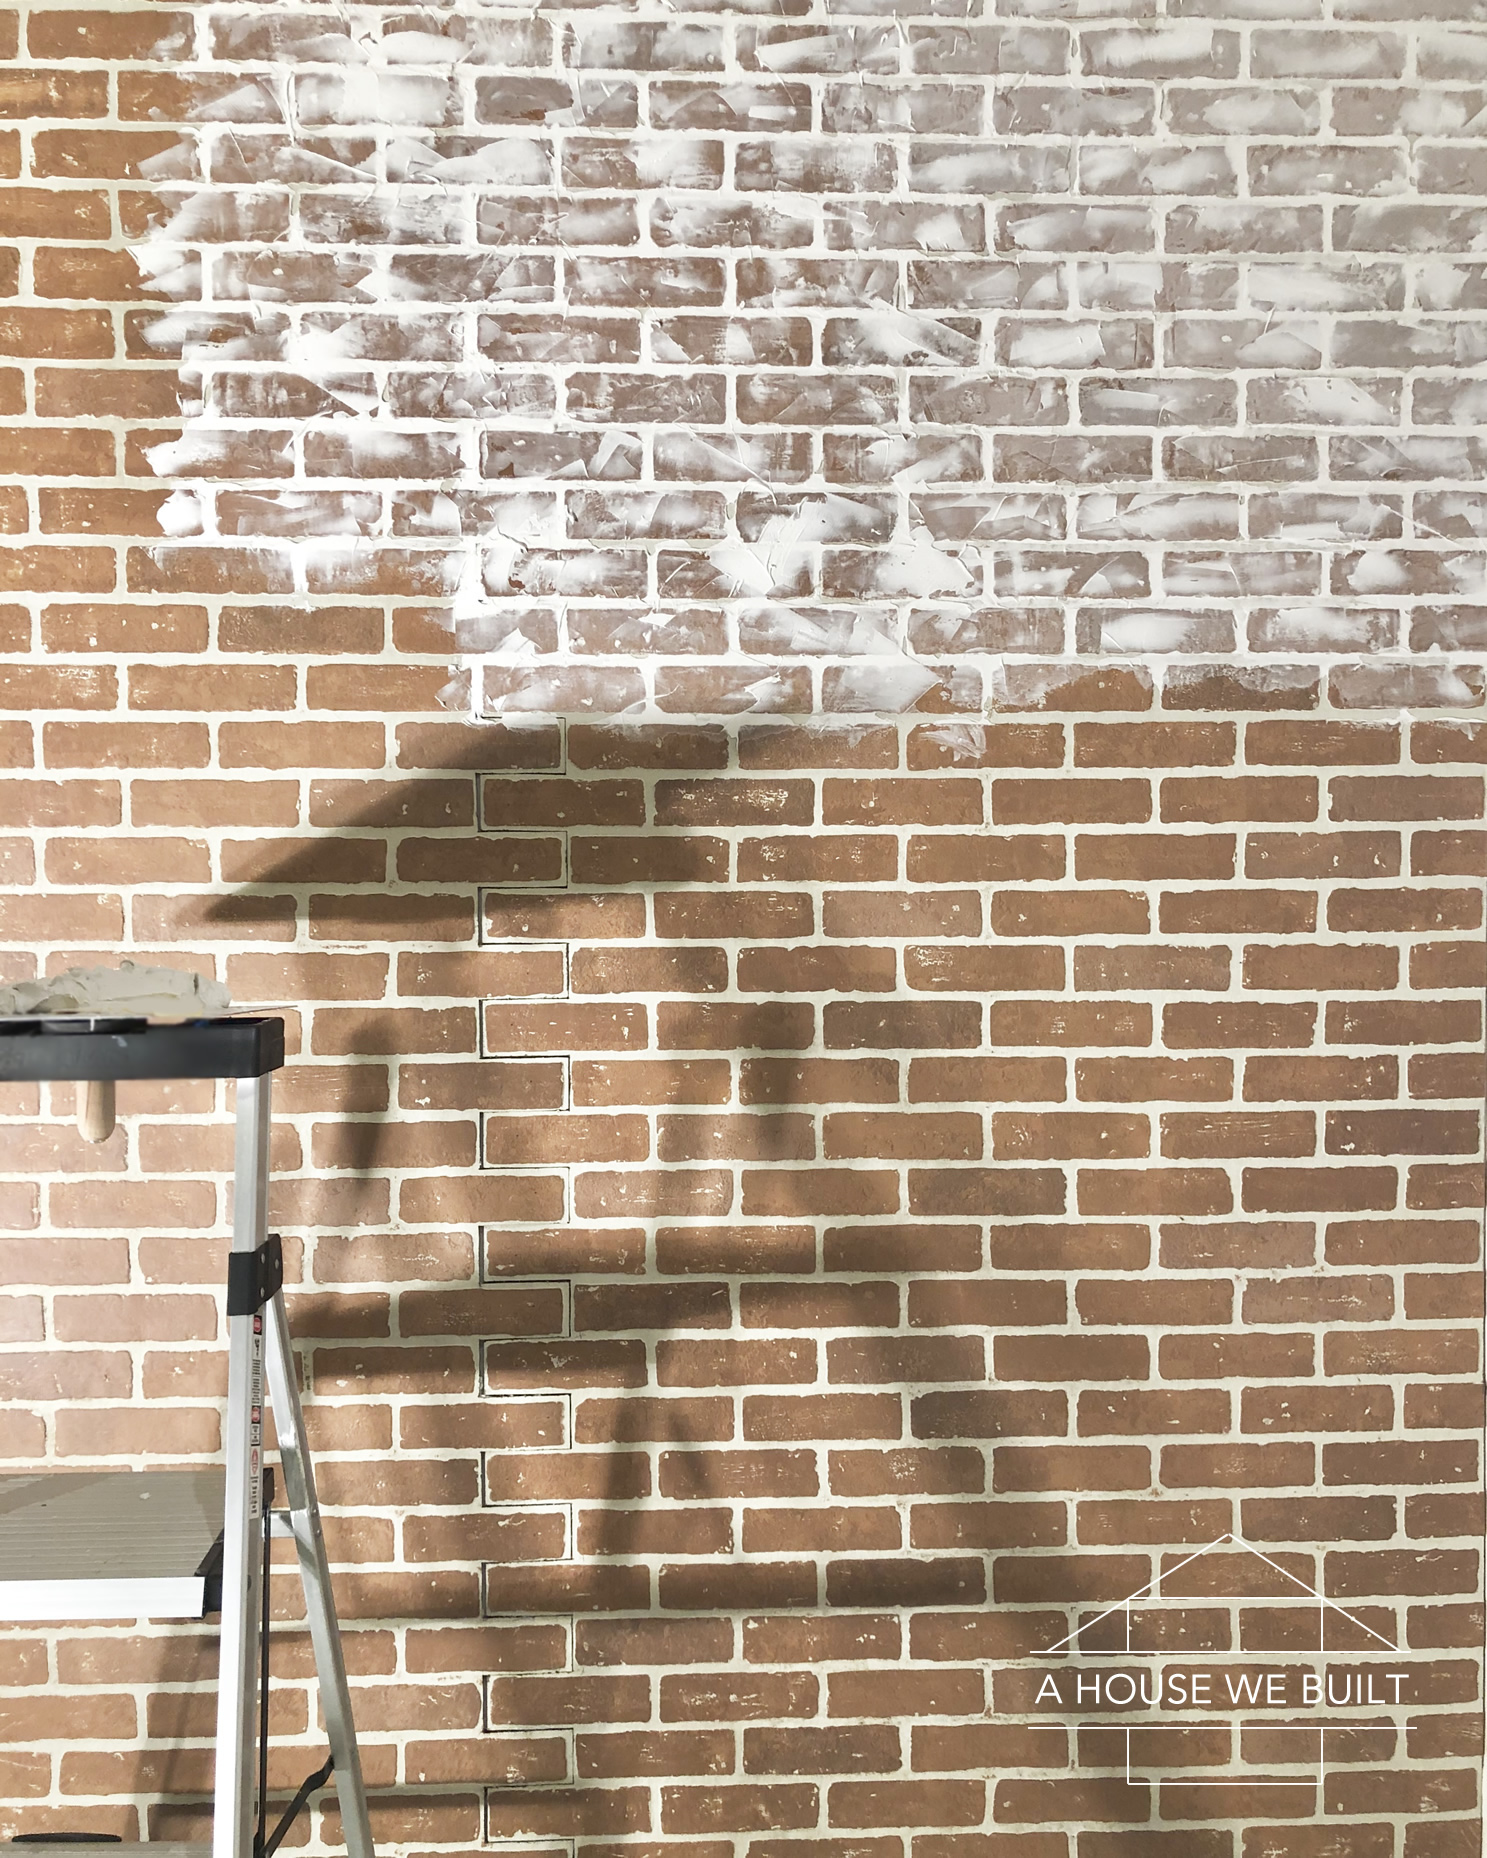
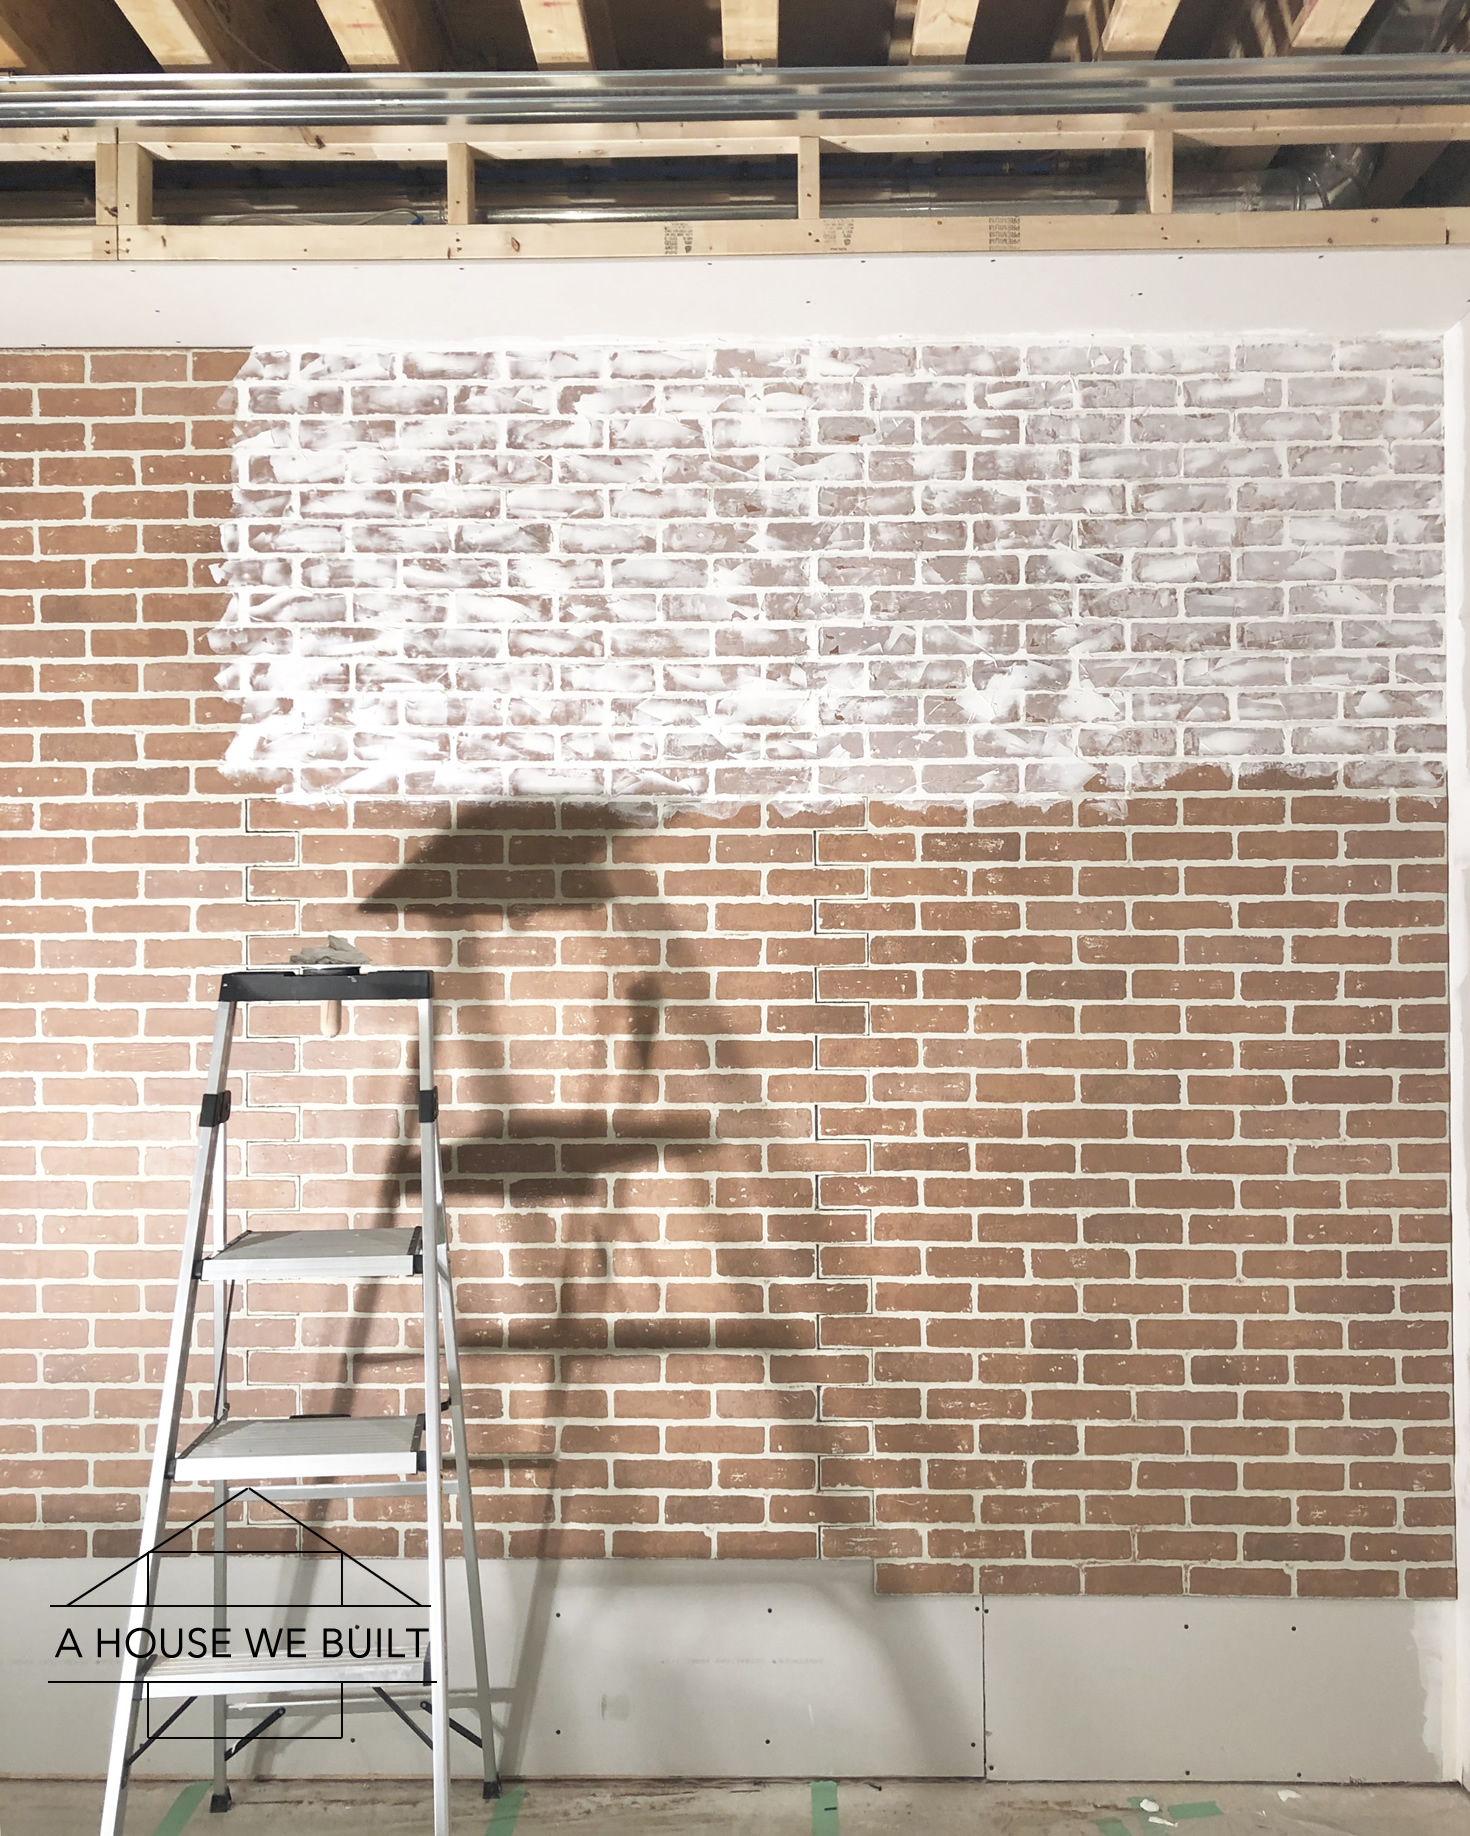
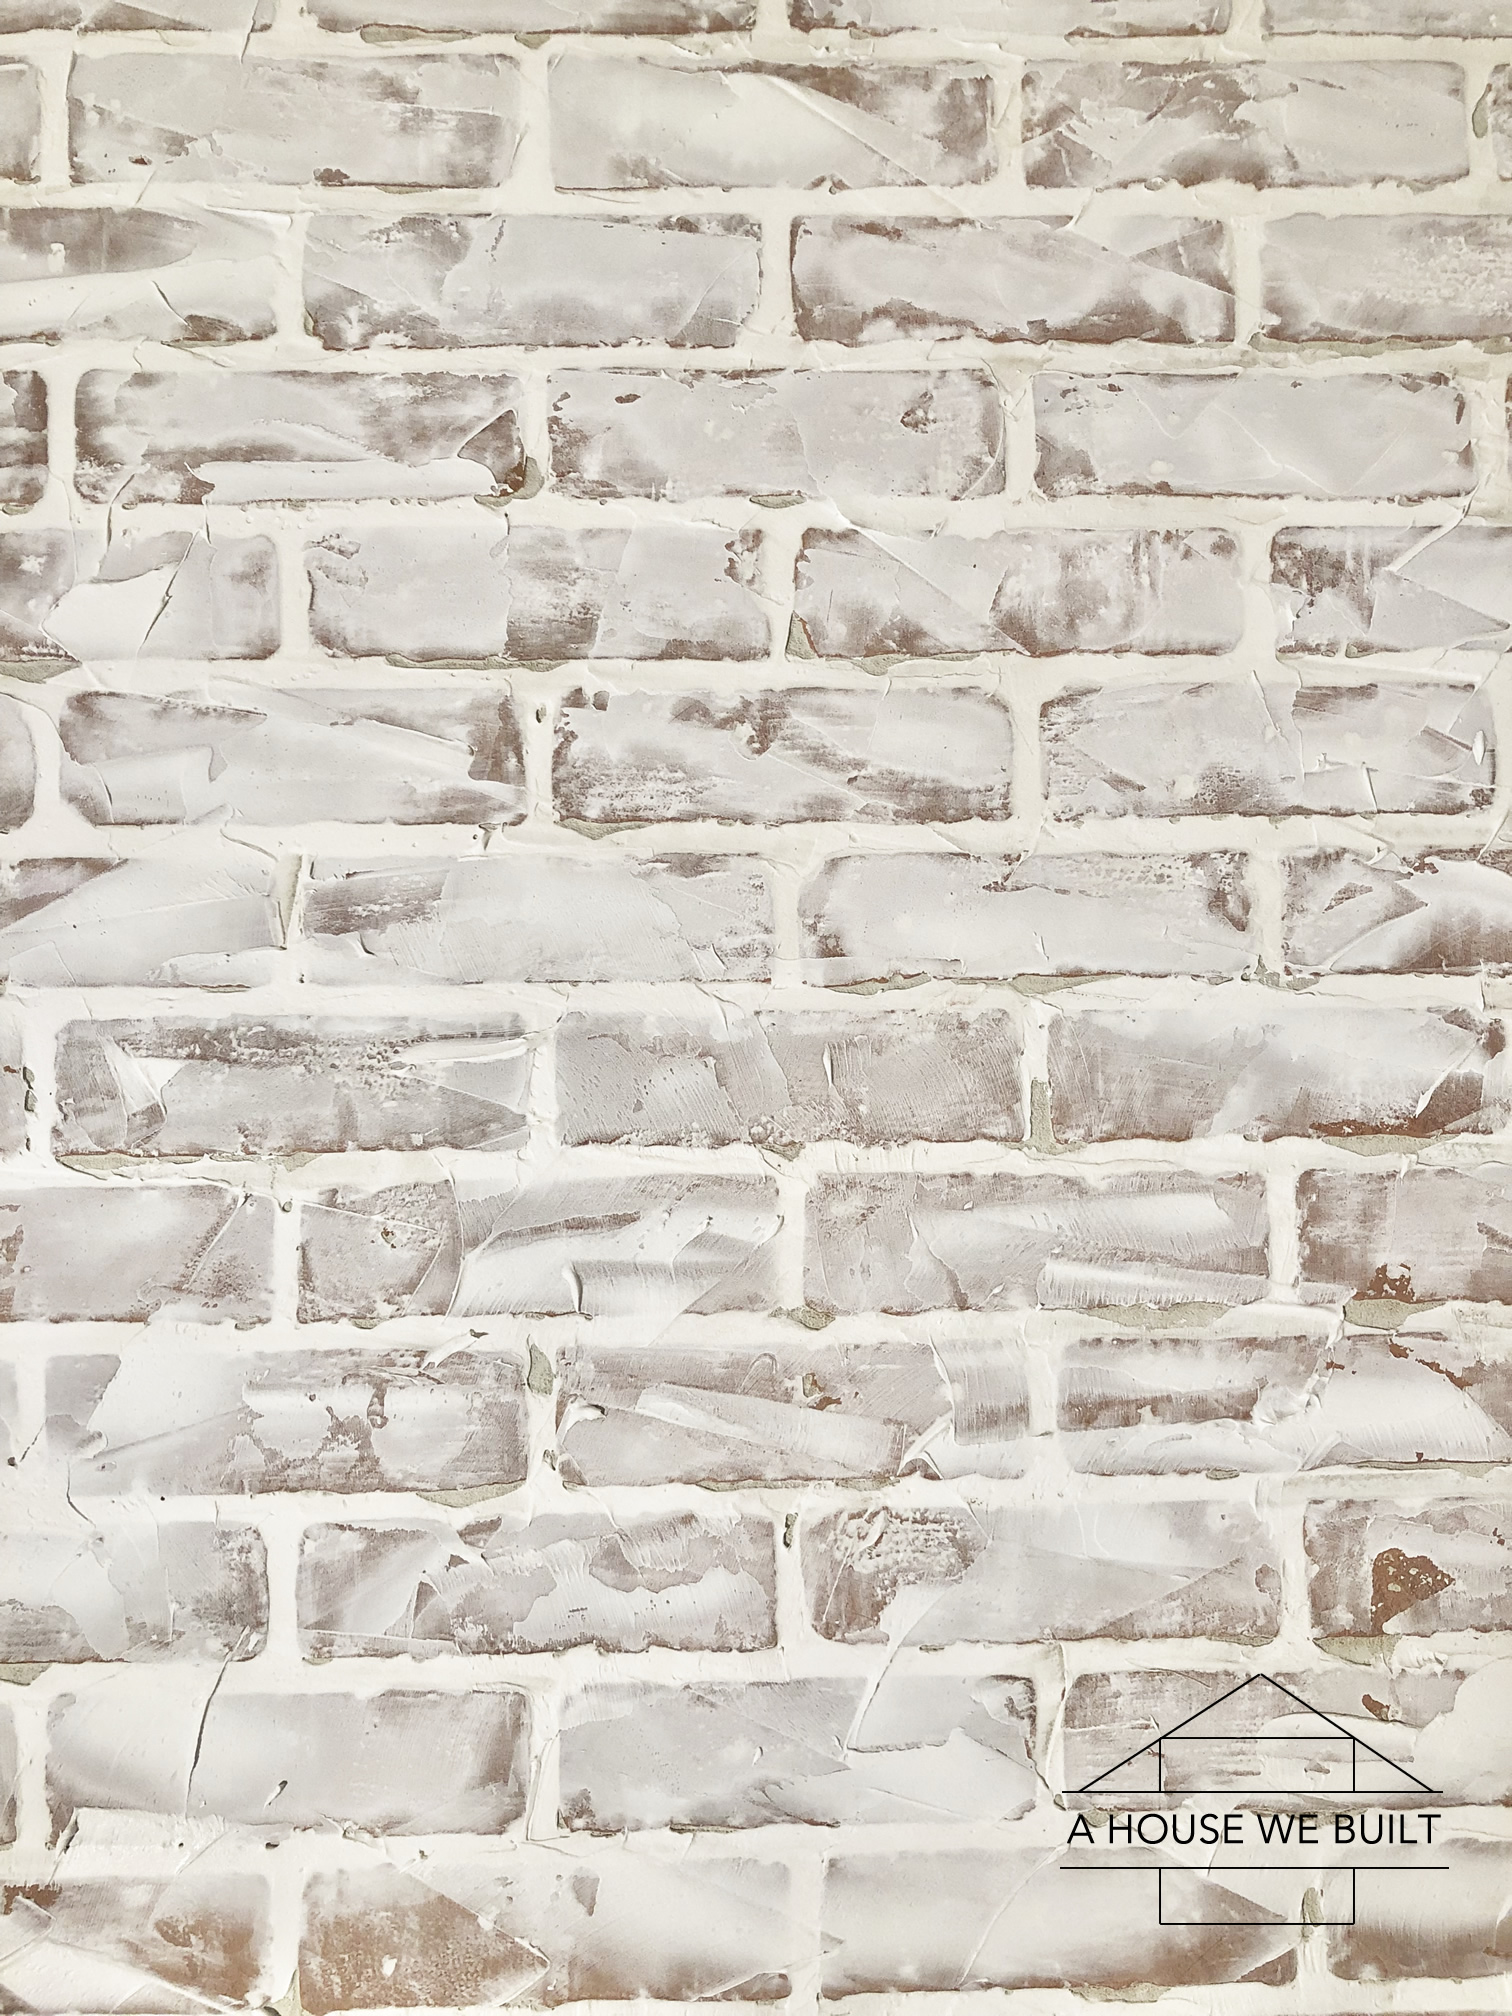
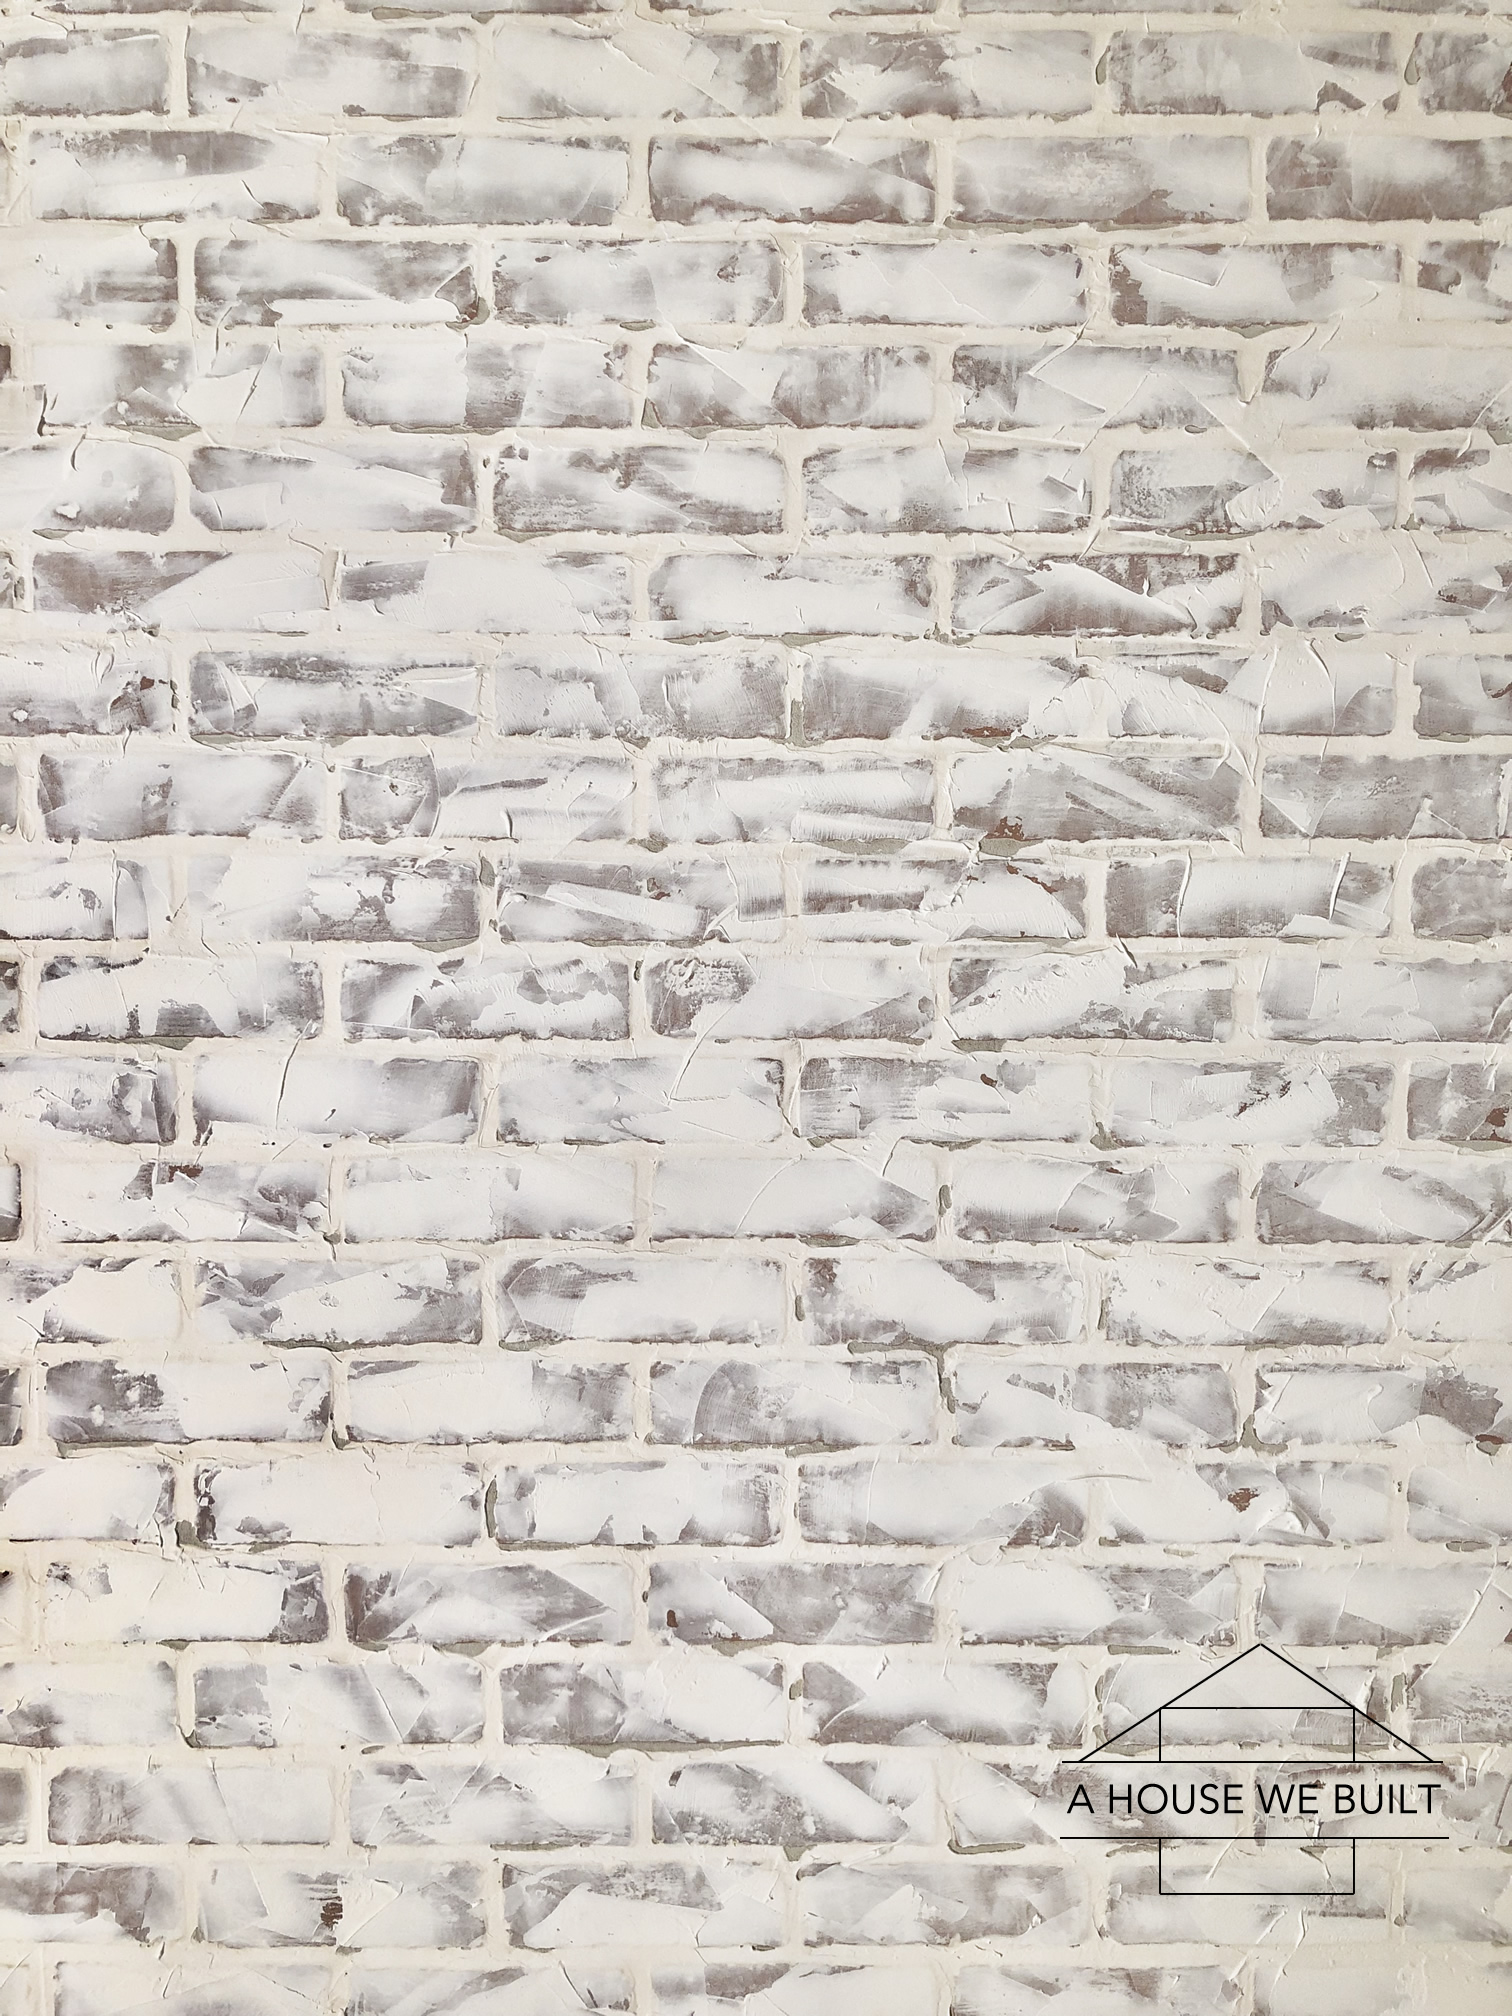
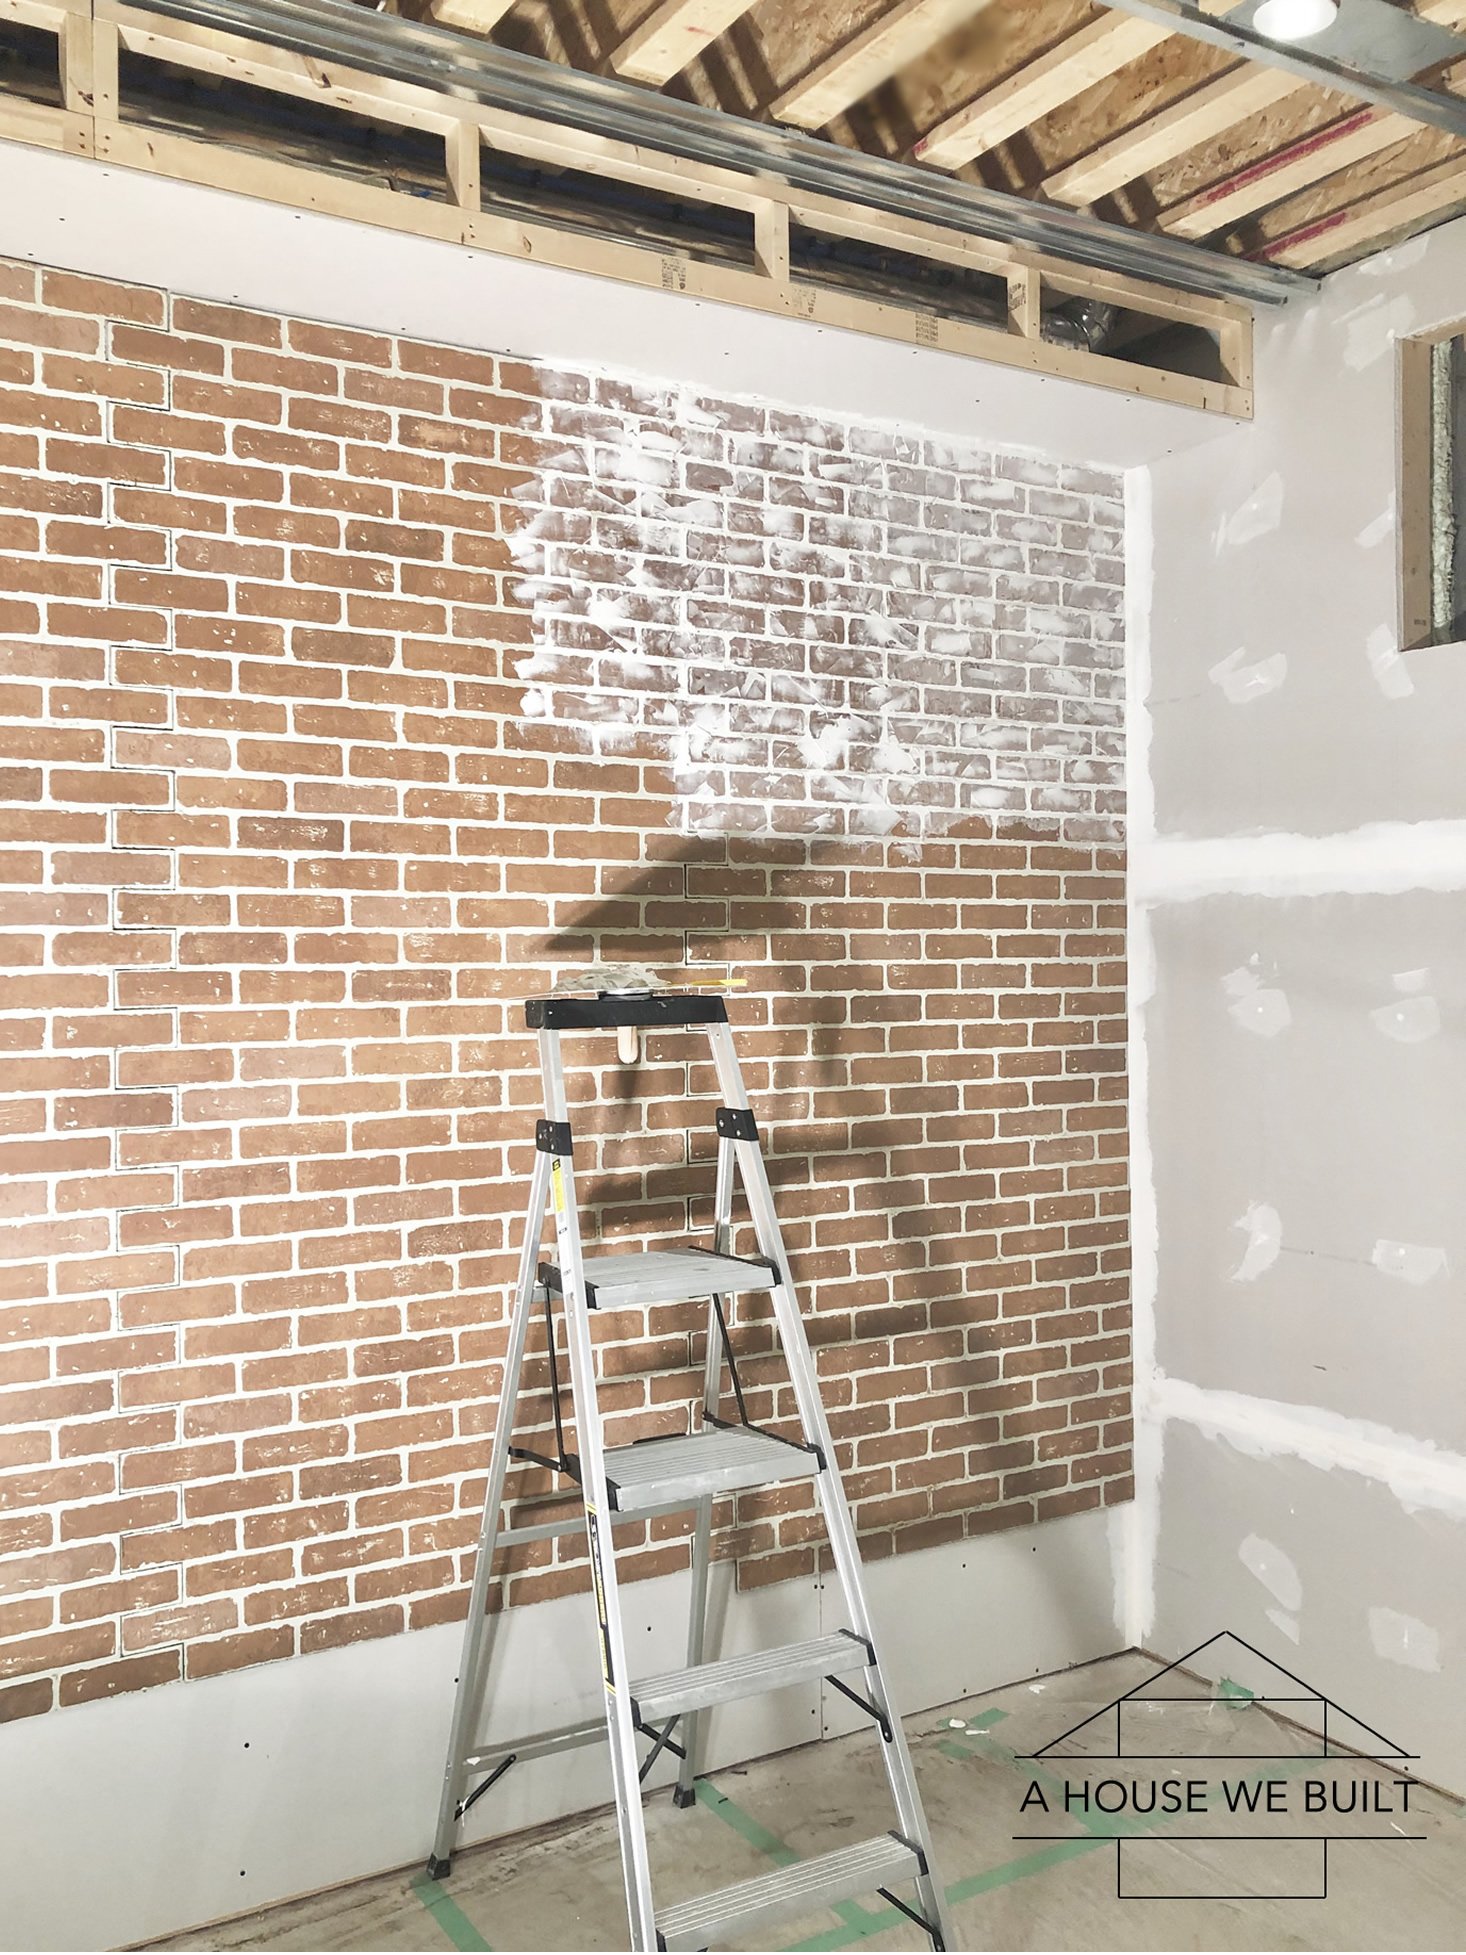
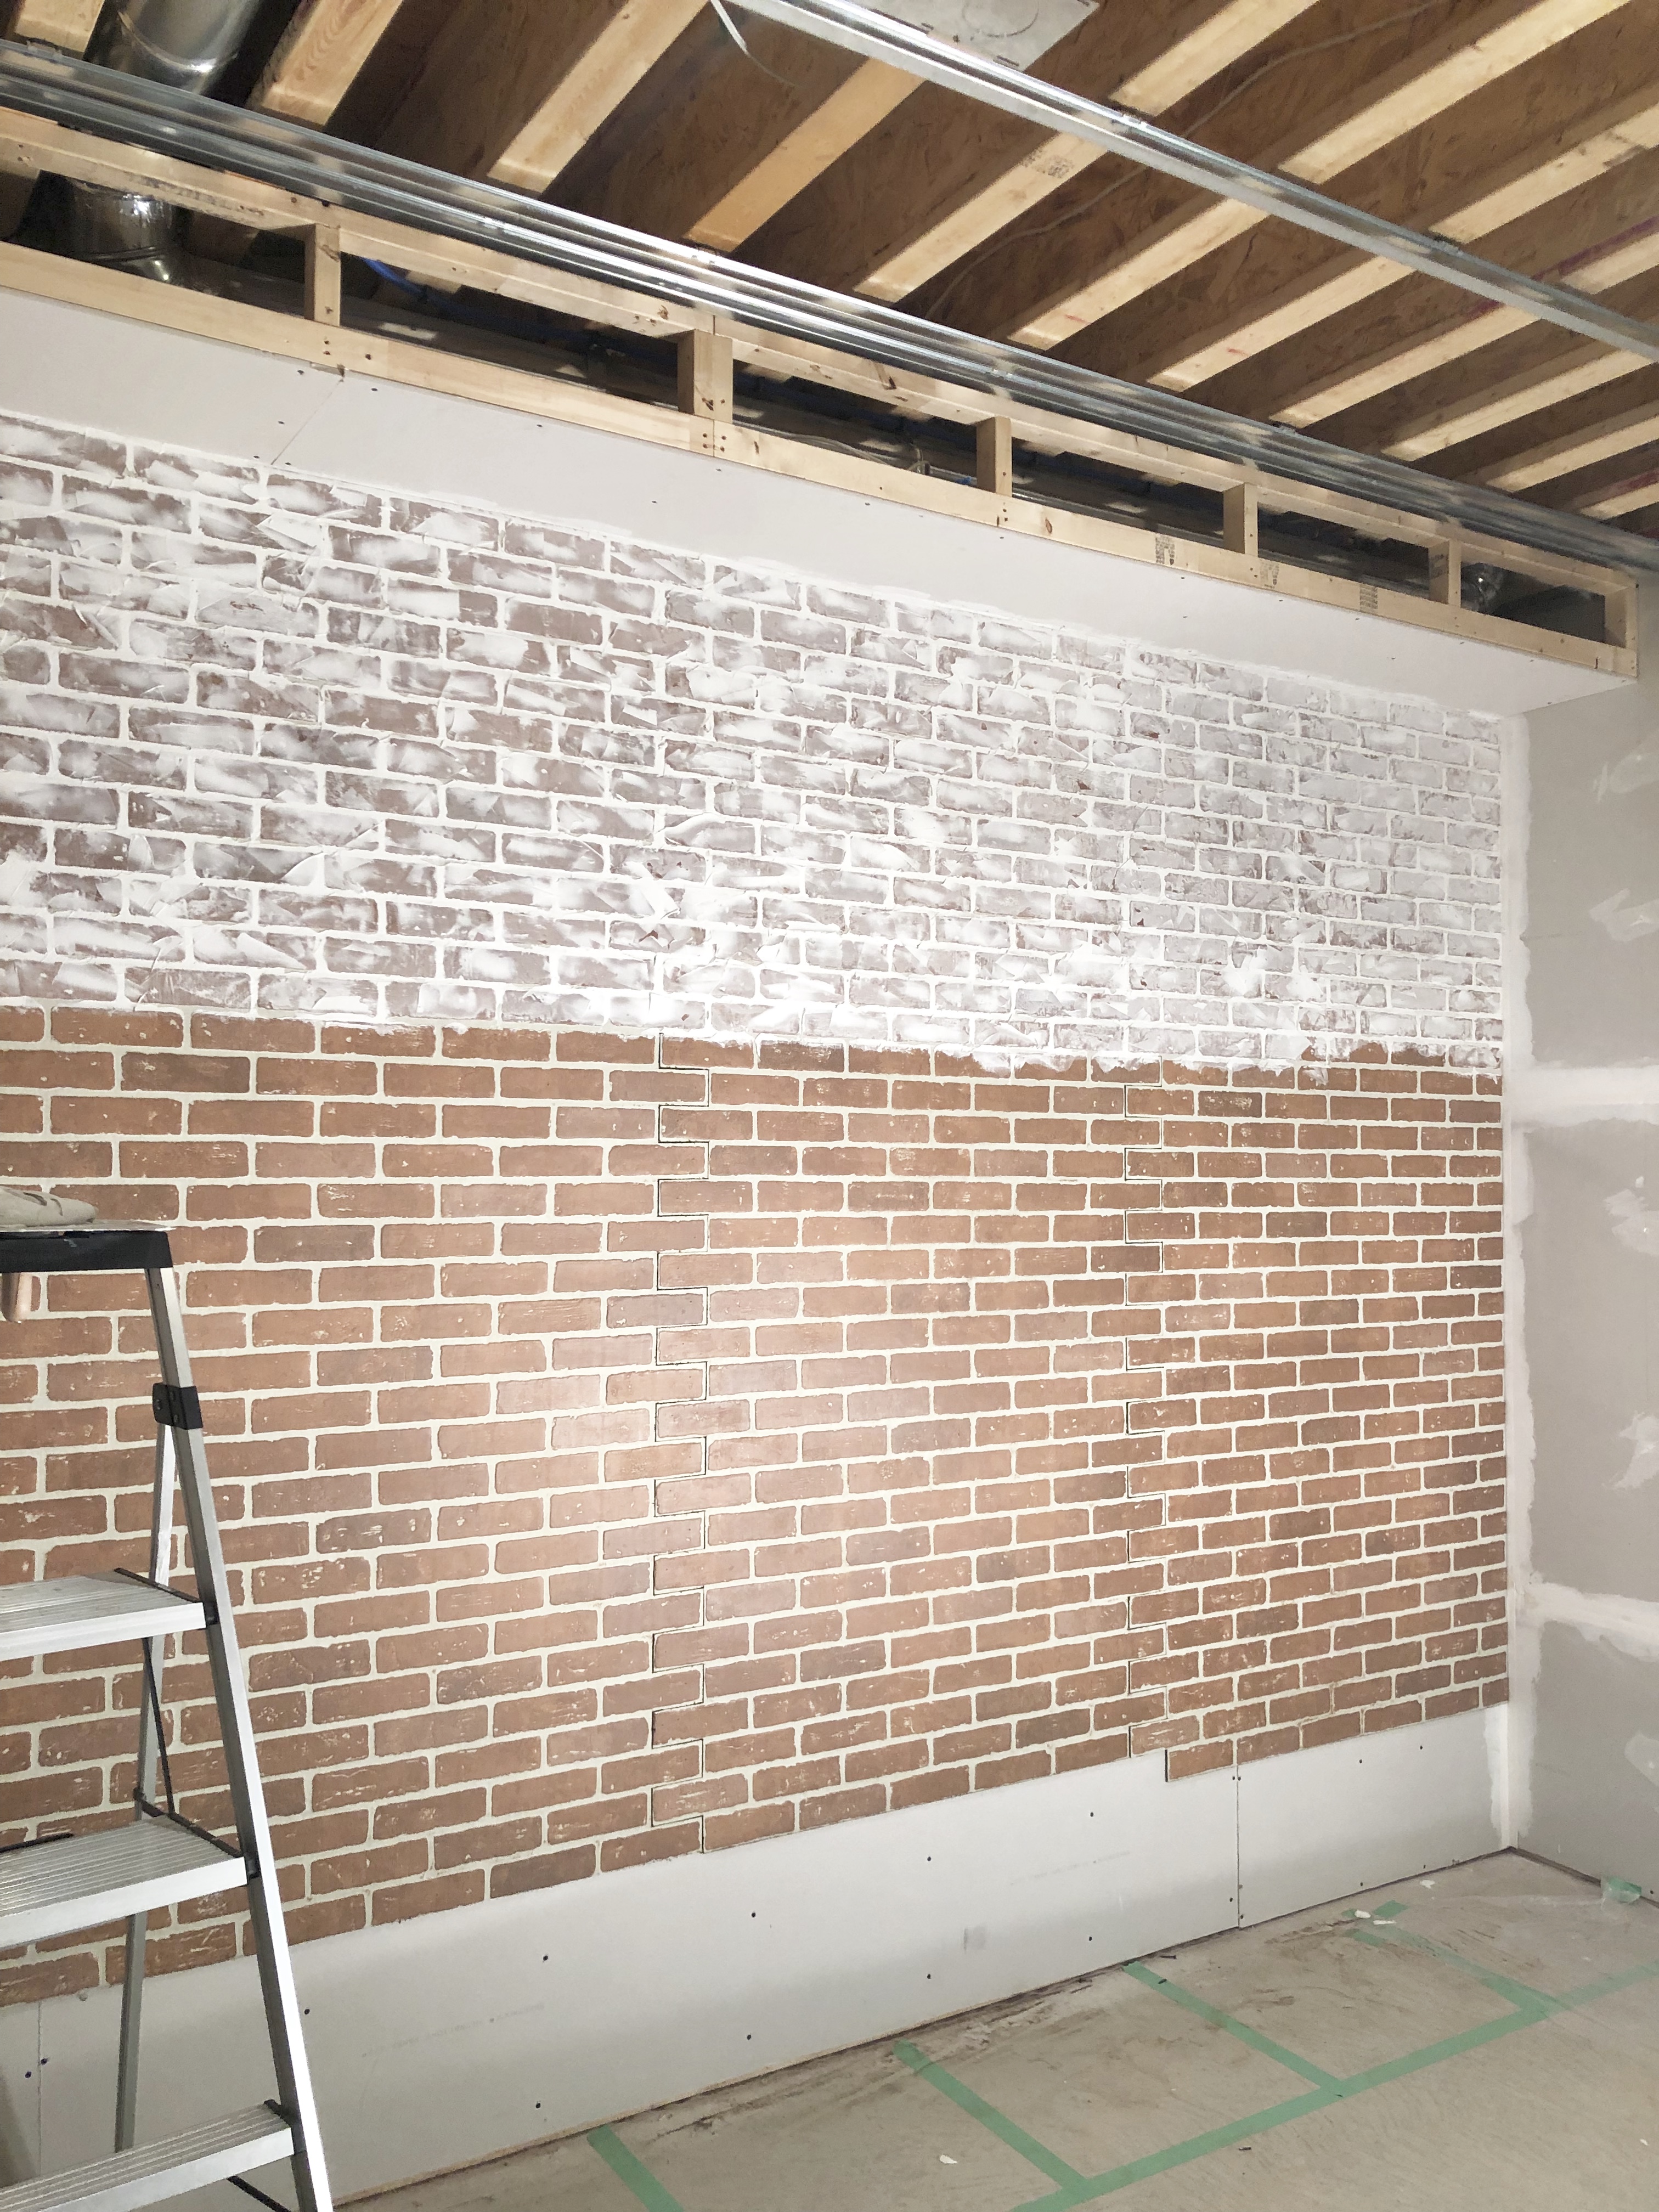
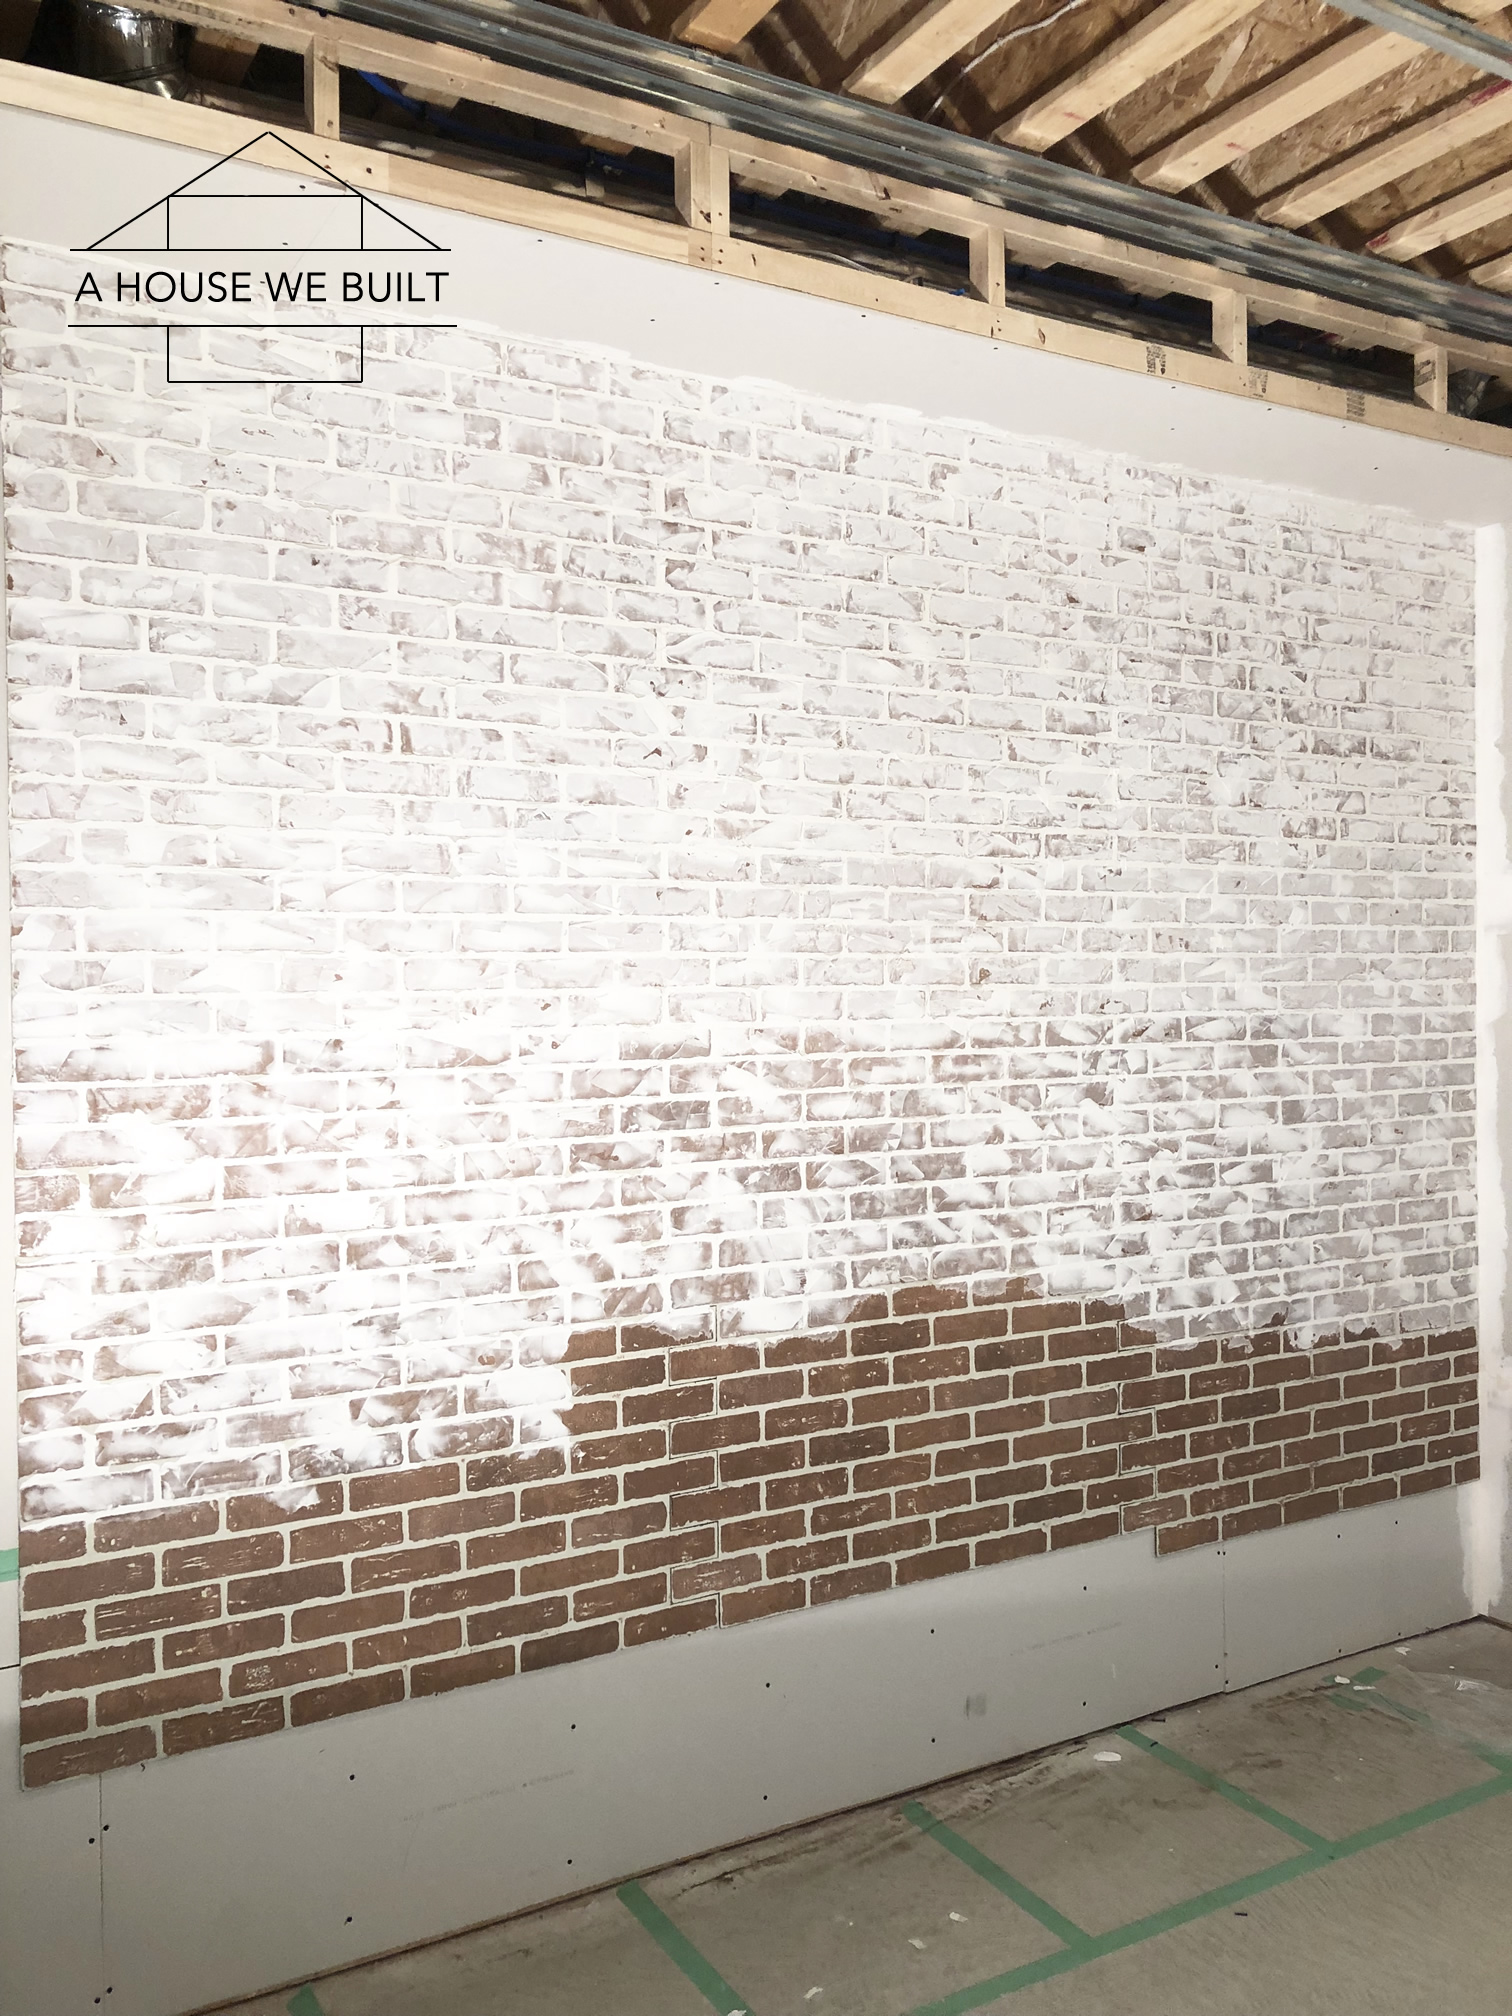
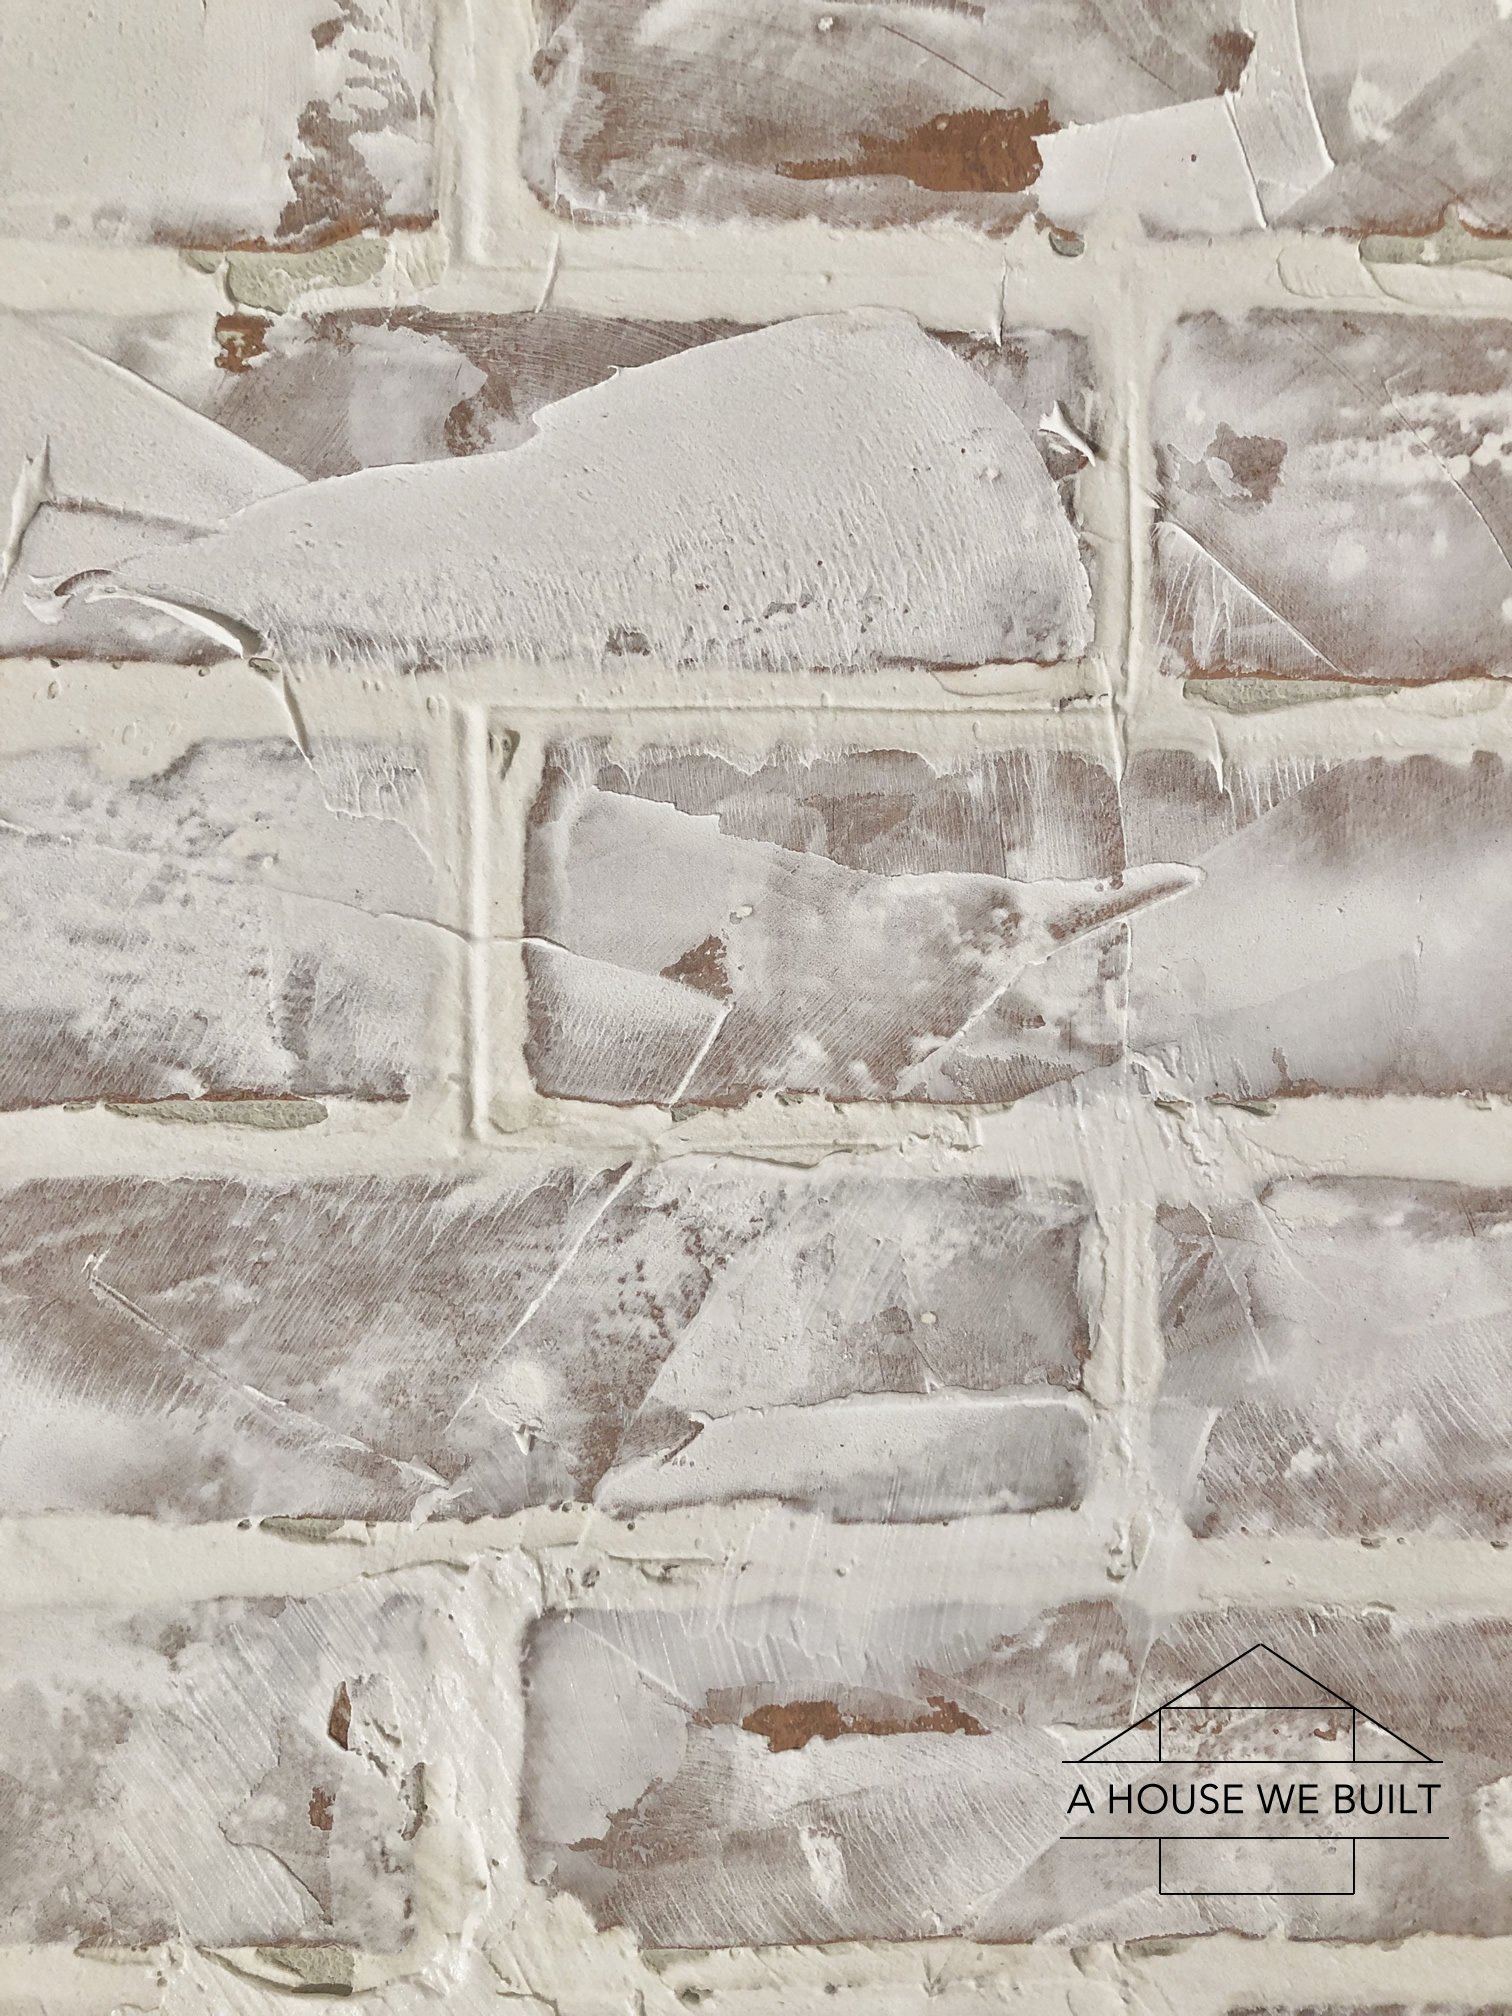
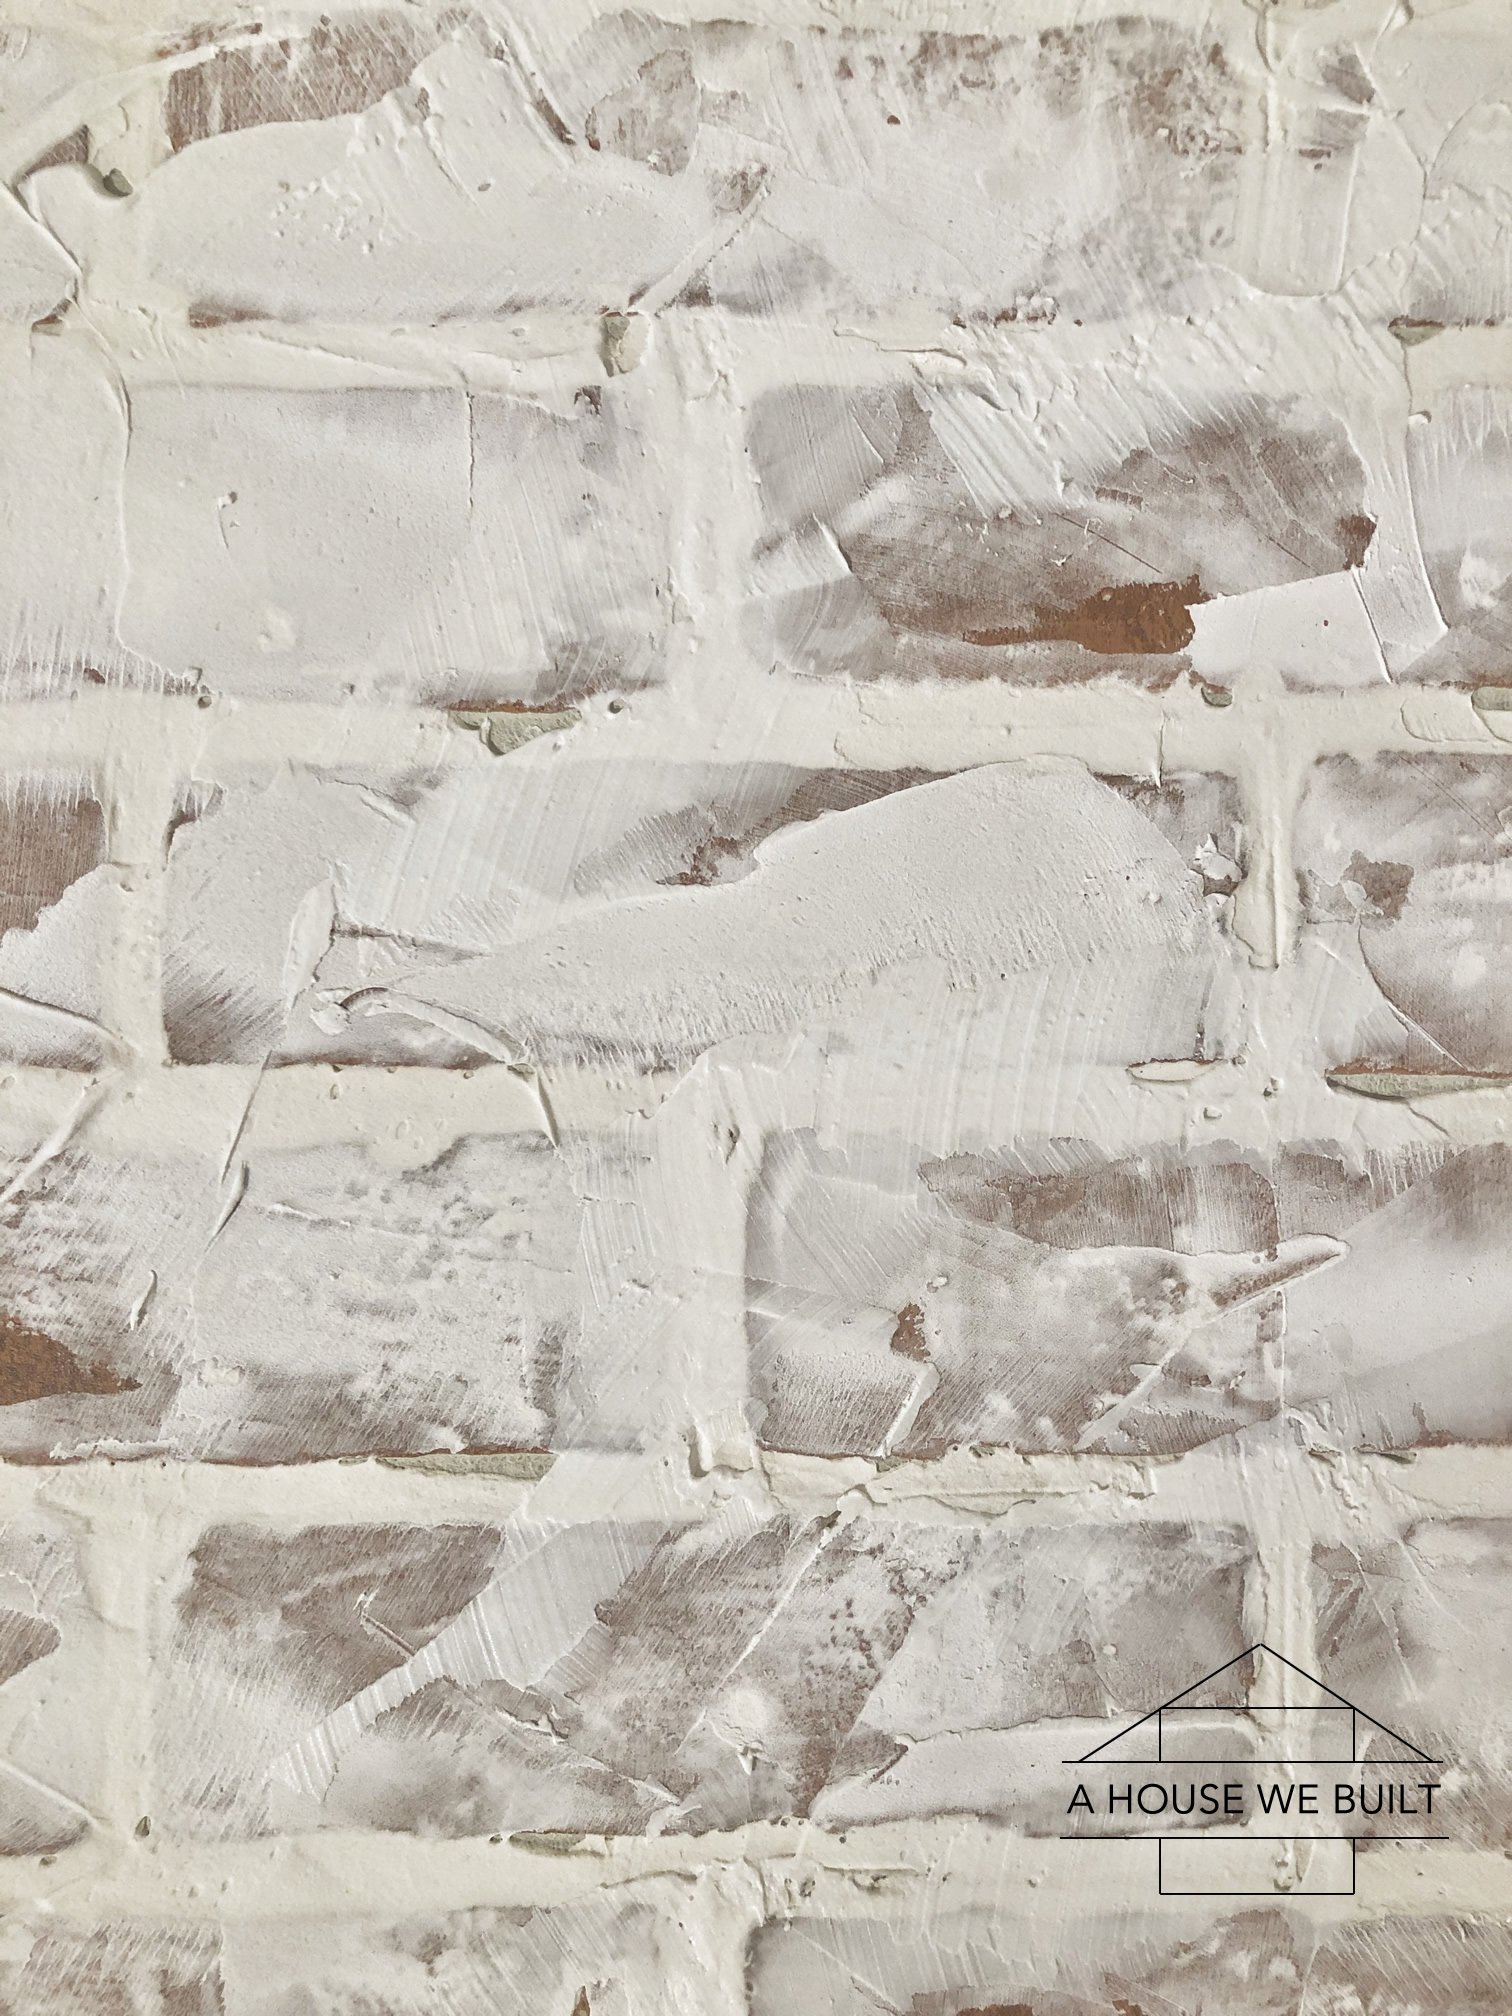
To do the "schmear" you just grab a big a glob of the compound on your putty knife (I'm guessing about 1/4 cup) and scrape it onto the wall. Then literally just scrape it around going left, right, up, down, sideways, whatever way you want until you're happy with the look. I recommend doing about 1 square foot at a time. There is really no wrong way to do this, it's just about whatever look you want. I recommend getting the compound into the grout lines in most places, but let a bit of the original grout show through here and there for added depth. Basically you're smearing it on, then scraping it off in every possible direction until you have as much or as little of it on as you want on the wall and you're happy.
Be sure you get extra compound into the top and side seams between the panels and the wall/ceiling so that there are no holes or gaps there. This is very important to making your wall look finished.
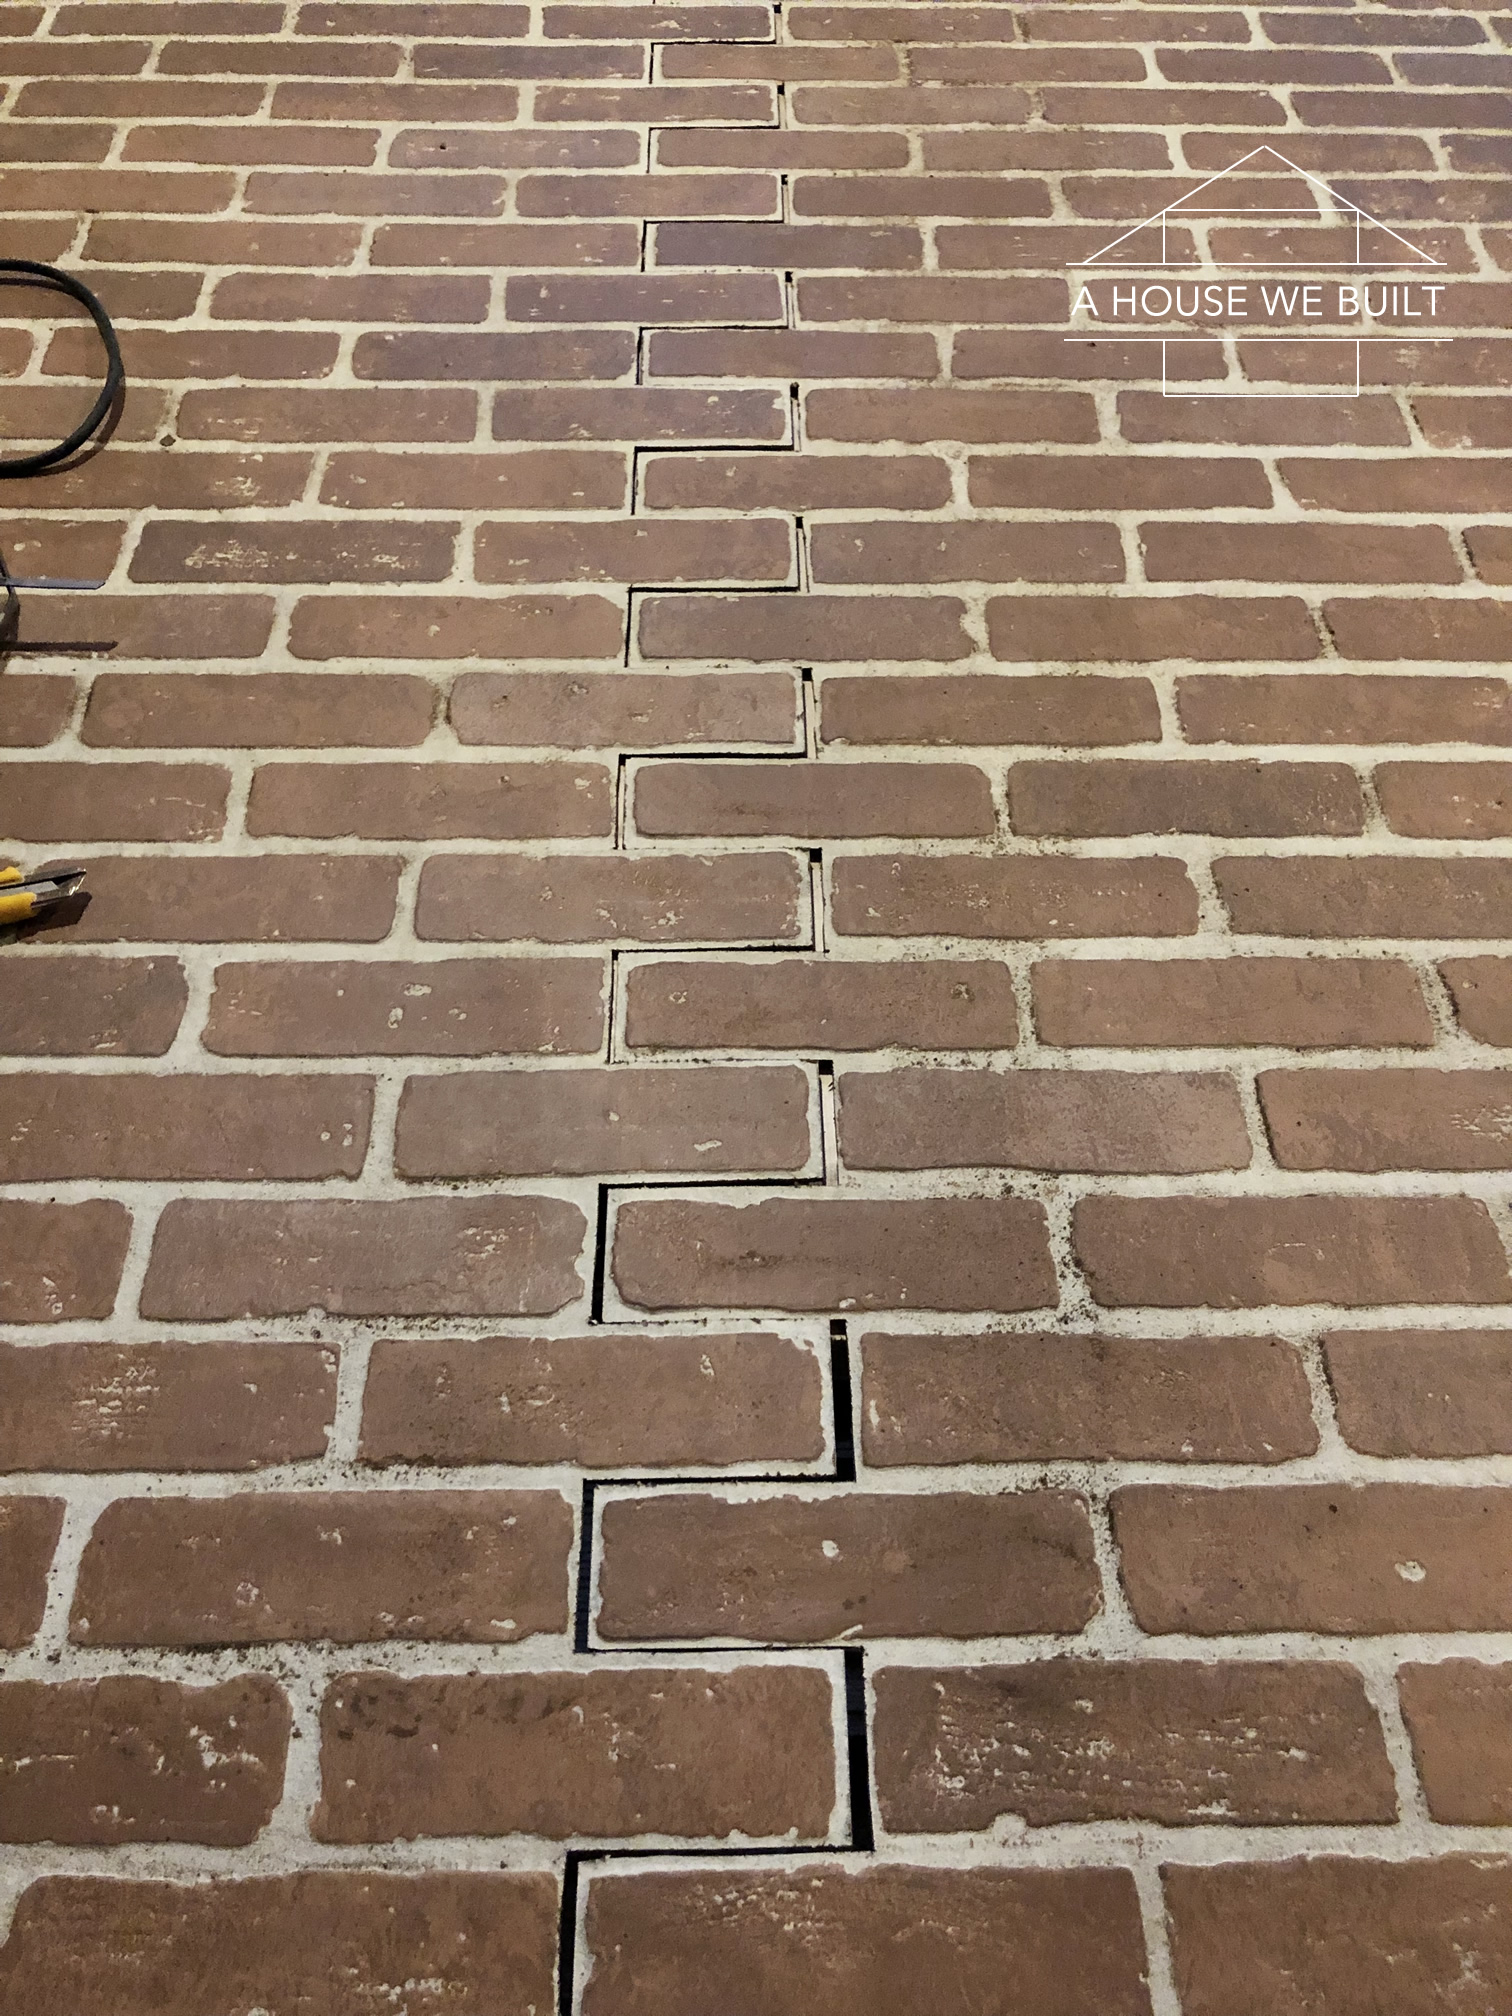
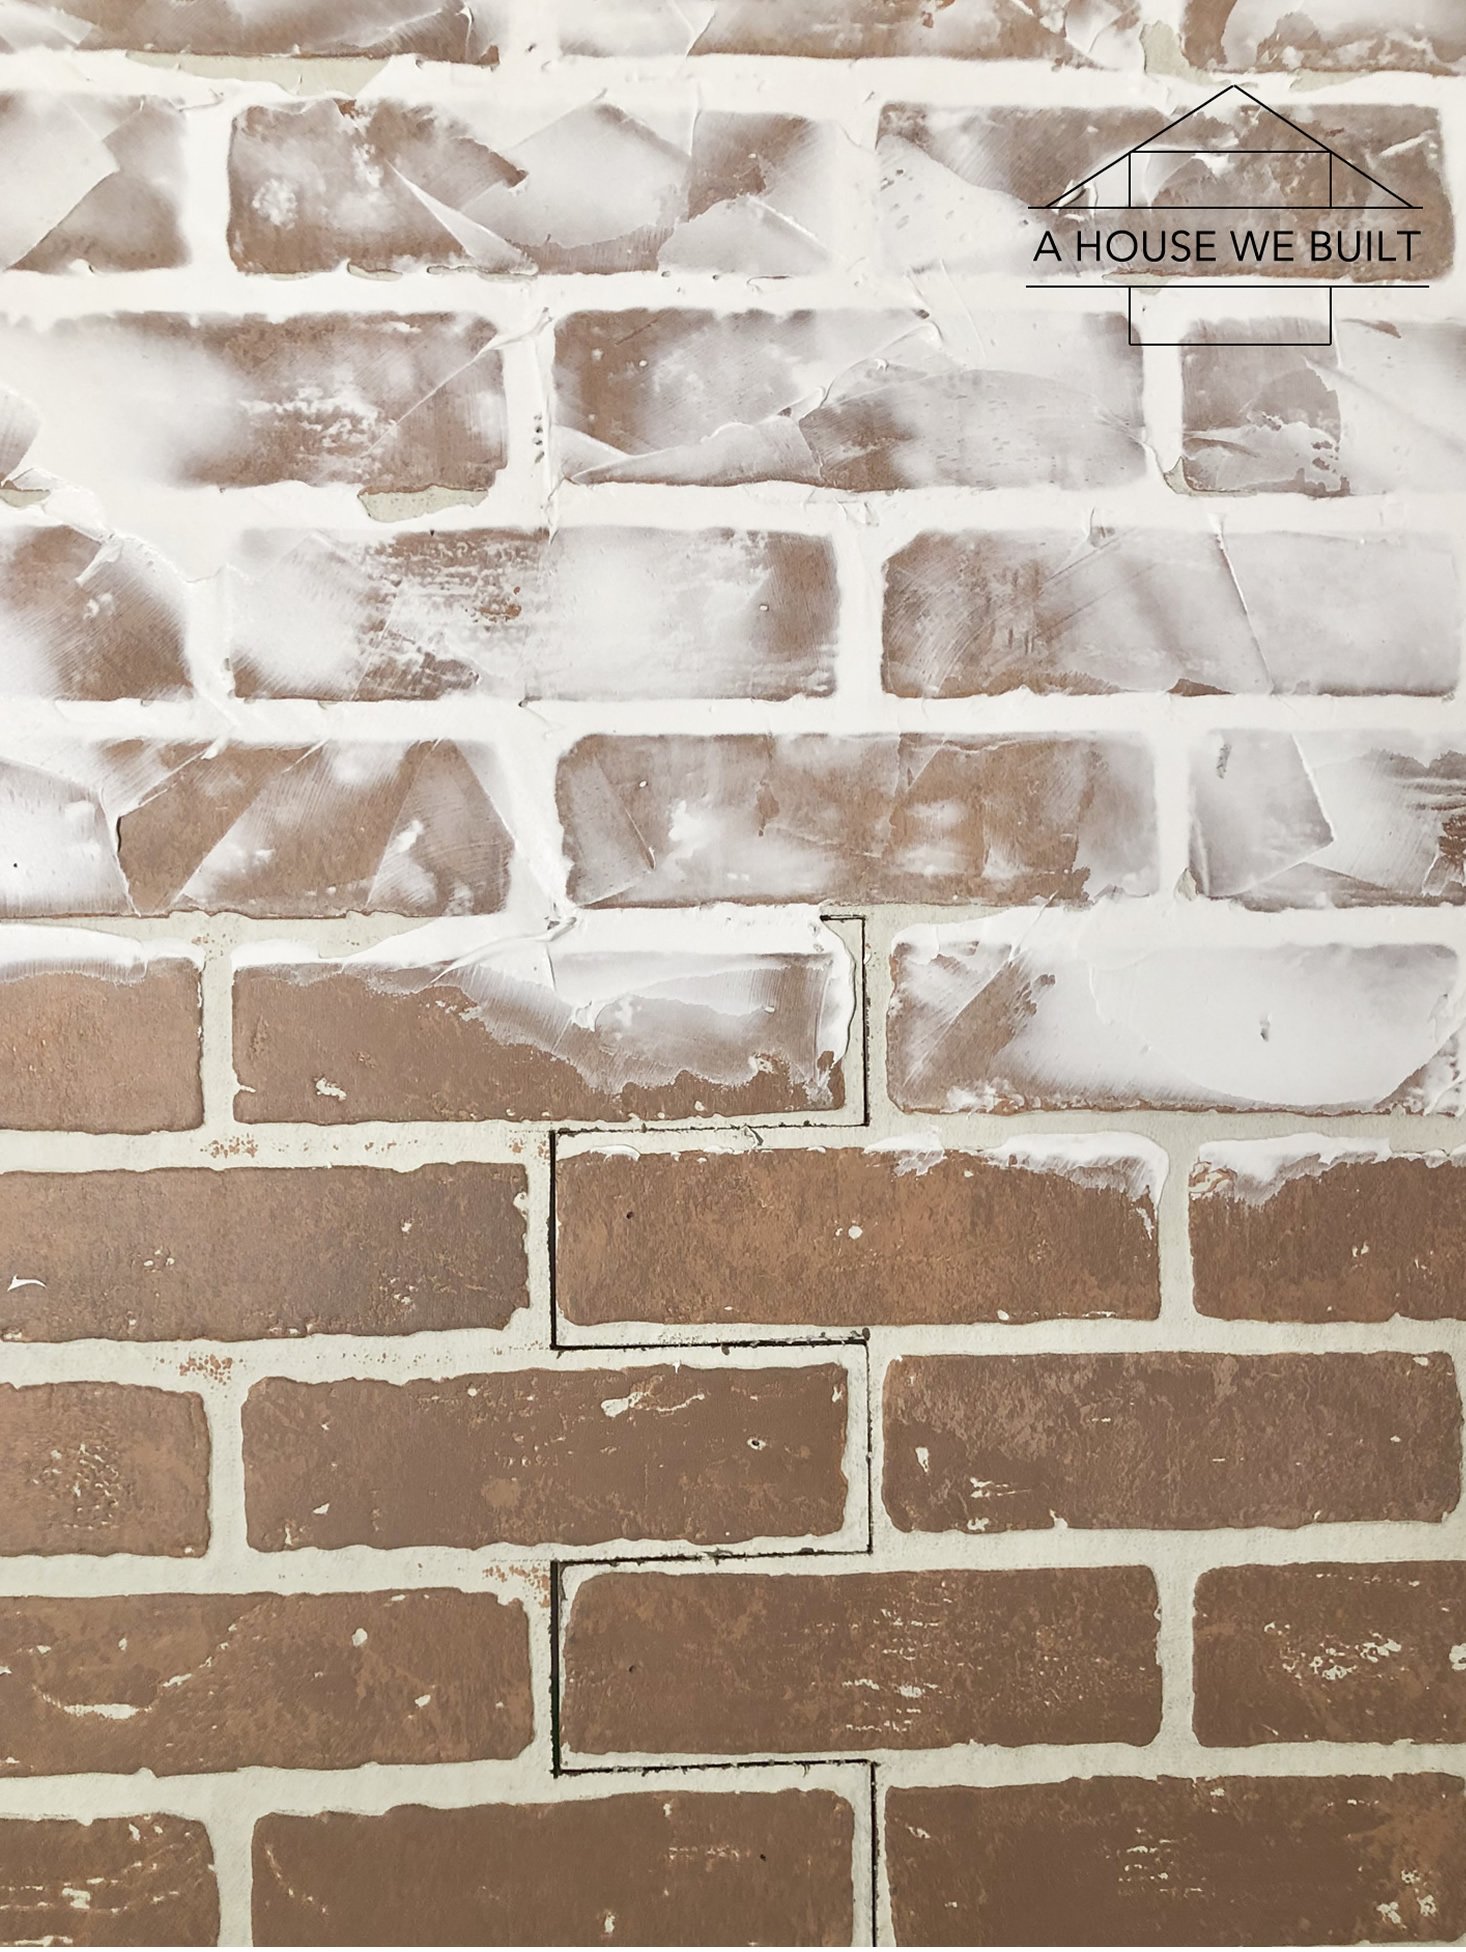
When it comes time to do the seams between the panels, just use extra compound and push it into the cracks between the panels and smear/scrape the compound around until you hide the seam. You might notice that the line/crack between the panels falls in a little as it dries (middle pic below) – don't worry about that. Make it as good as you can on the first day, then go back the next day and fix up the seam line (third pic below) even maybe with just applying the compound with a finger. It's pretty forgiving.
You'll want to work in even sections along the wall and try to stand back every time you move the ladder and make sure that you're being consistent with your application. I also found it helpful to look at the wall through my camera phone. Don't ask me why but looking at your work through something else often helps you notice trouble spots. Remember, the less 'perfect' it looks, the better!
I personally didn't worry about making the wall smooth. I wanted a bit of dimension and texture to my wall so while I didn't leave any big globs, I certainly let some areas be thicker than others.
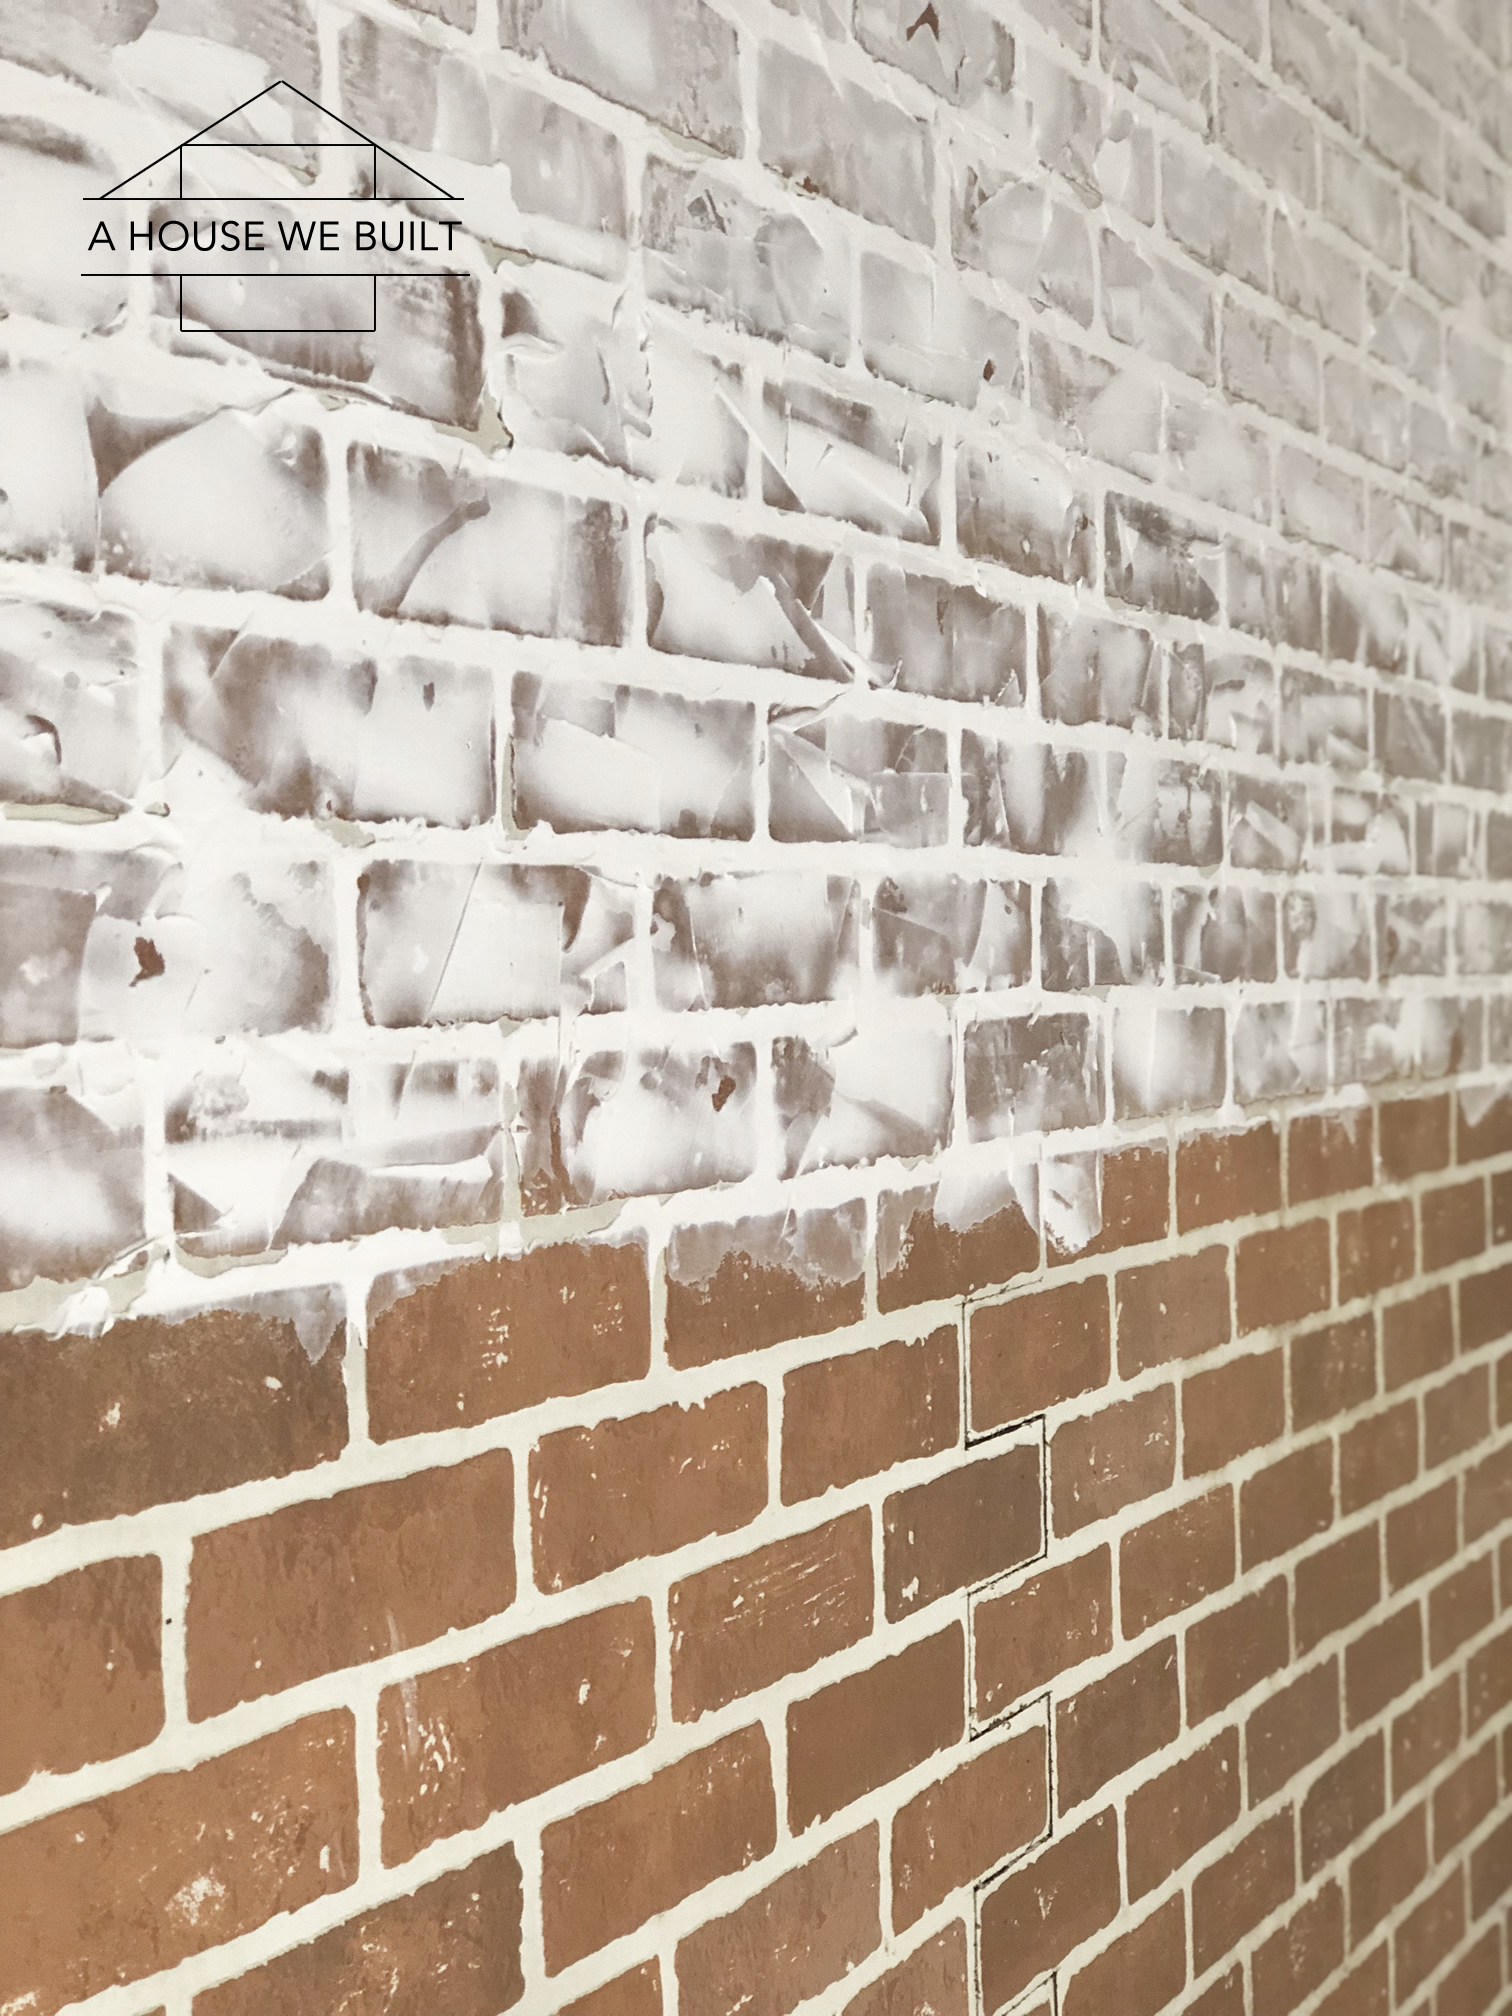
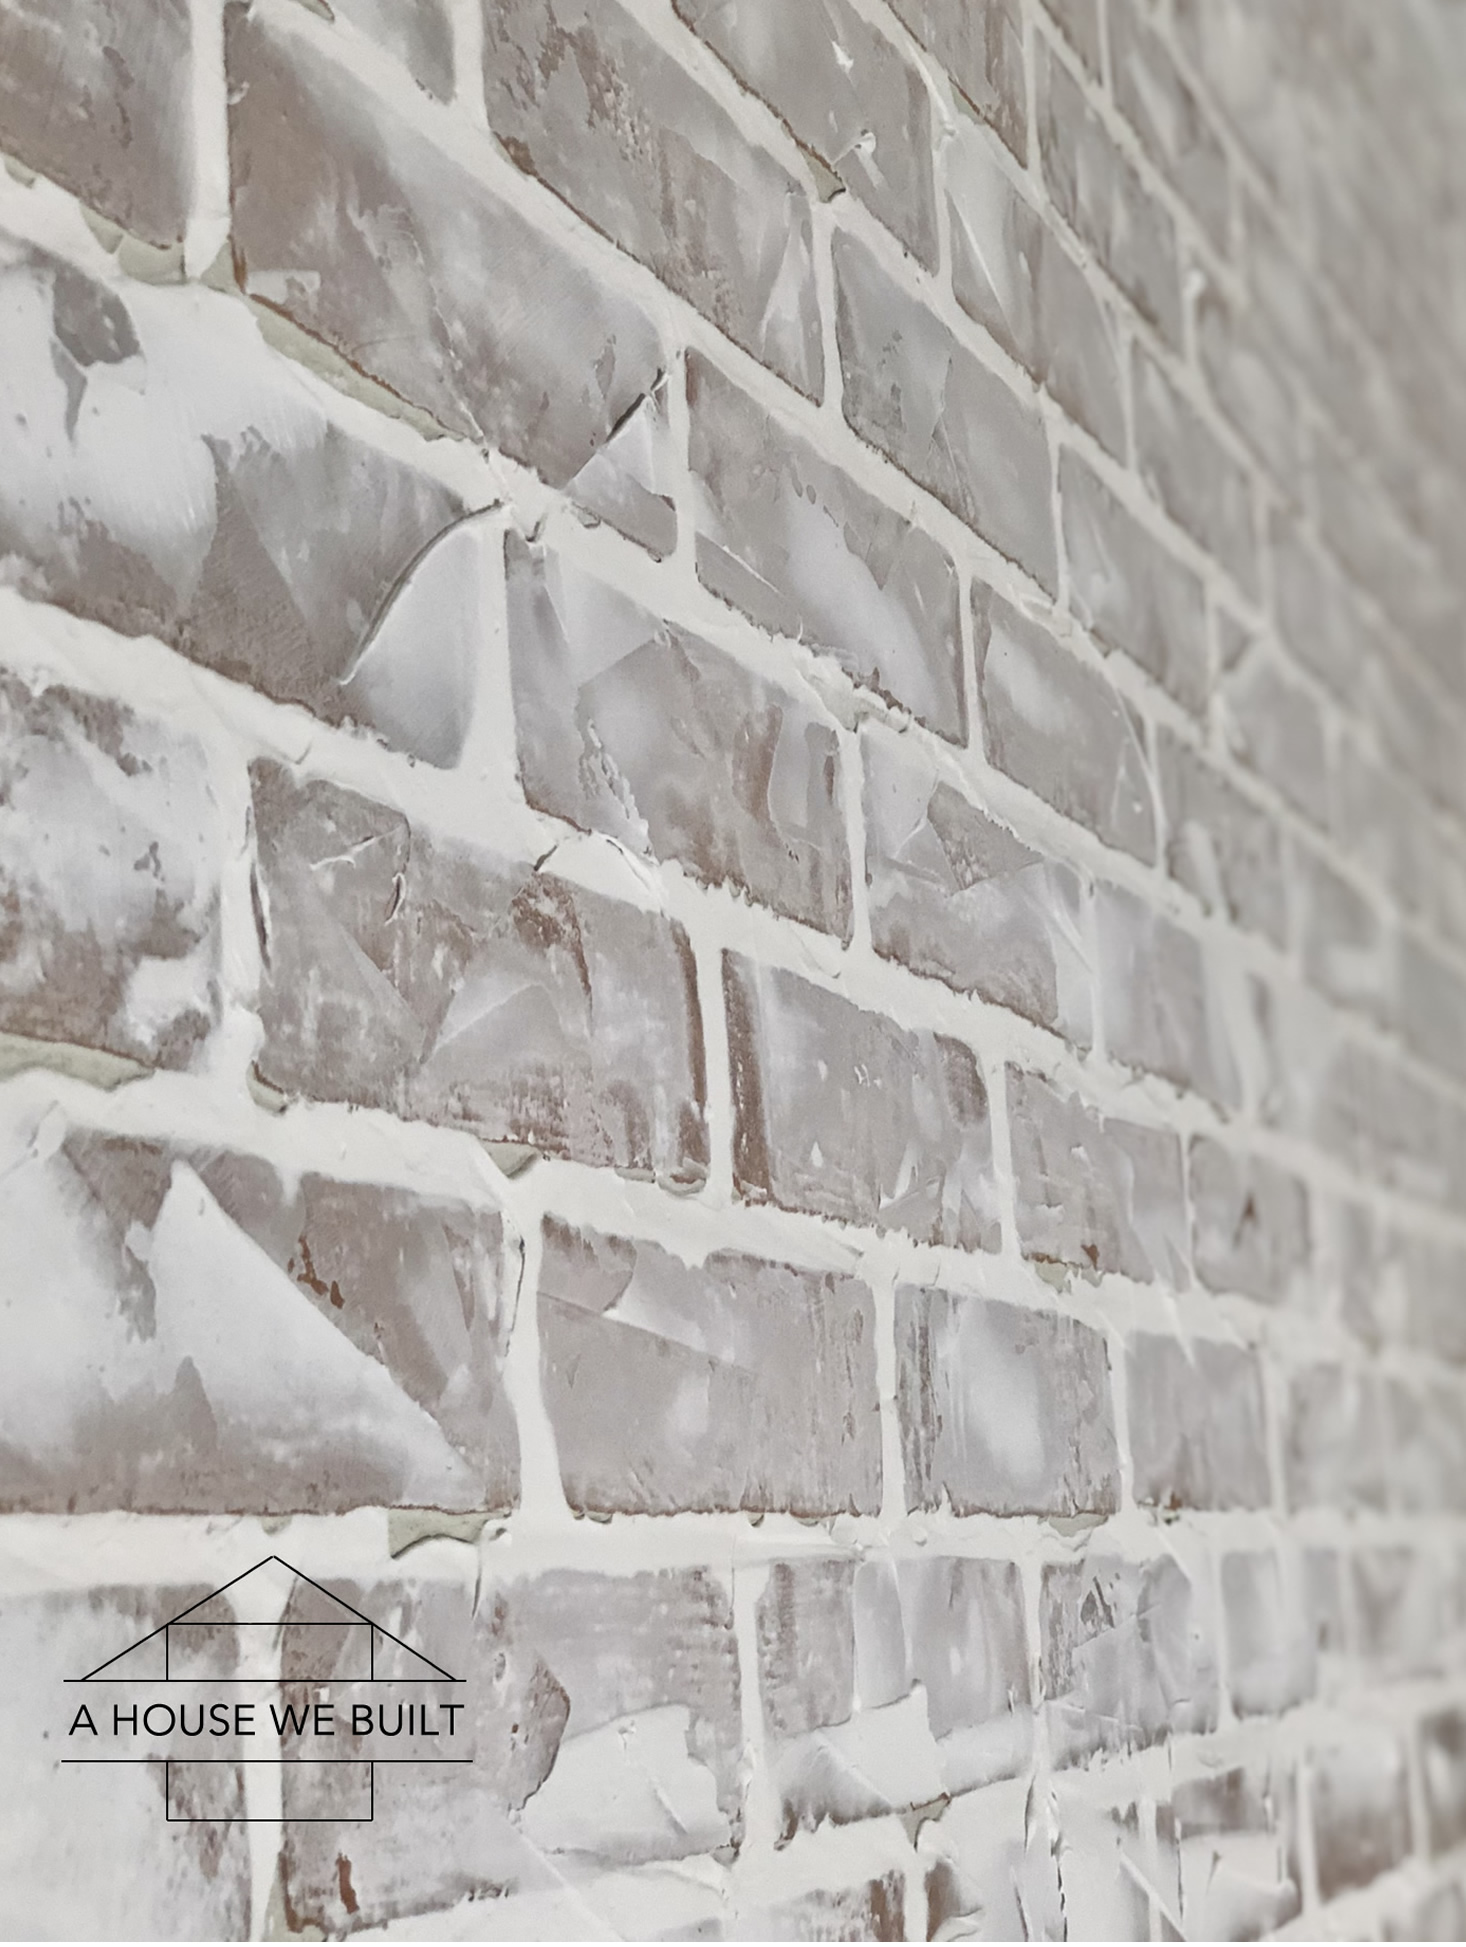
Note: as the compound dries a little (which it will as you work, even if you use the 24 hour drying one I recommend), you'll notice that the color will become a little lighter. This means that your work might look inconsistent when you step back to look at it all together, but it's actually not. So make sure you take this into account when you're comparing the areas you're currently working on to the areas you previously worked on for consistency: it will look a little whiter as it dries. But when I say "dry" I mean that in a light sense. It took me 2.5 hours to "schmear" this whole wall and at the end, I was still able to go back and fix up the area I started with so don't worry about it fully hardening until you leave it overnight.
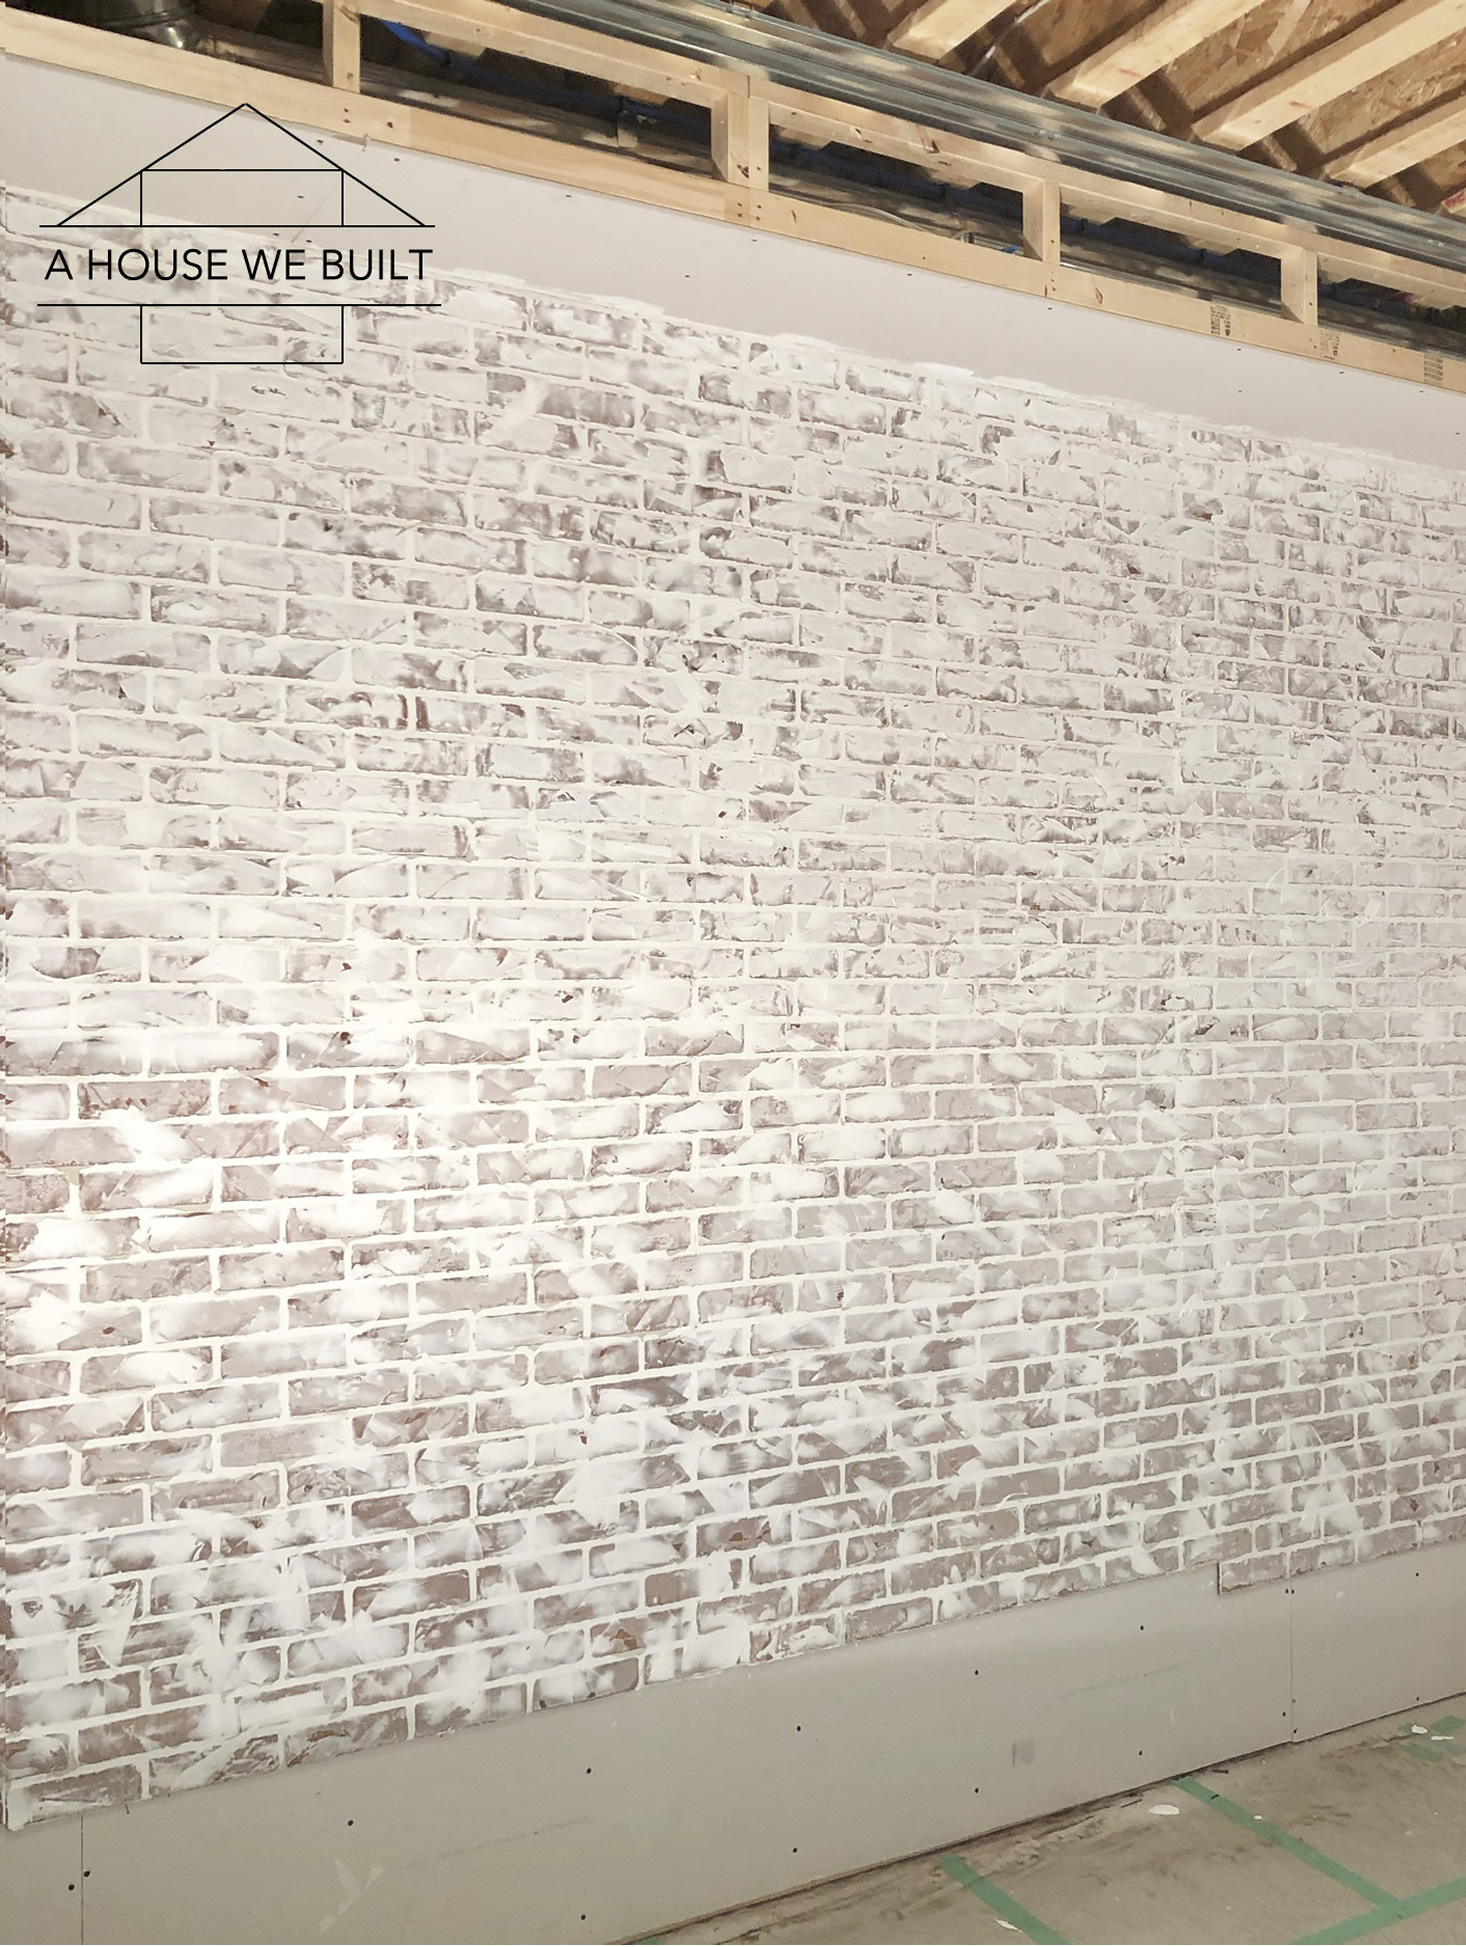
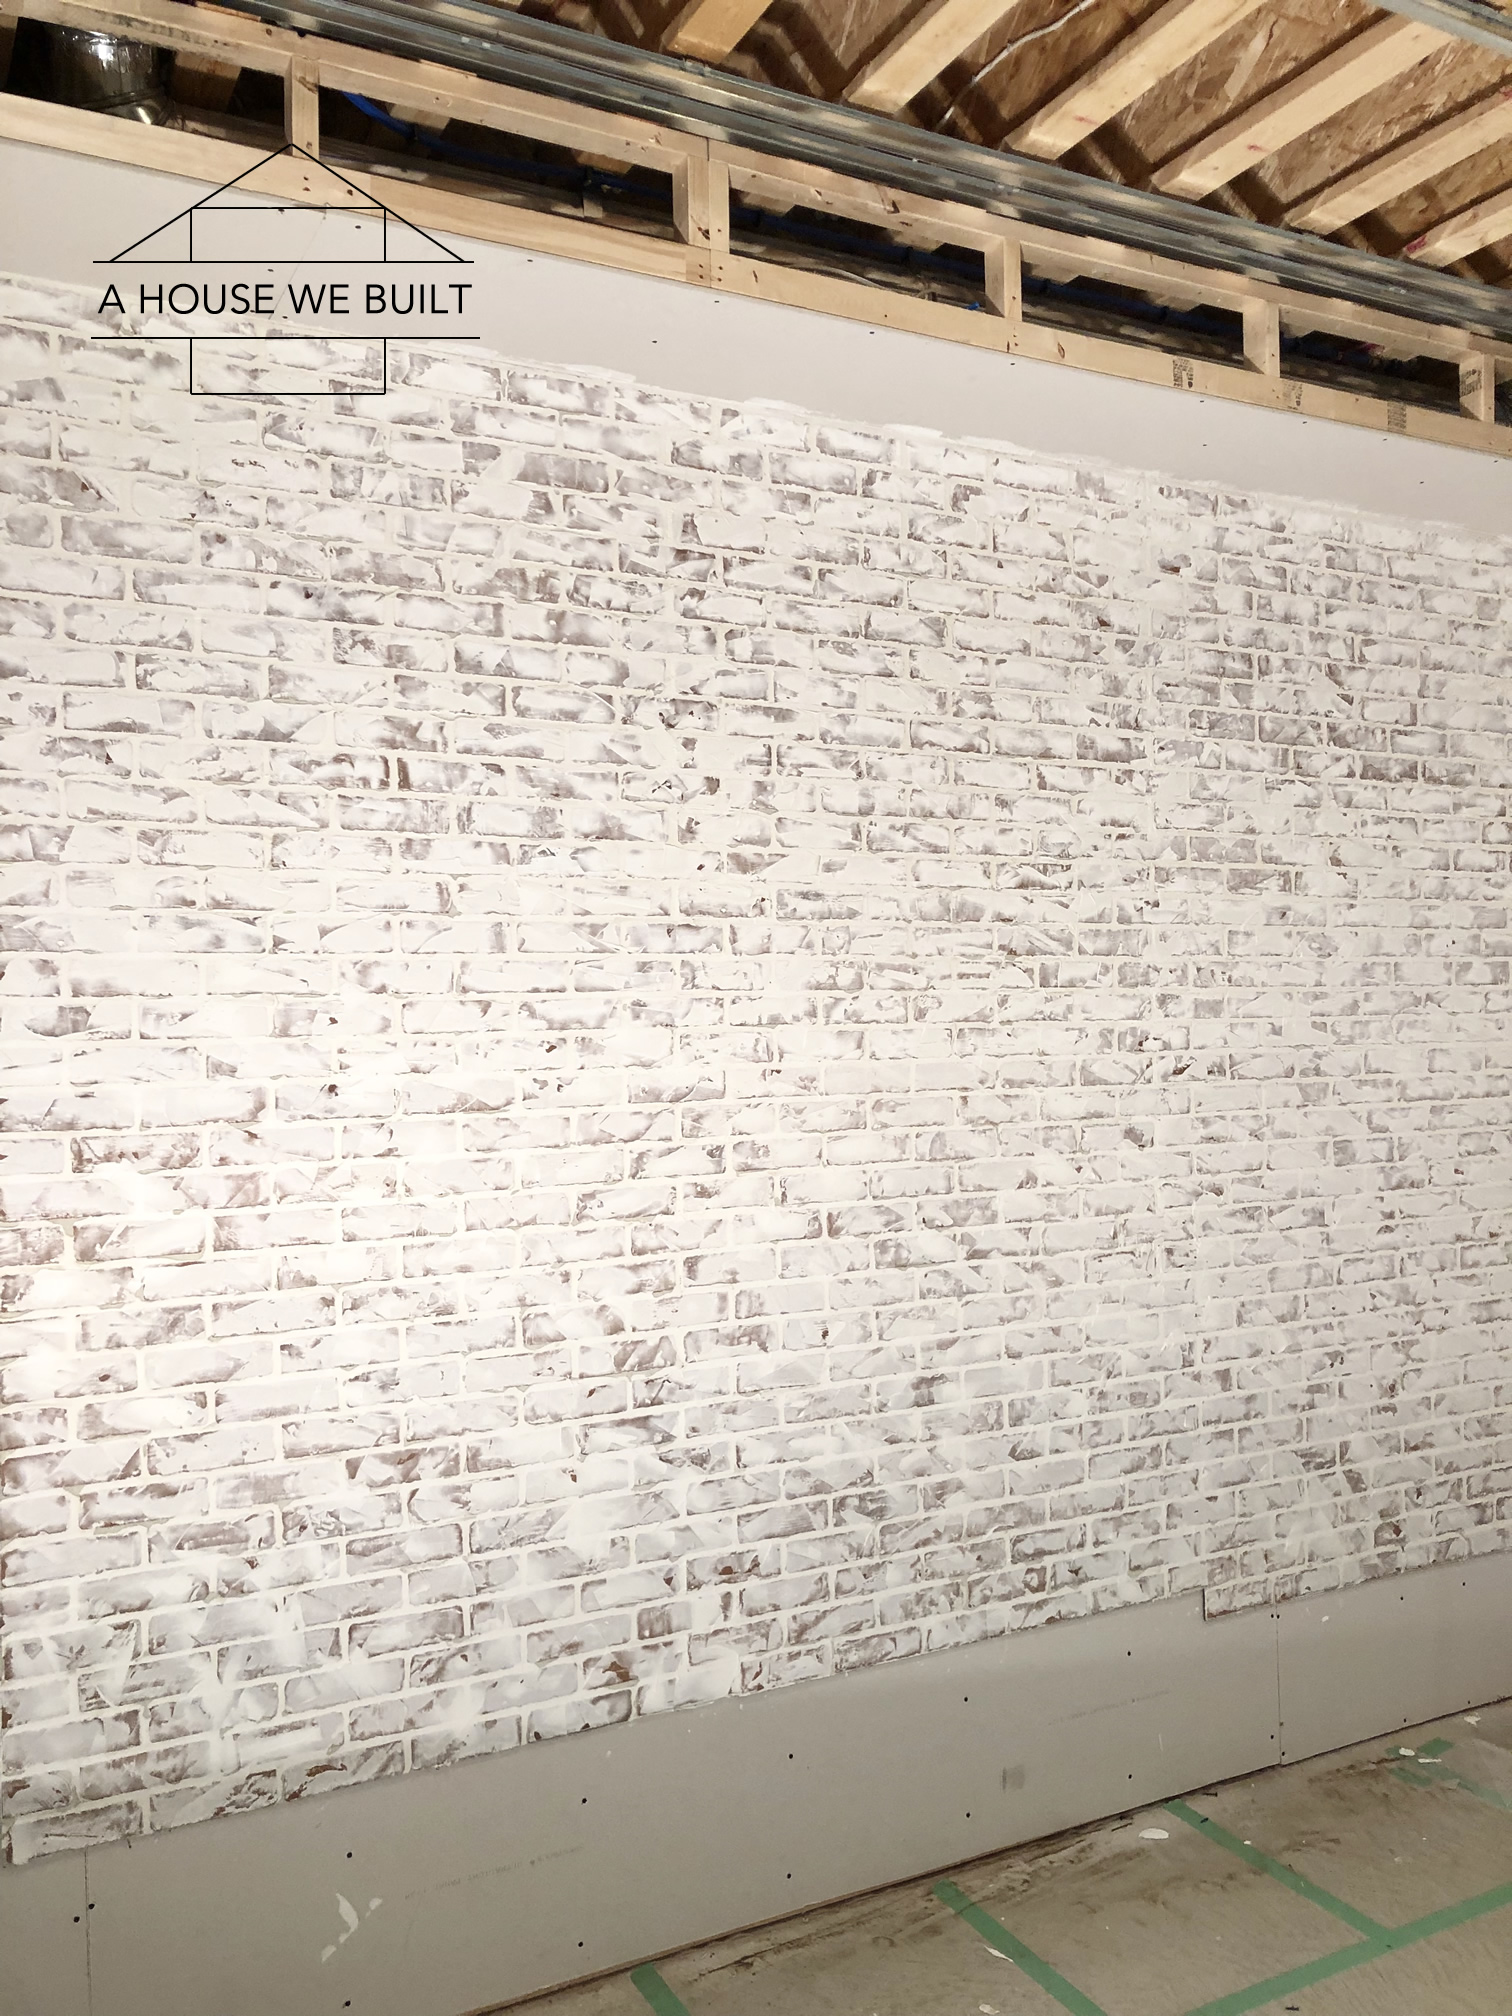
These pictures above show you what I mean. Left Pic was taken right as I finished and you can see how the coloring looks inconsistent since the different areas of the wall were at different drying stages. Right Pic was taken the next morning and you can see the color fully evened out as the whole wall dried.
OPTIONAL FINAL STEPS.
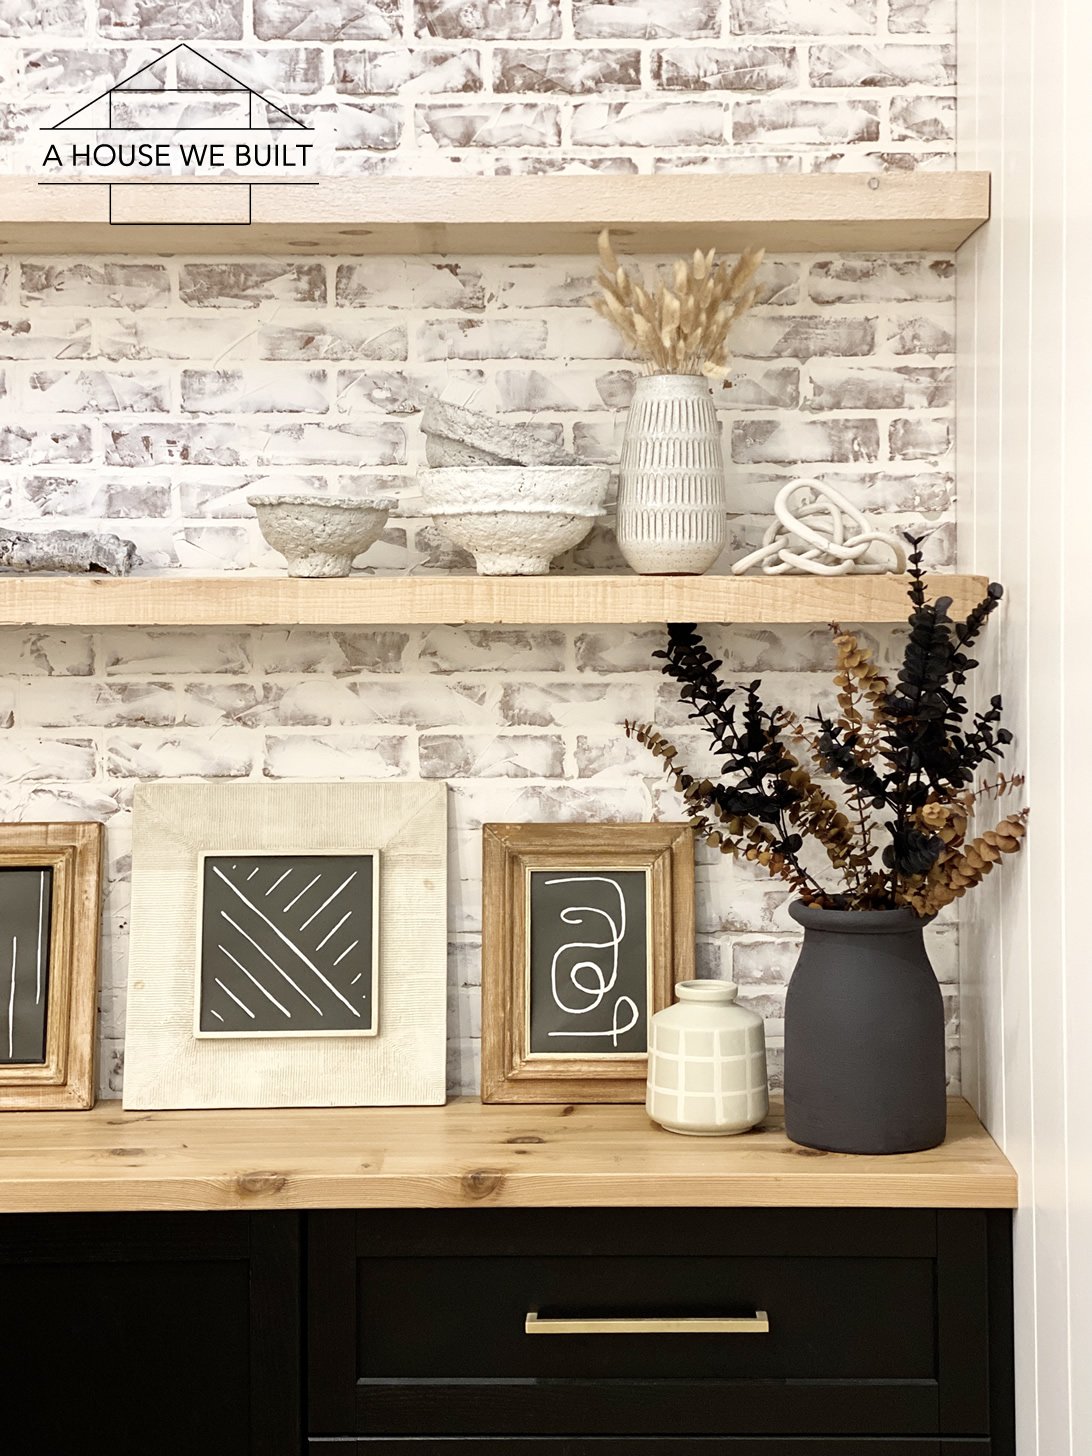
So, what you've seen here is as far as I've gotten in this project and I think it's where I'm going to pause until we get the rest of the basement to the finishing stage since I'm not entirely sure how I want the final wall to look and the less I do right now, the more options I'll have down the line.
One option is to just leave it like this. My faux brick wall will have lower cabinetry below it so since it's not a wall anyone will be leaning on, it doesn't really "require" a top coat.
Option 2 is to "set" the wall with some kind of top coat but make sure it's one that won't yellow over time.
Option 3 is to "set" the wall with a mixture of 25% paint to 75% water if you want an even more white-washed look than you already have. I am considering doing this with 25% of our final wall color so that this brick wall will be the exact same white color as what the surrounding walls will be.
Option 4 is to go all the way and fully paint it whatever color your want (in my case it would be white). White brick is a gorgeous look! You could keep the schmear messy or sand it down first.
If you want a smoother wall, you can take a sanding sponge and knock off any high spots (I don't want a smooth wall so I won't be doing this, but it's a possibility, even if you change your mind after it dries).
If you feel you've used too much compound and you want more of the original brick color to show through, you can also use a sanding sponge to remove a little of the compound (I might end up doing a little of this, haven't decided yet). And actually since this compound is water soluble, while you're applying it, you can also use a damp sponge to remove some of the compound if needed.
So there you have it! This is how we made our faux brick wall! I hope this tutorial was helpful 🙂
Below is a final picture of how this wall turned out. See more of this room on our Game Room page!
If you have any questions, leave a comment and I'll get back to you.
For more of our tutorials, click here.
To explore the other rooms in our house, click here.
For our daily progress, follow us on Instagram @ahousewebuilt.
How To Draw A Brick Wall On Paper
Source: https://www.ahousewebuilt.com/faux-brick-wall/
Posted by: ozunaparch2000.blogspot.com
0 Response to "How To Draw A Brick Wall On Paper"
Post a Comment