

How To Draw A Dog How To Draw A Cute Dog Face
Whether yous're a dog possessor (like myself), y'all love dogs or you simply want to learn how to make a cute portrait of a dog, this article will for certain help you!
Nosotros'll brainstorm by learning well-nigh the best way to simplify a dog'south caput structure then y'all'll be able to apply this method to draw any kind of dog!
What You'll Learn in this Tutorial
- The structure of a domestic dog's head
- How to use the construction of our dog'due south caput for other breeds
- How to detail dog features
- How does dog fur works and how to shade information technology?
Materials Needed for this Guide
- A piece of paper
- A graphite pencil from the number HB to 4B
- A graphite pencil from the number 8B (a higher gradation if possible)
- A blending stump / q-tip / piece of towel paper
- An eraser (a Tombow mono nix too if possible)
- A ruler
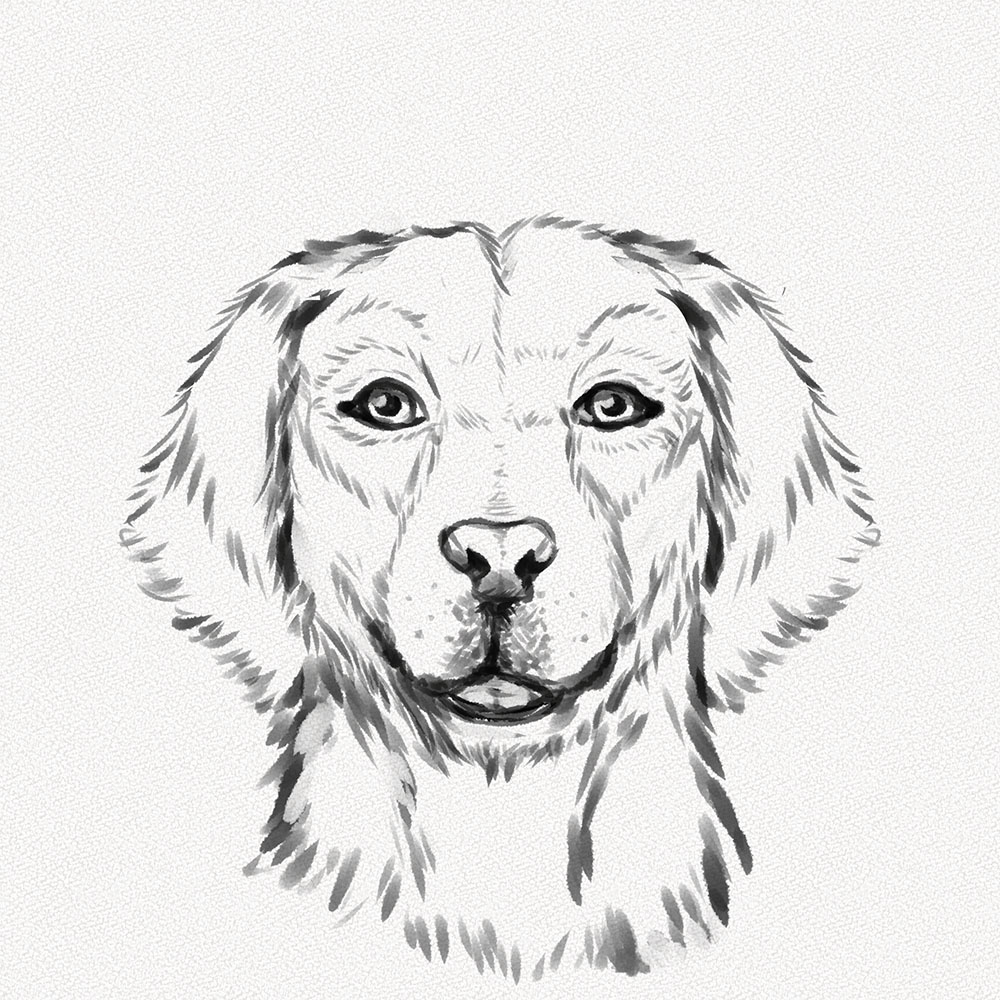
Here are all the steps in ane prototype:
Let's brainstorm!
Section 1: The Structure of a Domestic dog's Head
For these steps, we're going to utilise a piece of paper (recommended Fabriano paper), a soft graphite pencil from the gradation HB to 4B, and an eraser.
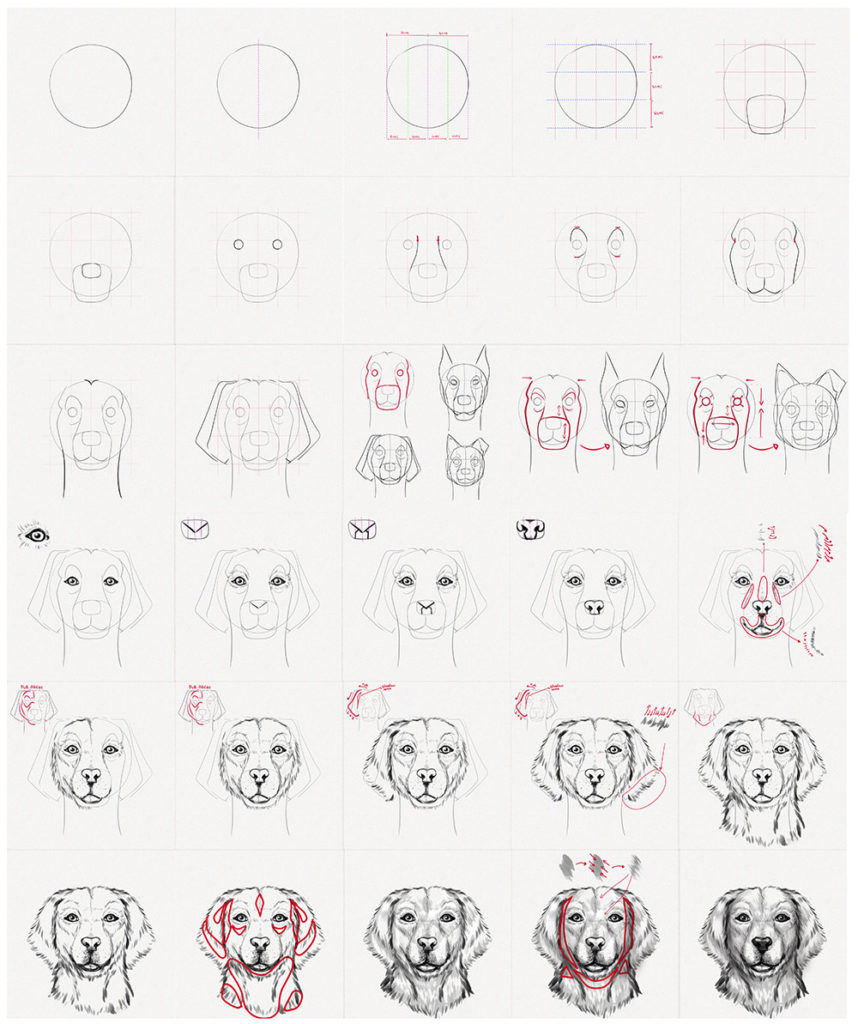
Step 1: Draw a circumvolve

Describe a circumvolve in the middle of our canvas, This will be our dog'southward head (without ears) so make sure to brand it as big as you want your dog's portrait to be.
Footstep 2: Find the middle of our circumvolve
Discover the middle signal of our circle and draw a soft vertical line.
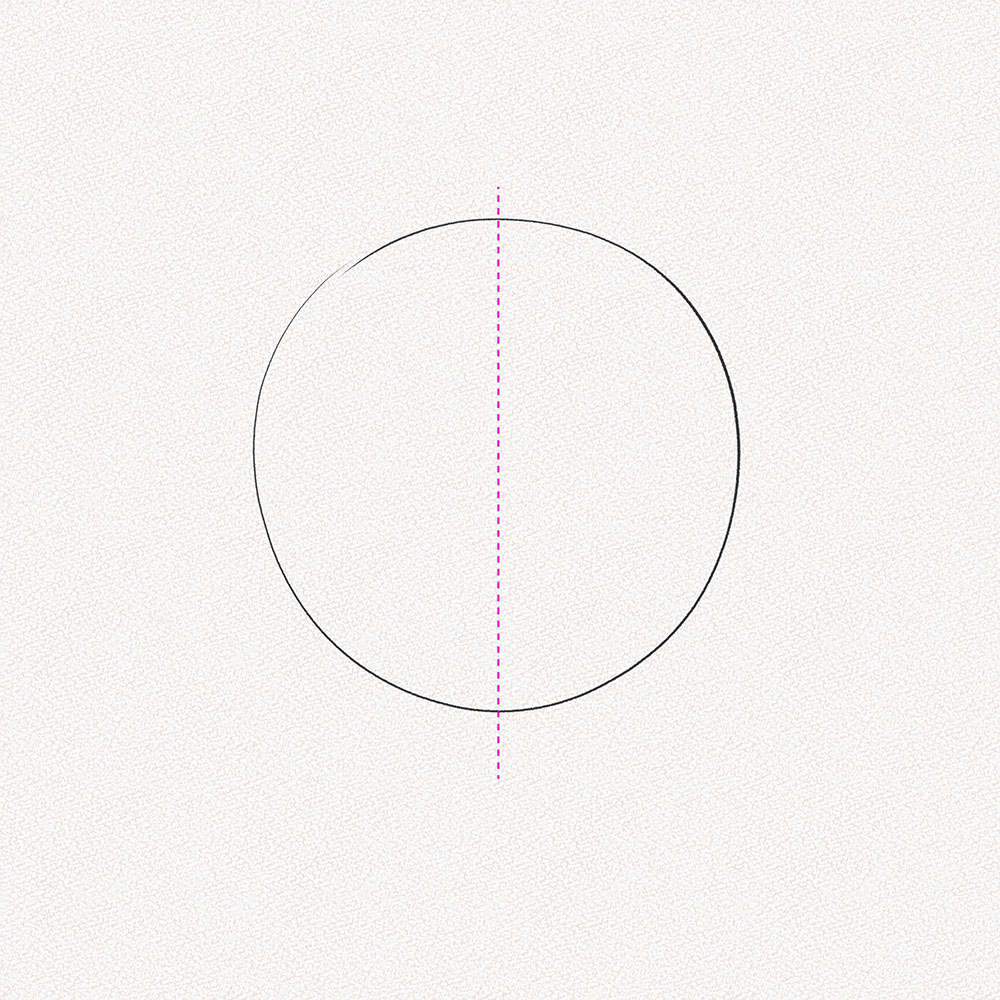
We're now going to establish a minor filigree that'll aid us draw the structure of our dog's caput accurately, make certain to pay attending to the following steps.
Step iii: Depict the vertical guidelines
Discover the centre point of each side of the circumvolve and describe a soft vertical line on each side. Make certain the distance between each line and the borders of our circle are the same.
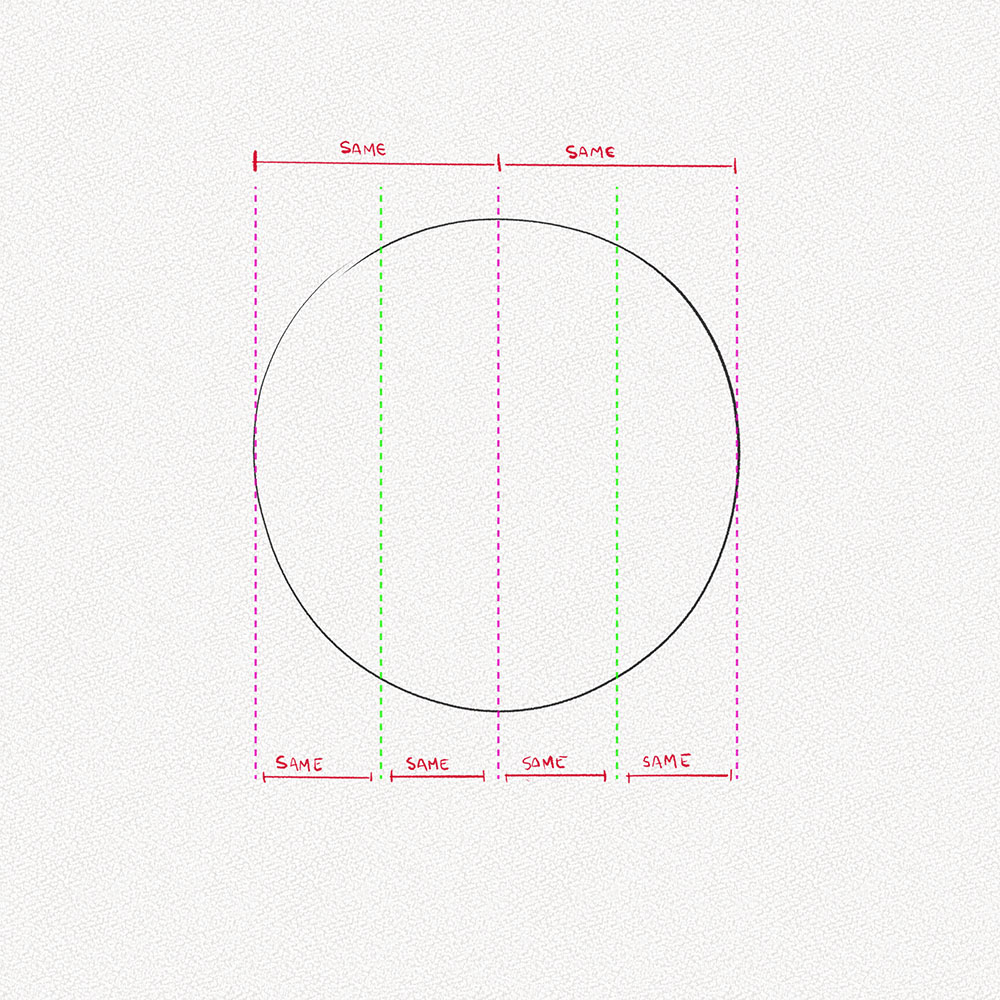
Step four: Dissever our circumvolve into three equal parts horizontally
I promise this is the terminal step of our grid, cutting the circumvolve horizontally into 3 equal parts and trace soft lines.
Step five: Depict a rectangle-like shape
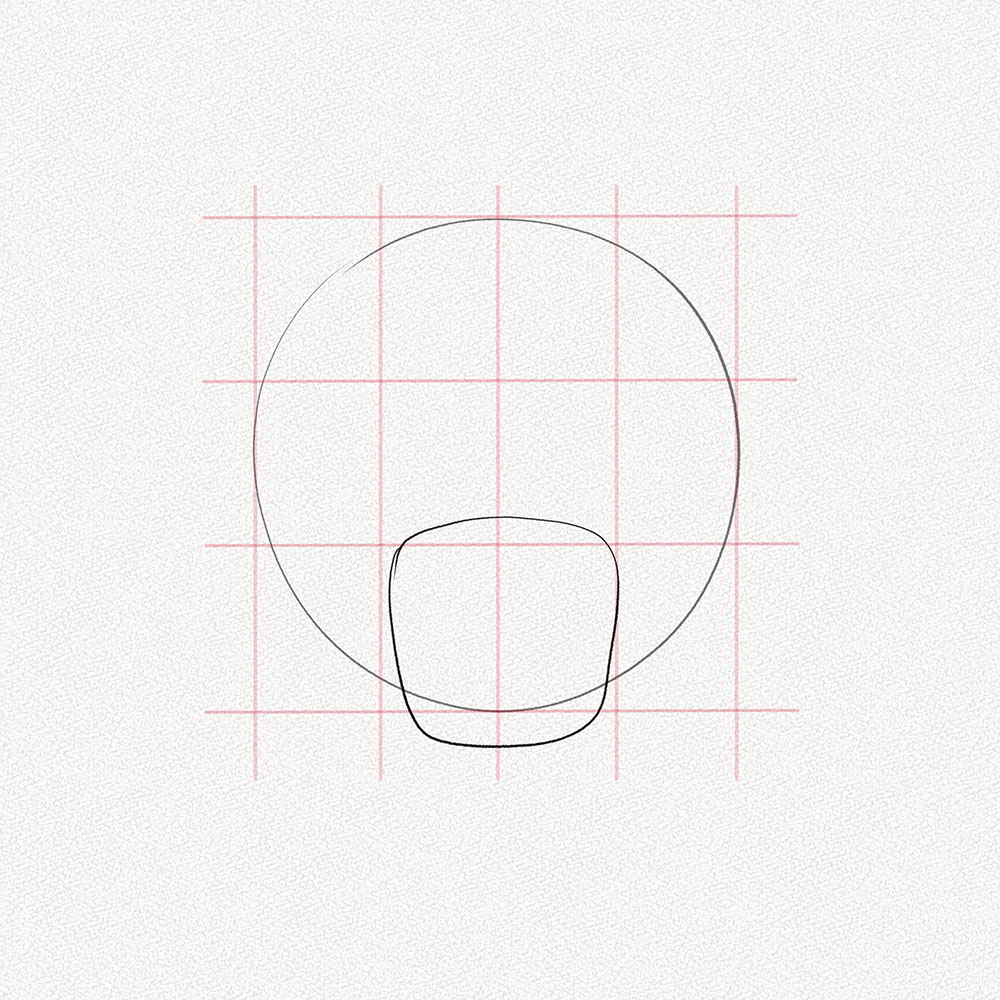
This shape will exist the nose and rima oris of our dog. Brand information technology slightly bigger than the infinite between our beginning horizontal guidelines and slightly lower than the circle but make certain it fits betwixt our vertical guidelines.
Stride half-dozen: Draw a smaller rectangular-like shape
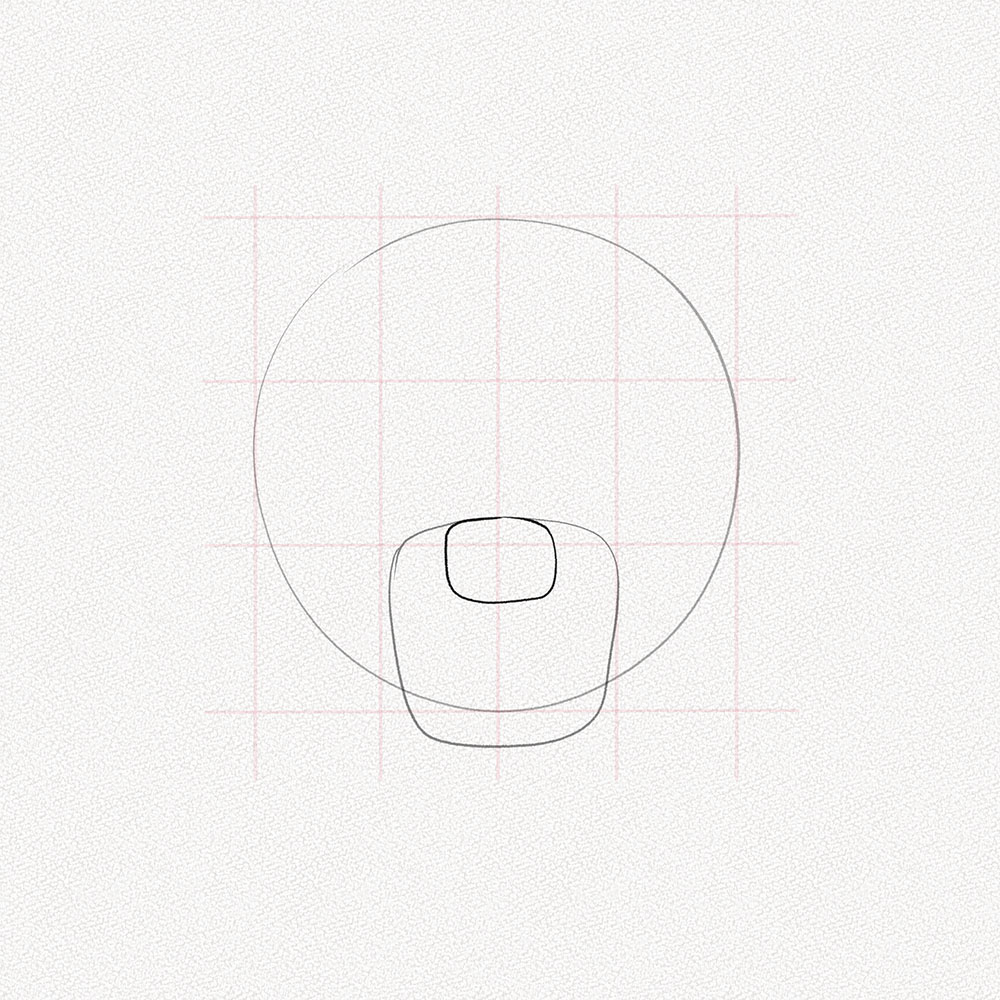
This shape will exist the nose of our dog, brand sure to make information technology symmetrical taking as reference the central guideline we drew in step 2.
Step 7: Set the position of the eyes
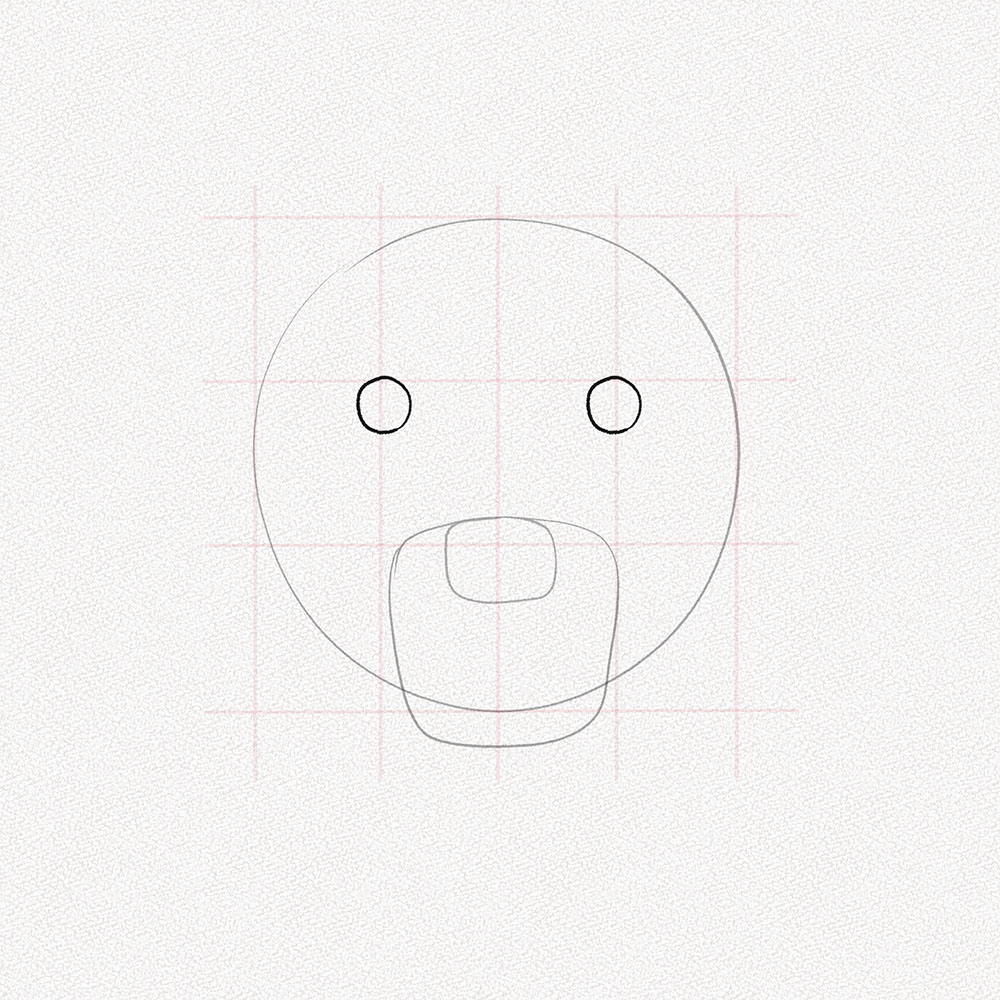
Describe 2 small circles in the position indicated in the example and make sure to align them with the center of the vertical guidelines.
Step viii: Describe the nose bridge
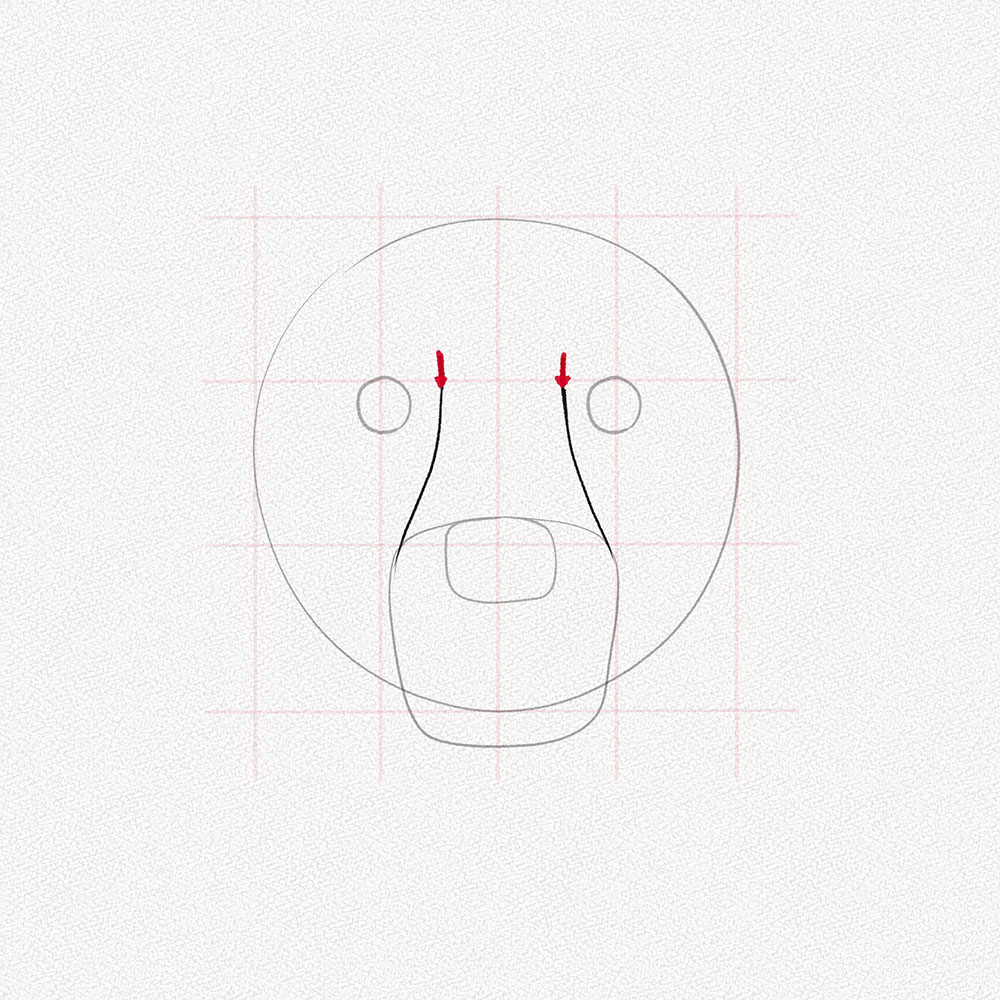
Pull two curved lines from the outer sides of the mouth to the inner side of the eyes, leaving a small gap between them.
Pace nine: Draw the guides for the eyebrows and eyelids
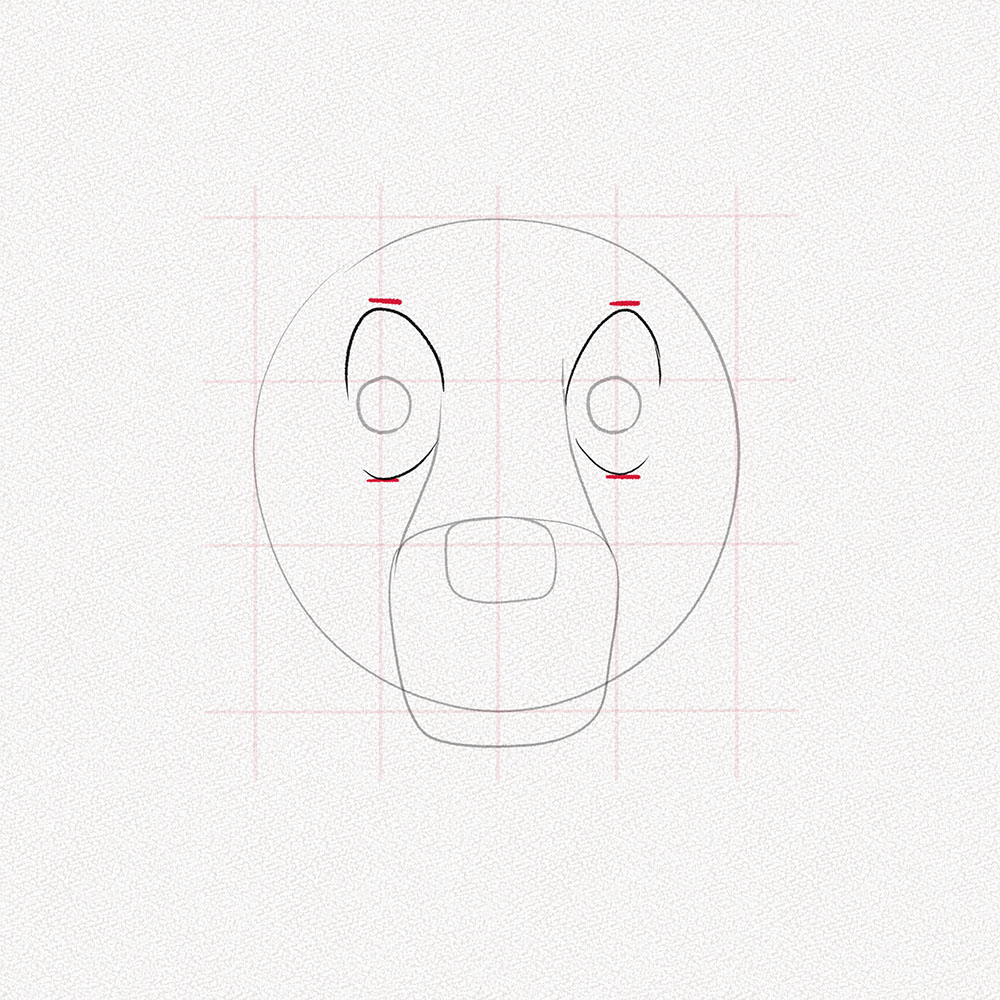
The simplest way to fix the guides for our dog'southward eyeballs, eyebrows, and eyelids is to pull 2 curved lines from the nose bridge to half of the eye guidelines, every bit shown in the instance.
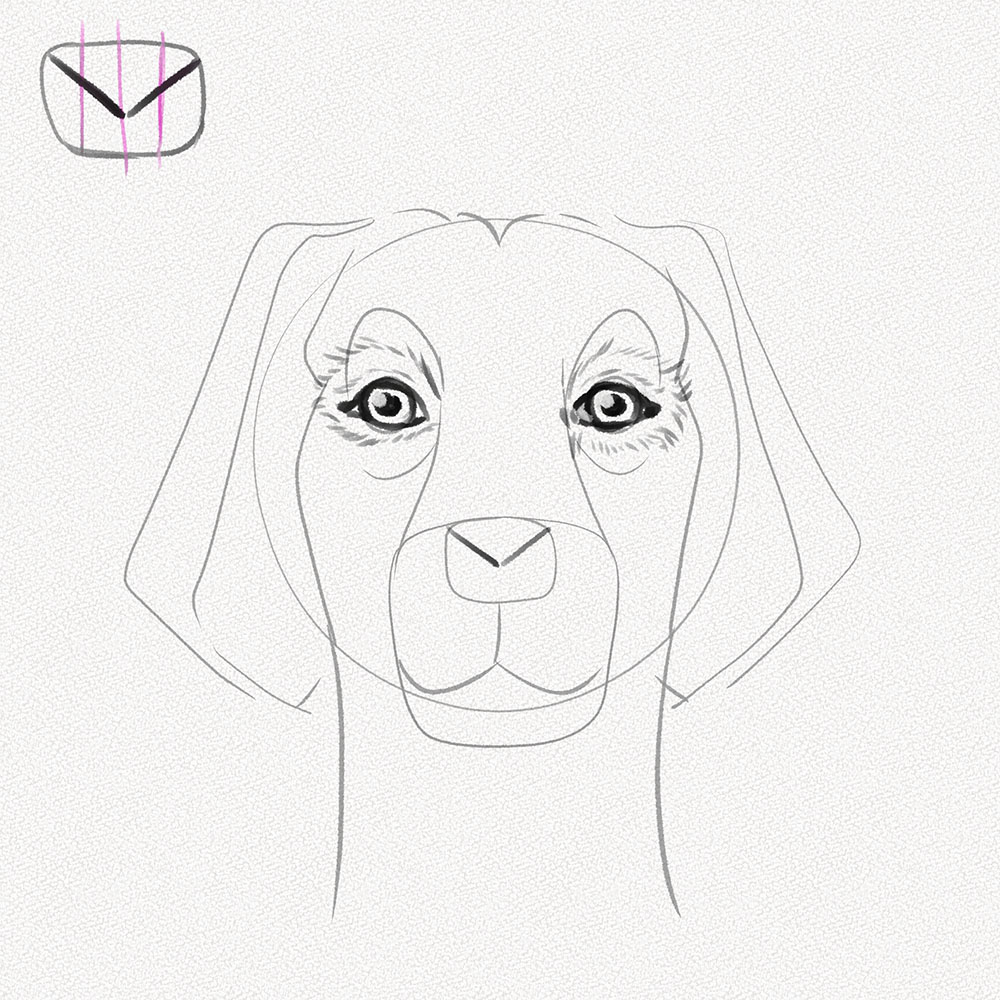
Step 10: Depict the face's construction
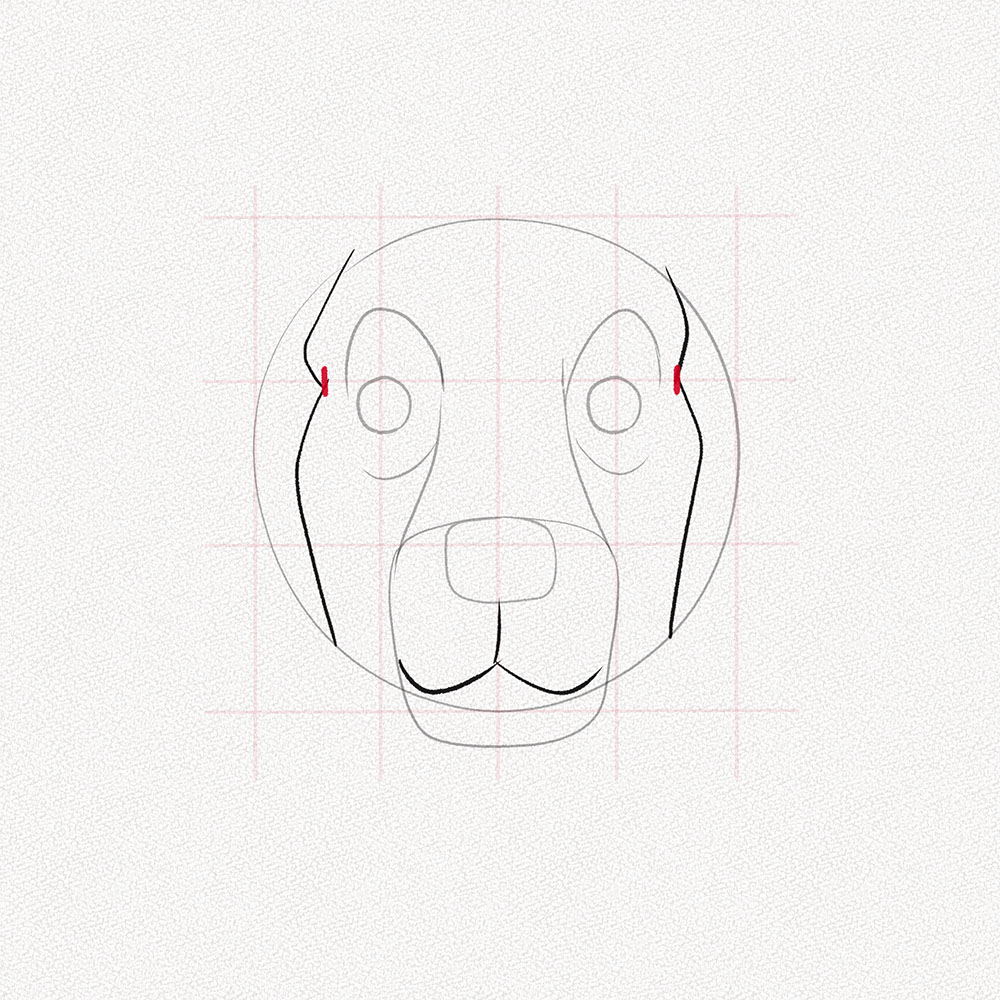
Dog'south skulls are quite a bit difficult to simplify, simply the best fashion to evidence structure in our domestic dog'south face up is to set the guidelines as shown in the example. Describe two curved lines from half of our outer guidelines showing the temple and cheekbones of our dog.
Besides, draw the mouth by making an inverse "Y" shape and pulling 2 curved lines from the extremes.
Stride 11: Draw the neck and define the skull.
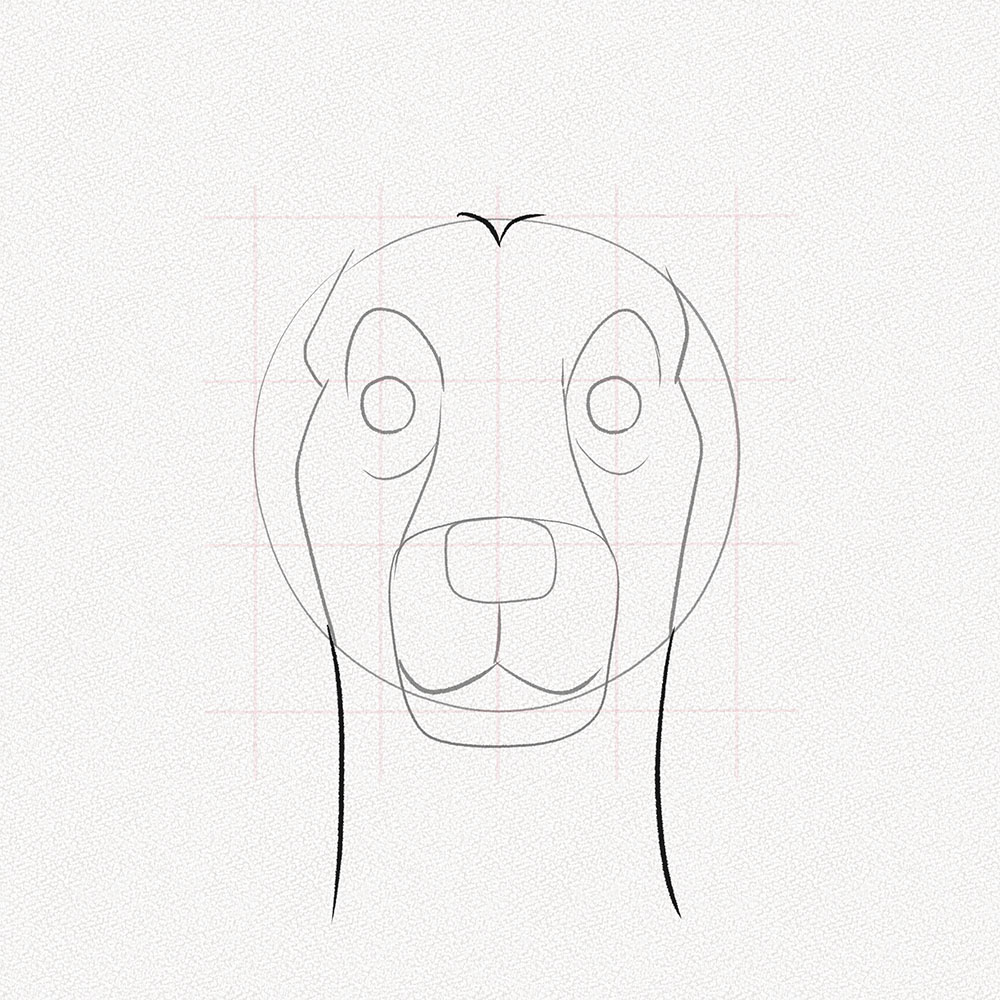
The dog'south skull has an indentation that runs from the center to the span of the nose, nosotros will stand for this shape with two converging curved lines in the centre of the height of the head, and we'll too depict the neck, pulling down ii slight curves from the cheek lines we drew in pace 10.
Section 2 – Choosing a Domestic dog Breed
Step 12: Different Kind of dogs
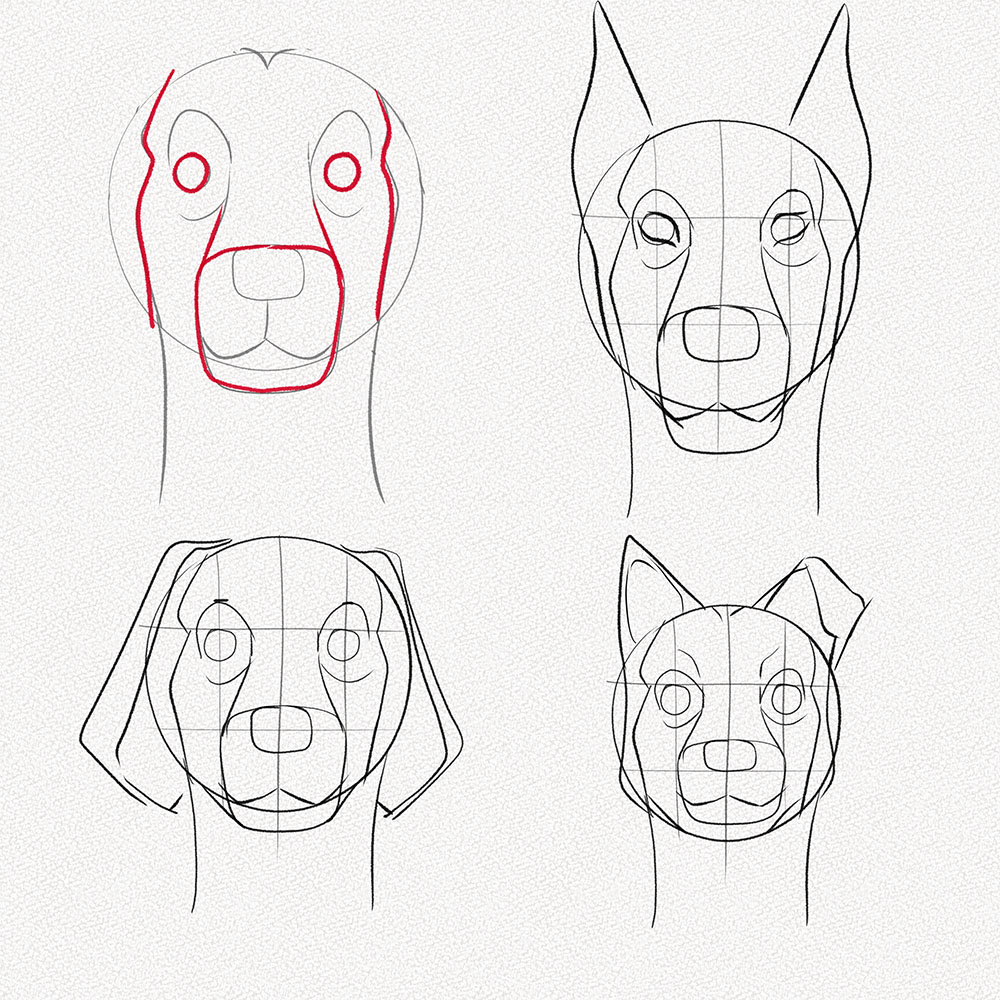
Every dog is different, the one that will be drawing in this tutorial is a cute gold retriever notwithstanding, this dog face structure is adept for whatsoever kind of dog! the only affair you'll take to do is move around the highlighted shapes. Keep reading to find out how!
Step xiii: Large Dogs
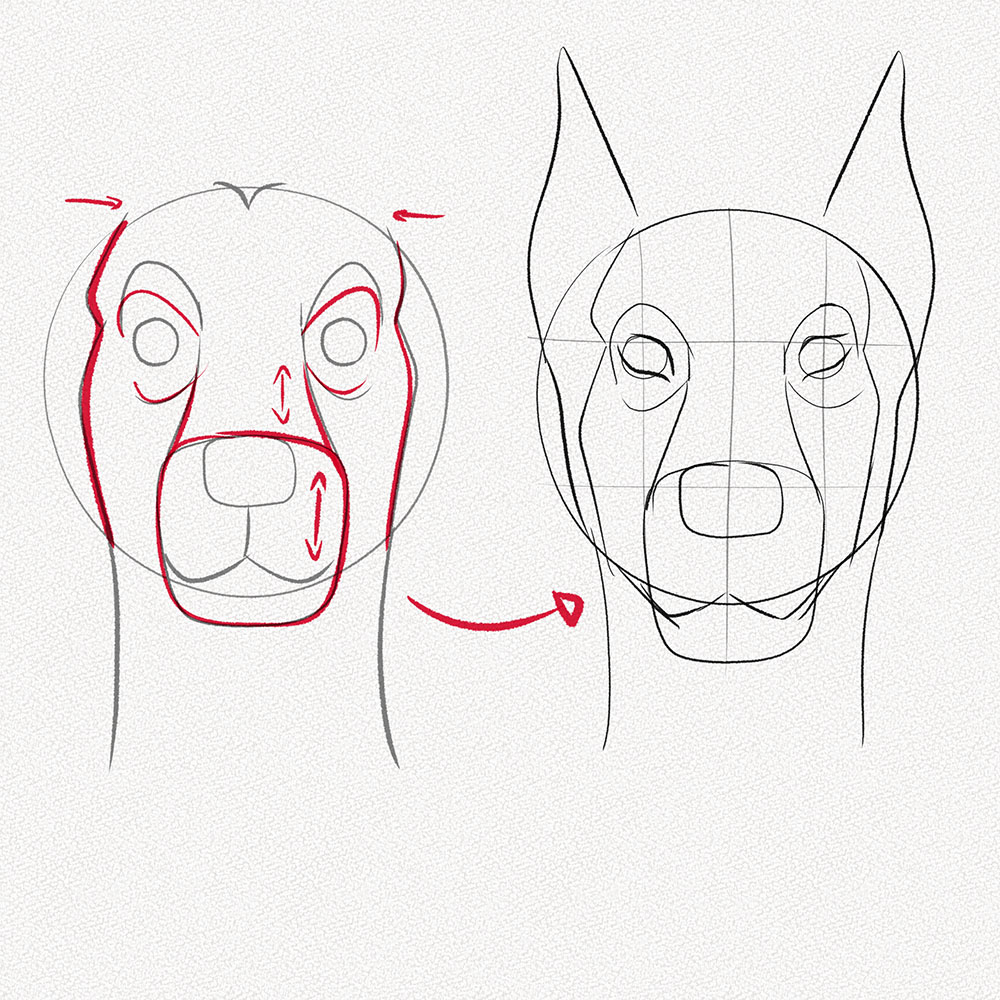
to draw a large dog like a Doberman, with sharp features and pointy ears all we'd accept to practise is elongate the nose span and the mouth shape and shorten the eye features while shortening the space between the structure face lines, draw the very pointy ears and we're done!
Step 14: Smaller dogs
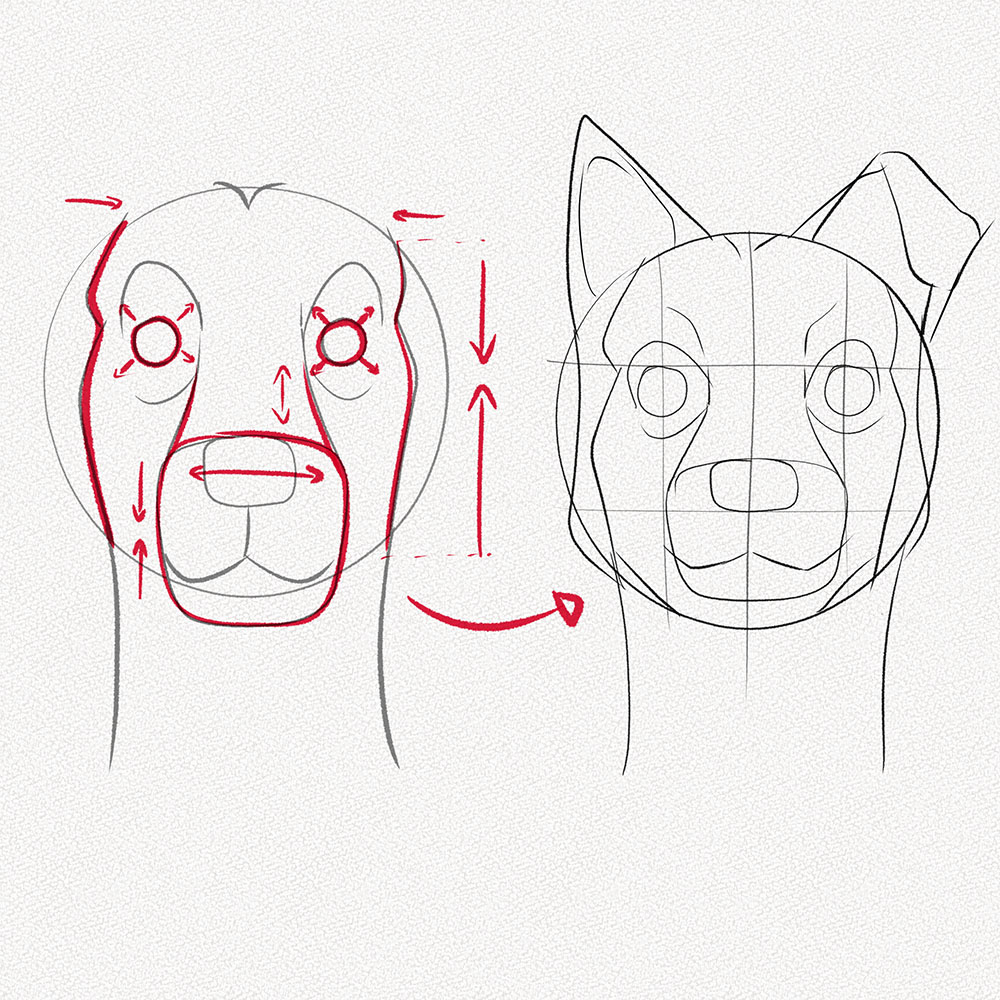
To draw a smaller breed, all we have to do is pay attending to their faces and adjust the shapes as nosotros encounter fit. For this example, I enlarged the eyes, shortened the face structure lines, widened the nose bridge and mouth, and drew their basic ear shape.
Step 15: The Dog Nosotros'll Describe – A Golden Retriever
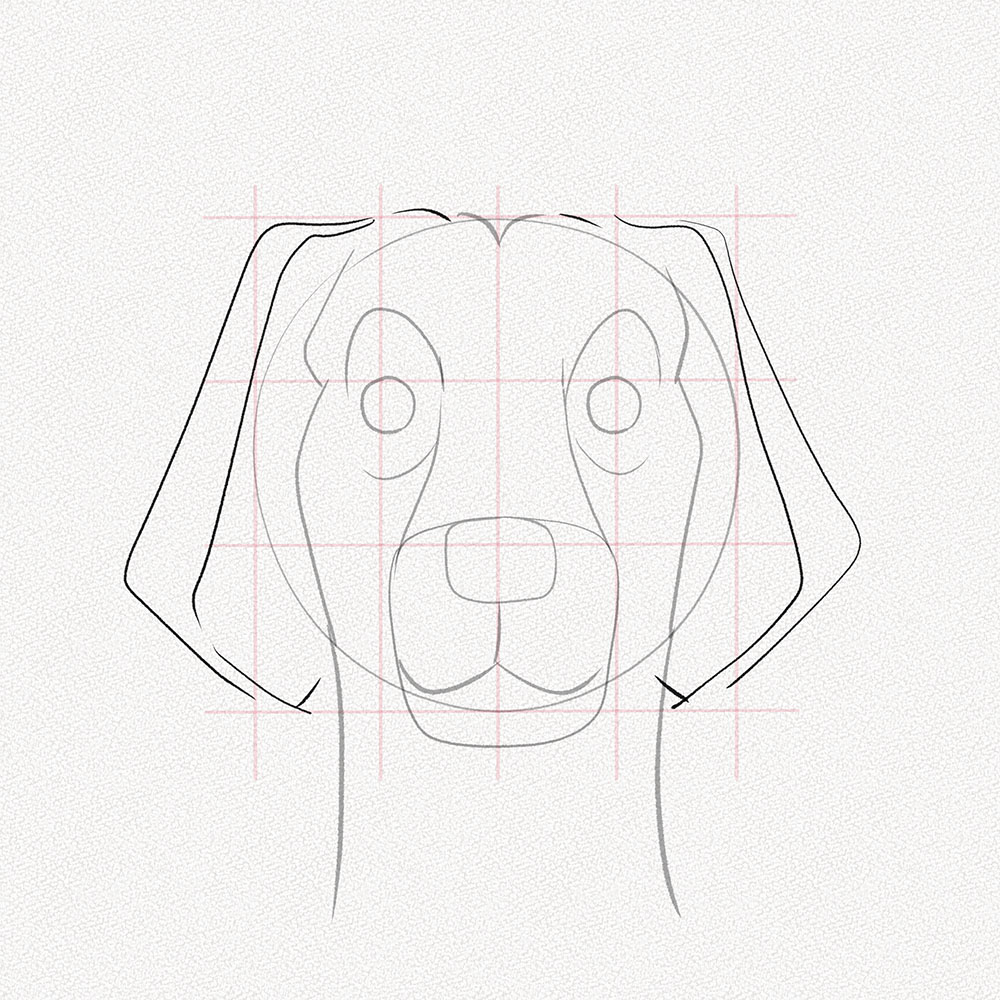
For this tutorial, we are going to draw a golden retriever, non changing the face construction much, we'll add together the characteristic ear shape of these beautiful dogs and erase our guidelines so we tin go ahead and offset drawing!
Section 3: How to detail Dog'south features
For these steps, we're going to employ the 8B graphite pencil or graphite bar.
Step 16: The Domestic dog'southward Eyes
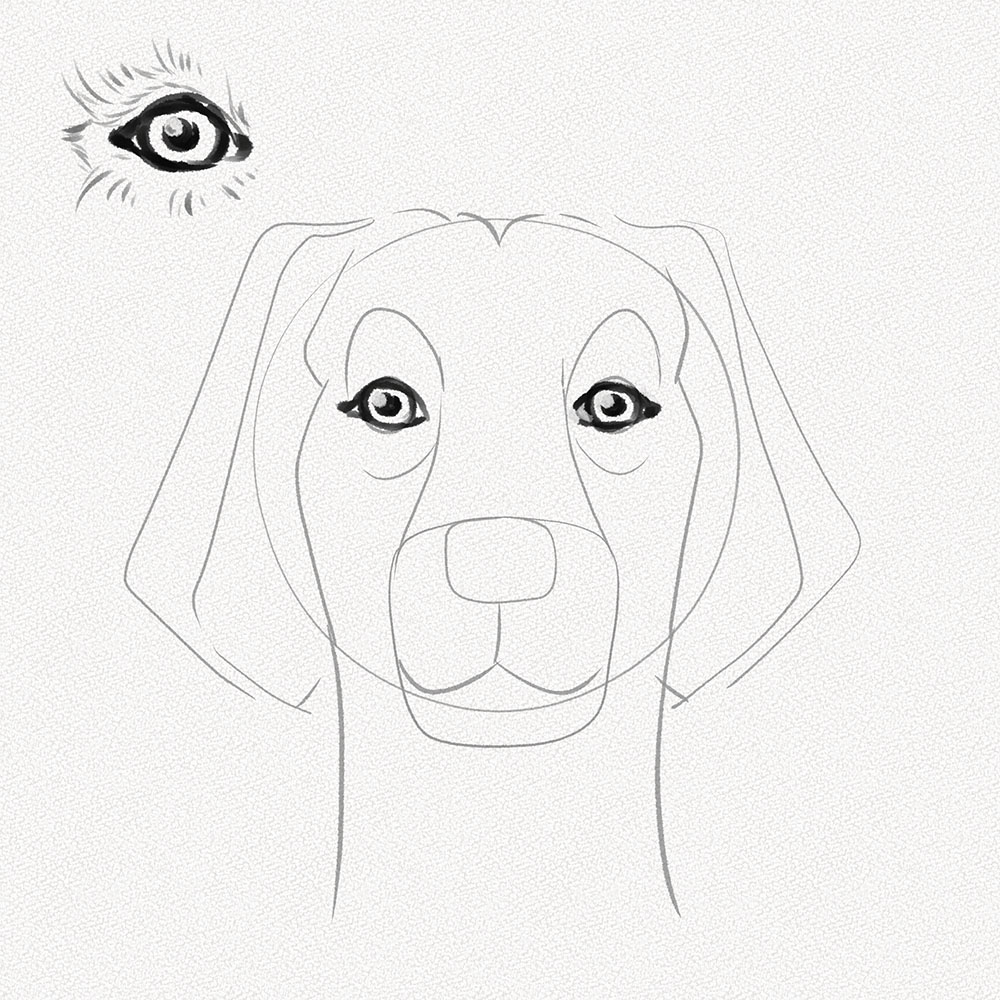
Paying shut attention to our dog's breed (golden retriever) nosotros're going to make the eyes. Make certain to add some fur on top of information technology to bind the eye's structure besides as the eyelids.
Need to learn how to draw eyes? Bank check out our extremely detailed stride-by-stride tutorial on How to Depict Eyes.
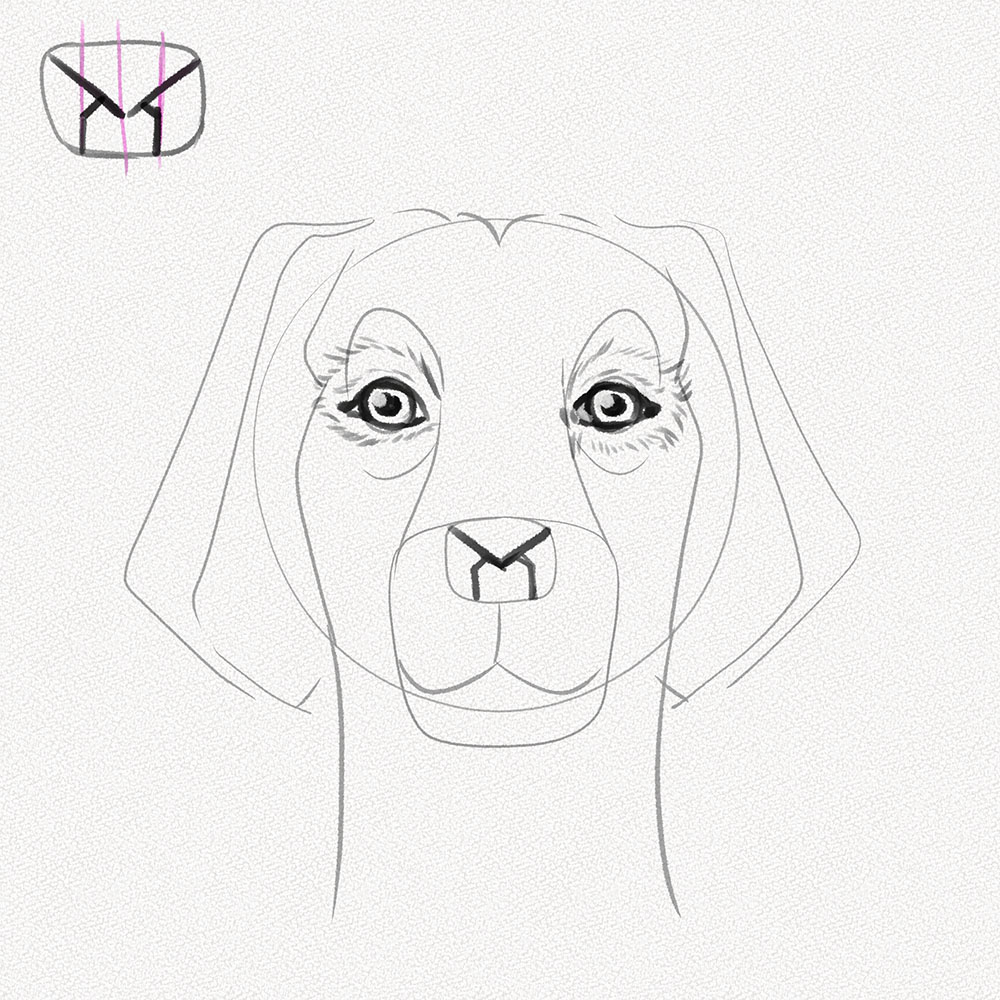
Step 17: Start Setting the Nose Structure
Canis familiaris noses are a bit complicated, but with these tips, you should be able to get in correct! Section the dog'due south nose shape in 3 equal parts and draw a "V" form as shown.
Step 18: Complete the nose structure
From the sides of that "Five" shape, pull 2 short lines to our department guidelines and so another ii vertical lines equally shown.
Step 19: Depict half of the nose
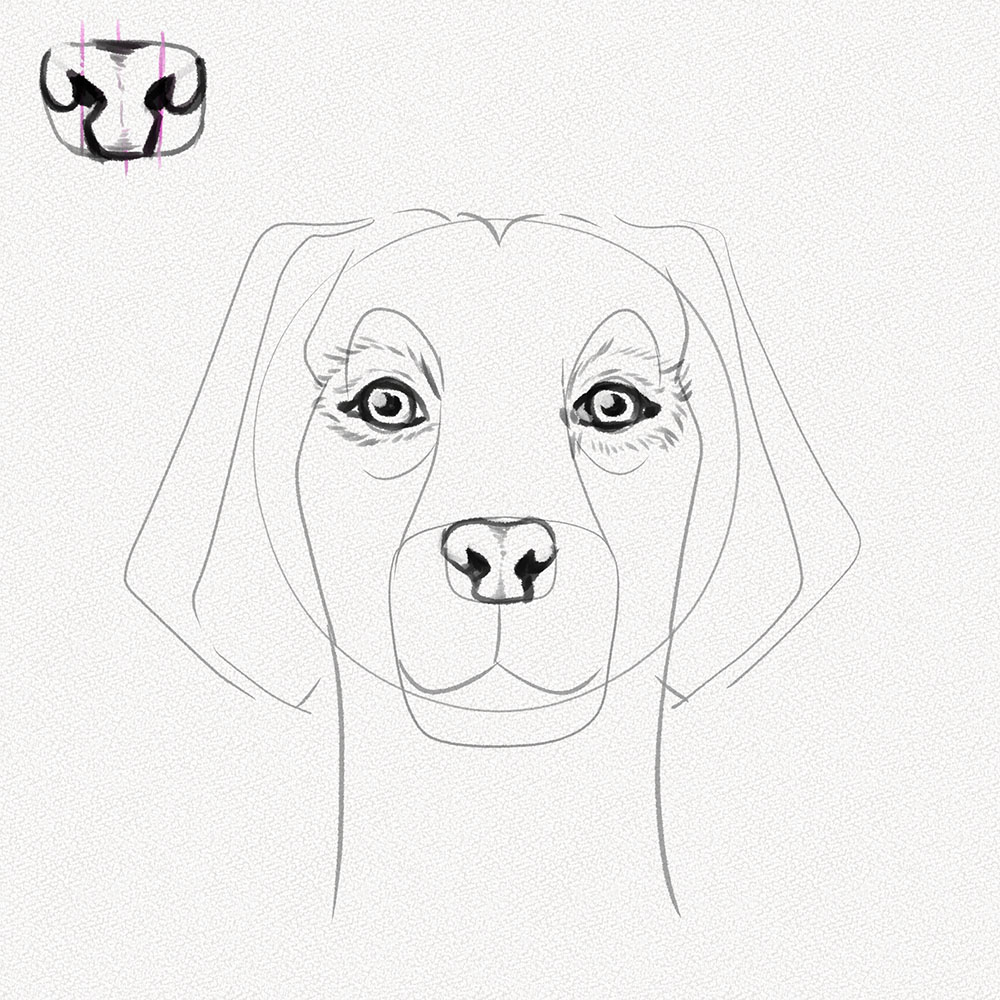
Now it's time to detail using the short similar nosotros drew equally a guideline, we're going to describe two "water driblet" like shapes and paint them all blackness, from the sides of those, pull two minor curves to connect them to the elevation of our olfactory organ and paint the middle line softly
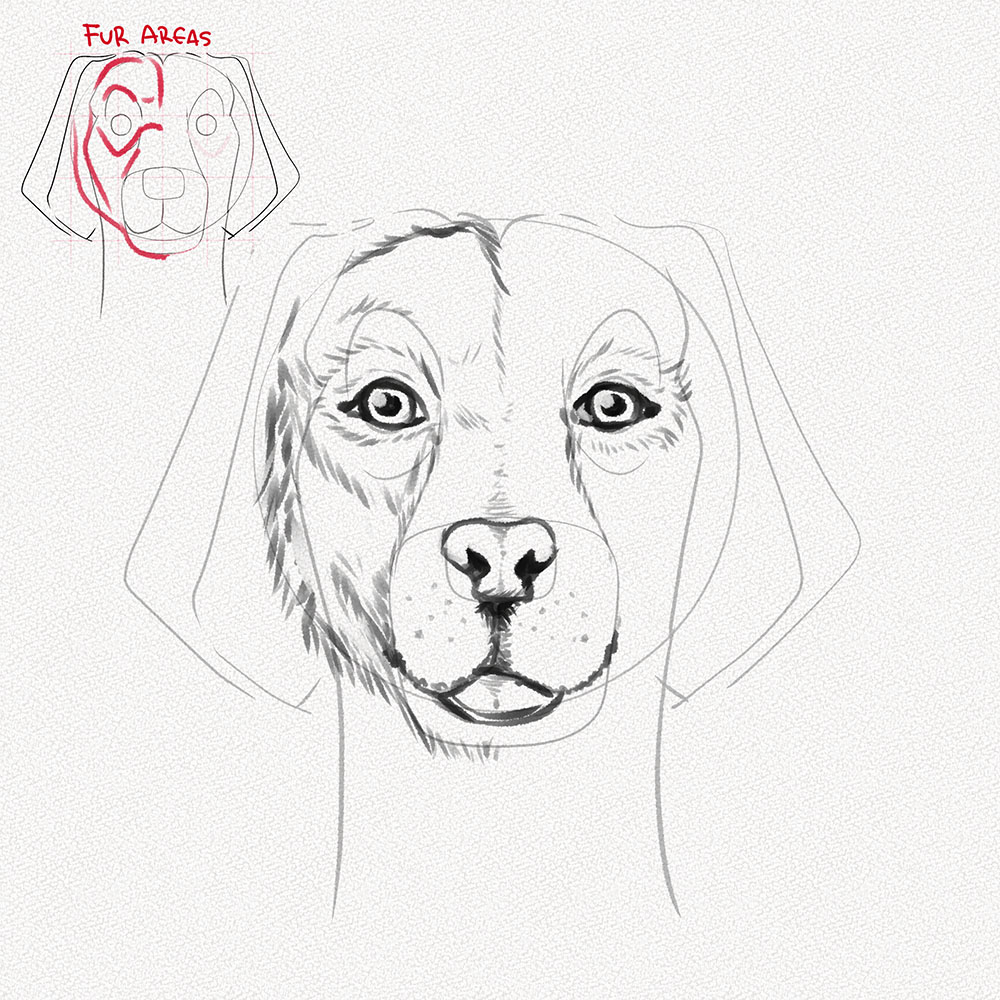
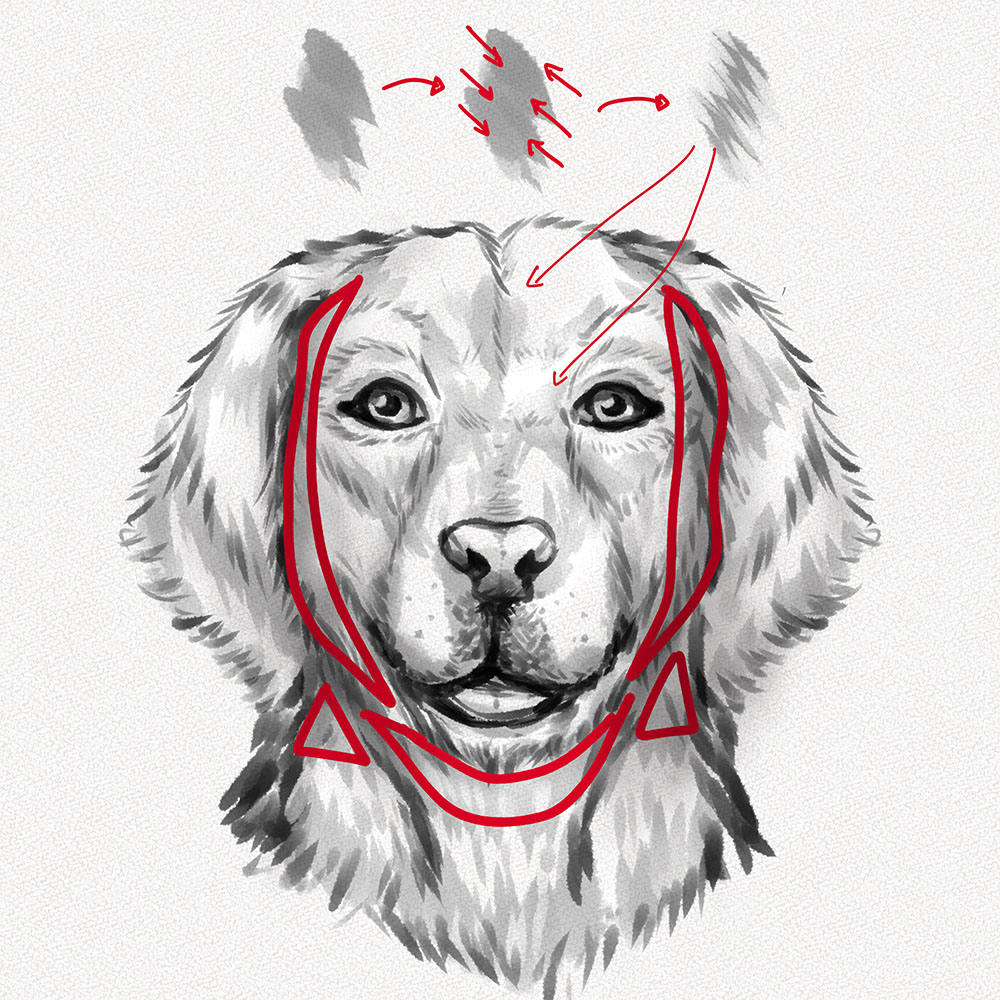
Step 20: Add fur details to the confront
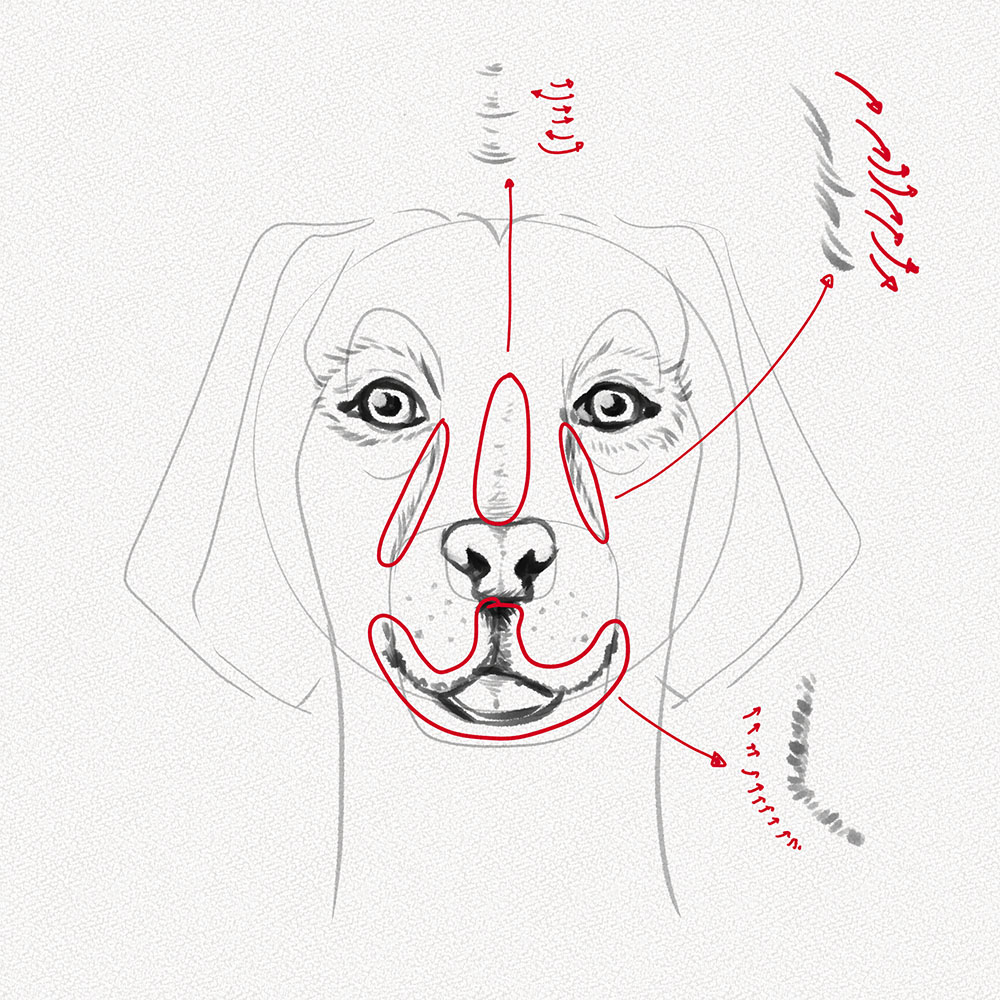
Following the instructions below, add together some fur details to the nose bridge, center of the face, and oral fissure, with soft traces going in the directions pointed by the arrows in red equally shown.
Section iv: Cartoon and Shading Dog Fur
For these steps we're going to use or 8B graphite pencil and our blending stump / q-tip / piece of towel paper.
Footstep 21: Draw more than fur to half of the face
To acquire how to place the dog's facial fur, we're going to do half of it starting time, going on top of the red areas shown in the mini diagram. With centre length, soft traces become over the edge of the face and the lines marked in red.
Step 22: Do the other half.
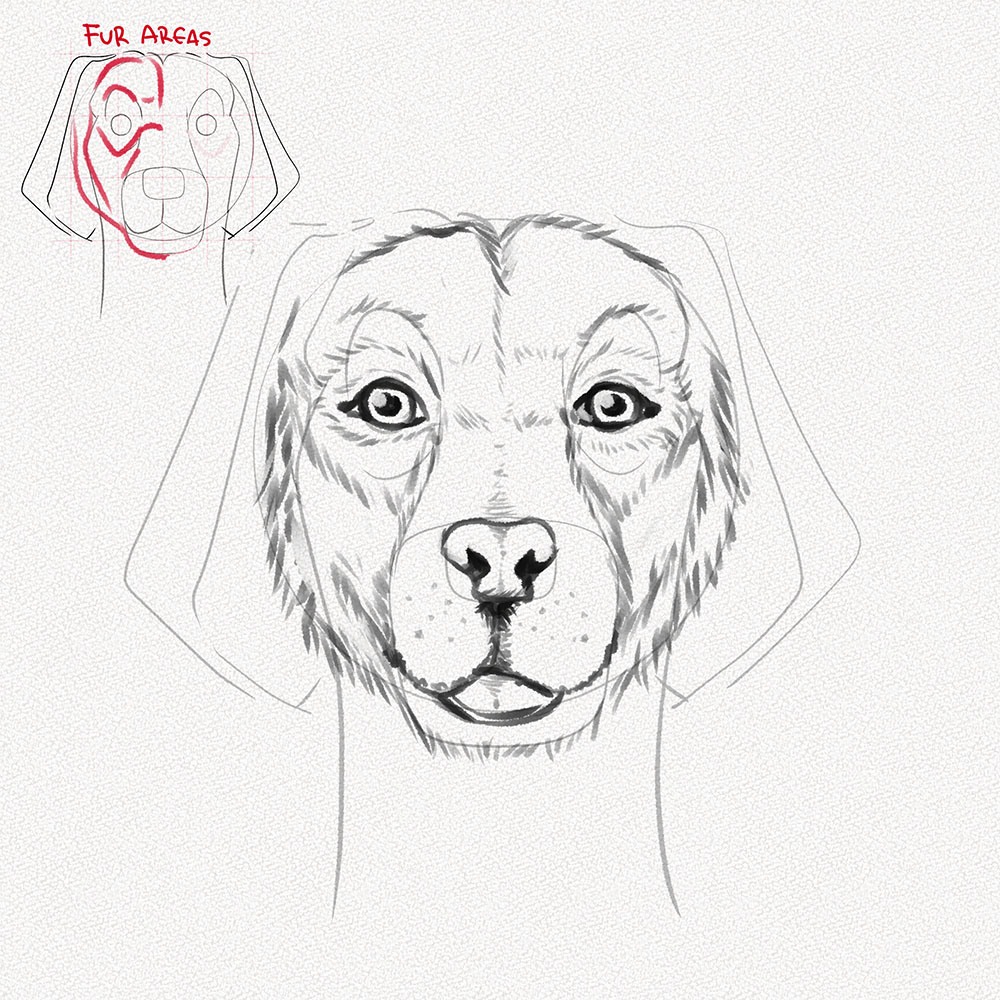
Do the same in the other one-half of the dog's confront and nosotros'll have prepare the base for our canis familiaris's confront.
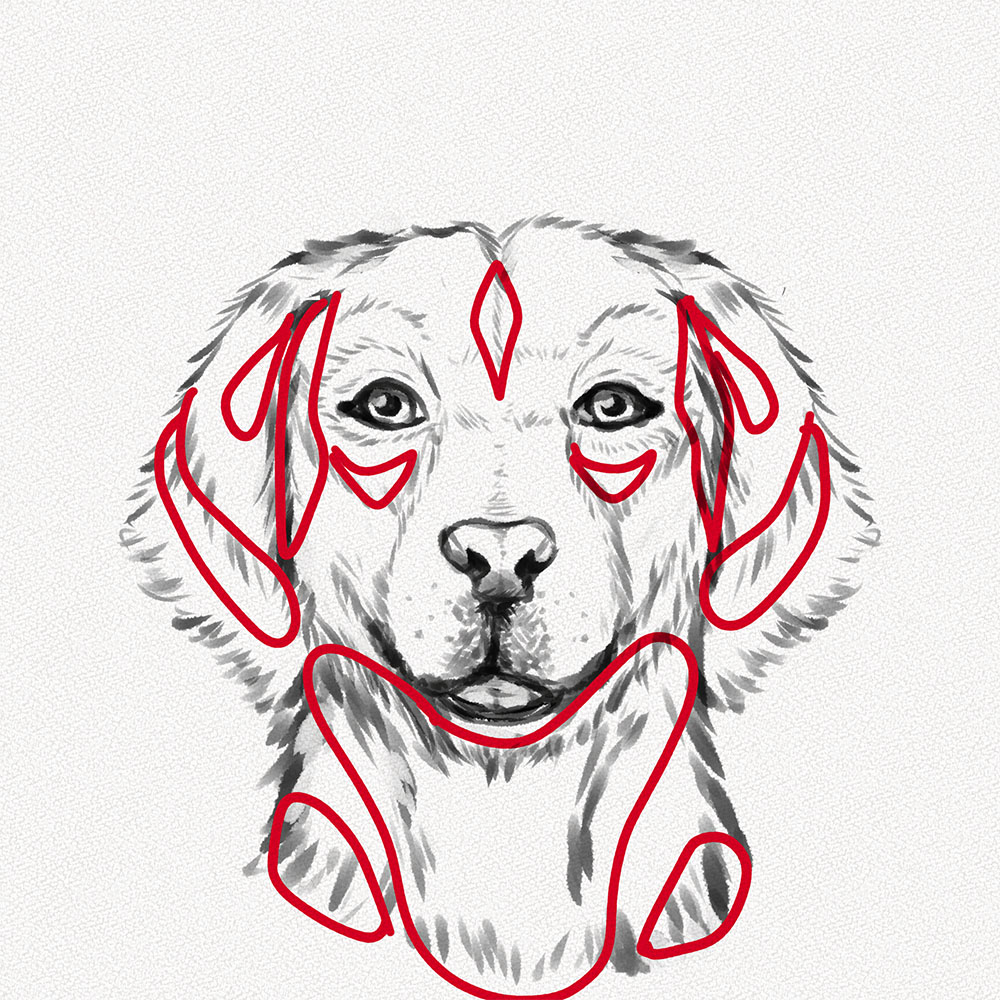
Step 23: The Dog'due south Ears
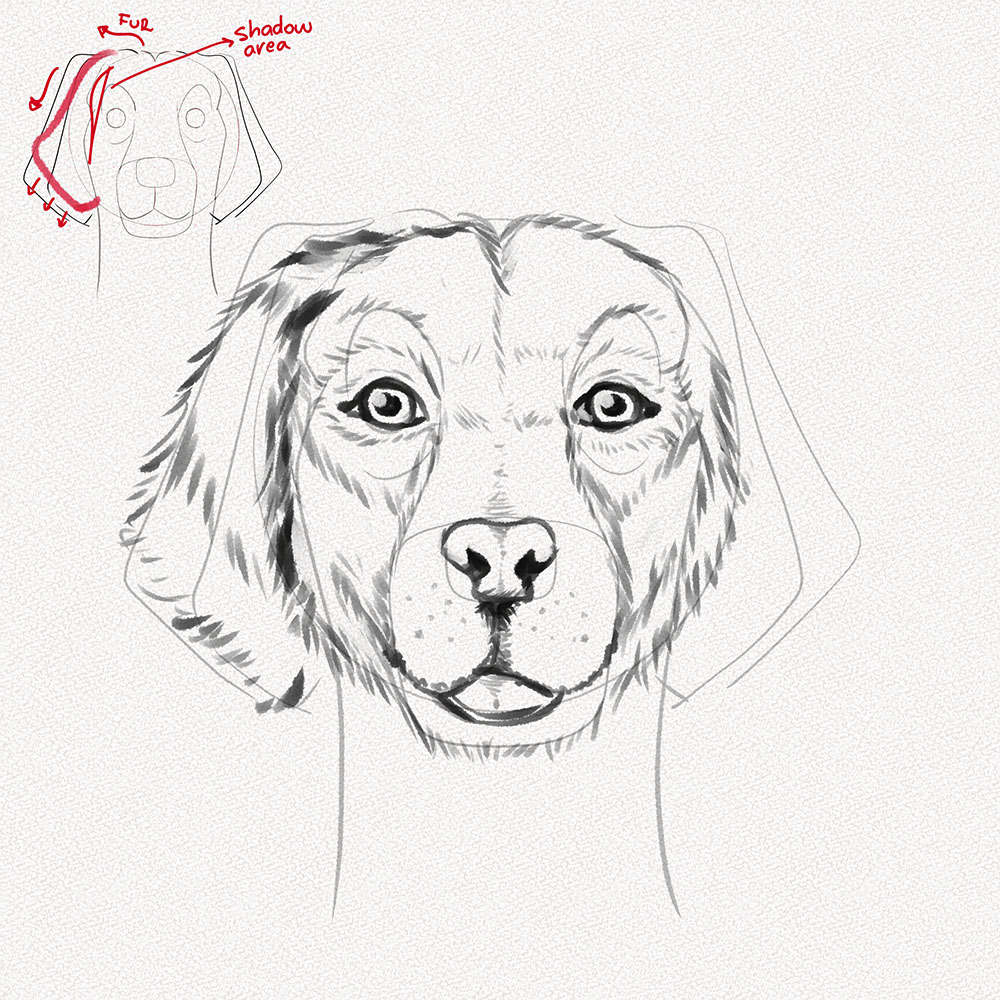
Using our dog as a reference, pull some traces in the directions indicated in the mini diagram, making sure to darken the area marked as "shadow area".
Stride 24: Describe the Other Ear

Now for the other ear and then exactly the same, and if the fur traces are too complicated, follow the small guide of traces below, making certain to go along your hand loose and to do the traces in the indicated directions.
Keep in mind that these traces will assistance you lot with making the fur of the rest of the face.
Step 25: Describe the Neck
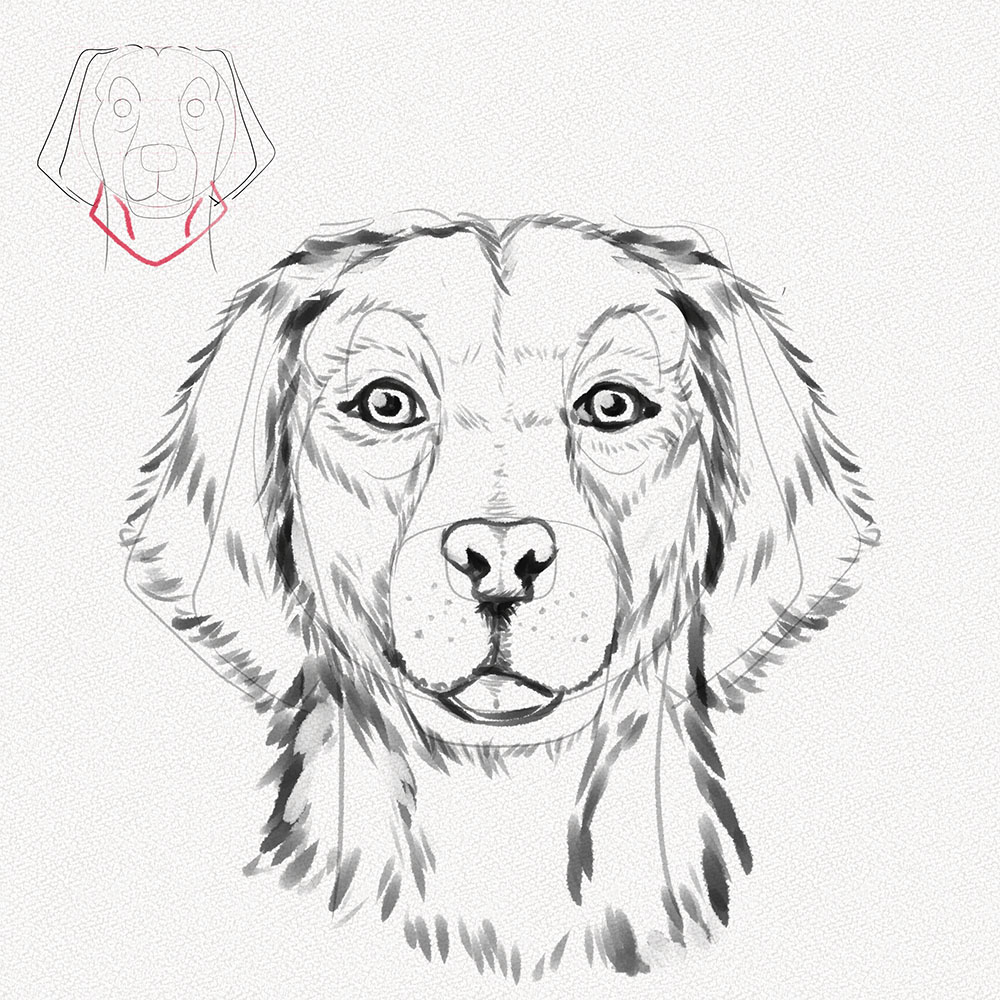
For this footstep, we're going to use our domestic dog as a reference and describe his fur as we saw it, for a golden retriever, the neck extends to the sides, so draw the fur forth the cherry lines in the mini diagram.
Step 26: Focused Shading
First, we're going to erase what's left of our guidelines and add some shadows to the eyes, nose, and upper oral cavity of our dog. These are modest details that will make our canis familiaris's face much more than realistic.
Since this dog has a scrap of his tongue out, nosotros're too going to shade darker the line under the tongue and the mentum.
Step 27: Add together the rest of the fur
Now, check the areas marked in red and with the same soft traces we learned to brand in pace 4, fill in those areas.
Step 28: Blend, blend, and alloy.

With the move we learned to make in stride iv, we're going to go over our graphite traces and blend with our blending tool, it should look something like this once you're over.
Footstep 29: Defining the Facial Fur
At present information technology for sure looks a bit more similar a dog, nosotros're not done though. With the tip of your eraser, we're going to have the spots nosotros over blended and do as shown beneath, taking away graphite with soft traces to requite the illusion of fur.
We're as well going to add a flake more graphite traces in the red area, to requite our dog's portrait more volume.
Footstep 30 – Concluding Pace
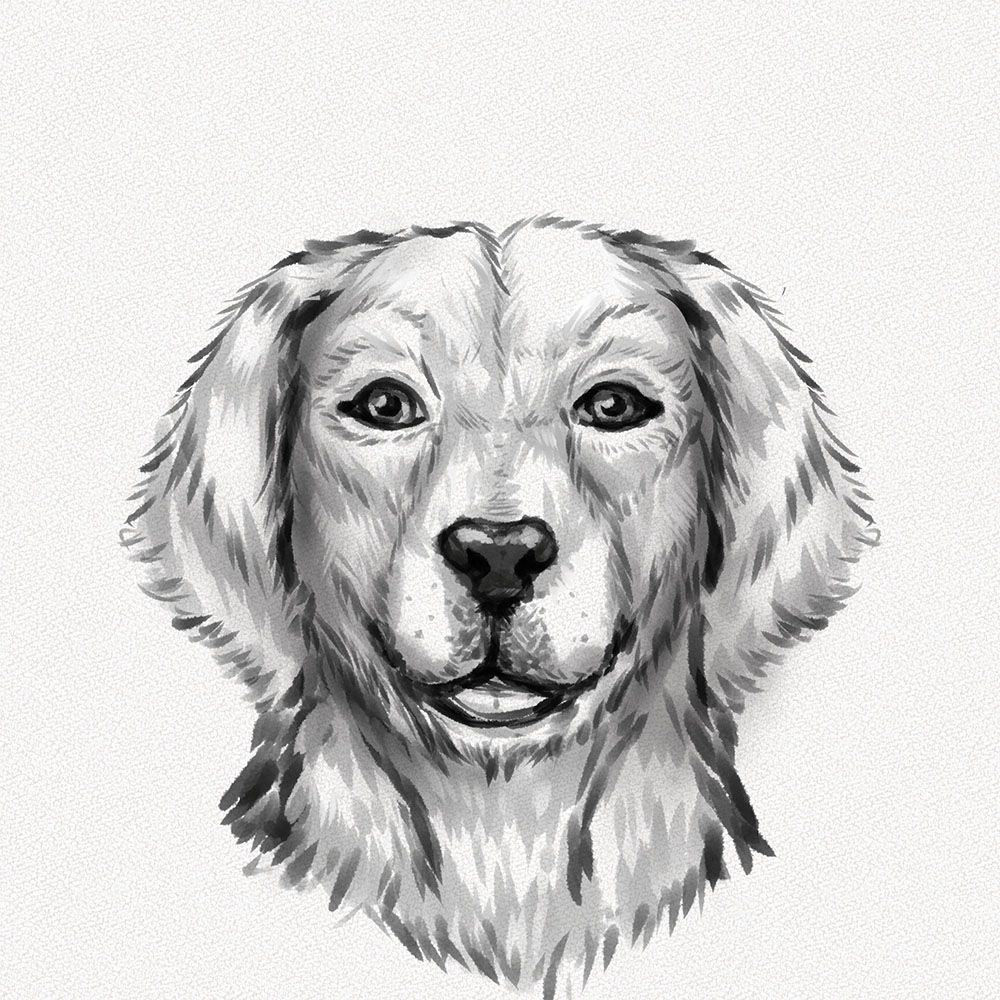
After nosotros're done blending and correcting, we're going to fill in the nose, leaving some unfilled areas at the top for the highlights, and shade our eyes a tad bit more. And that's it! Congrats on totally nailing this!
Thank you for following this tutorial, I hope you had fun drawing this pal!

Source: https://www.artlex.com/art-tutorials/how-to-draw-a-dog-face/
Posted by: ozunaparch2000.blogspot.com
0 Response to "How To Draw A Dog How To Draw A Cute Dog Face"
Post a Comment